3rd Party Verification Platforms
- Exploring Banner/IBV/Native Integrations within 3rd Party Verification Platforms
- Exploring Rich Media Integrations within 3rd Party Verification Platforms
Exploring Banner/IBV/Native Integrations within 3rd Party Verification Platforms
Introduction
In the dynamic landscape of digital advertising, where capturing and retaining users' attention is paramount, the role of third-party verification platforms has become increasingly vital. Advertisers and publishers alike have sought ways to ensure the transparency, viewability, and brand s afety of their online campaigns. However, beyond their fundamental functions lies a lesser-known yet innovative aspect that is pois ed to revolutionise the industry - the integration of creative wrapping. In this article, we delve into the practical implications how Banners/IBV/Native ads executed through Eskimi should be wrapped into a 3rd party verification platform.
Banner, IBV, Native Wrapping Process for Ad Operations Team
-
Begin by uploading the client's creatives through the creative setup page.
-
Set up a campaign using the newly uploaded creatives.
-
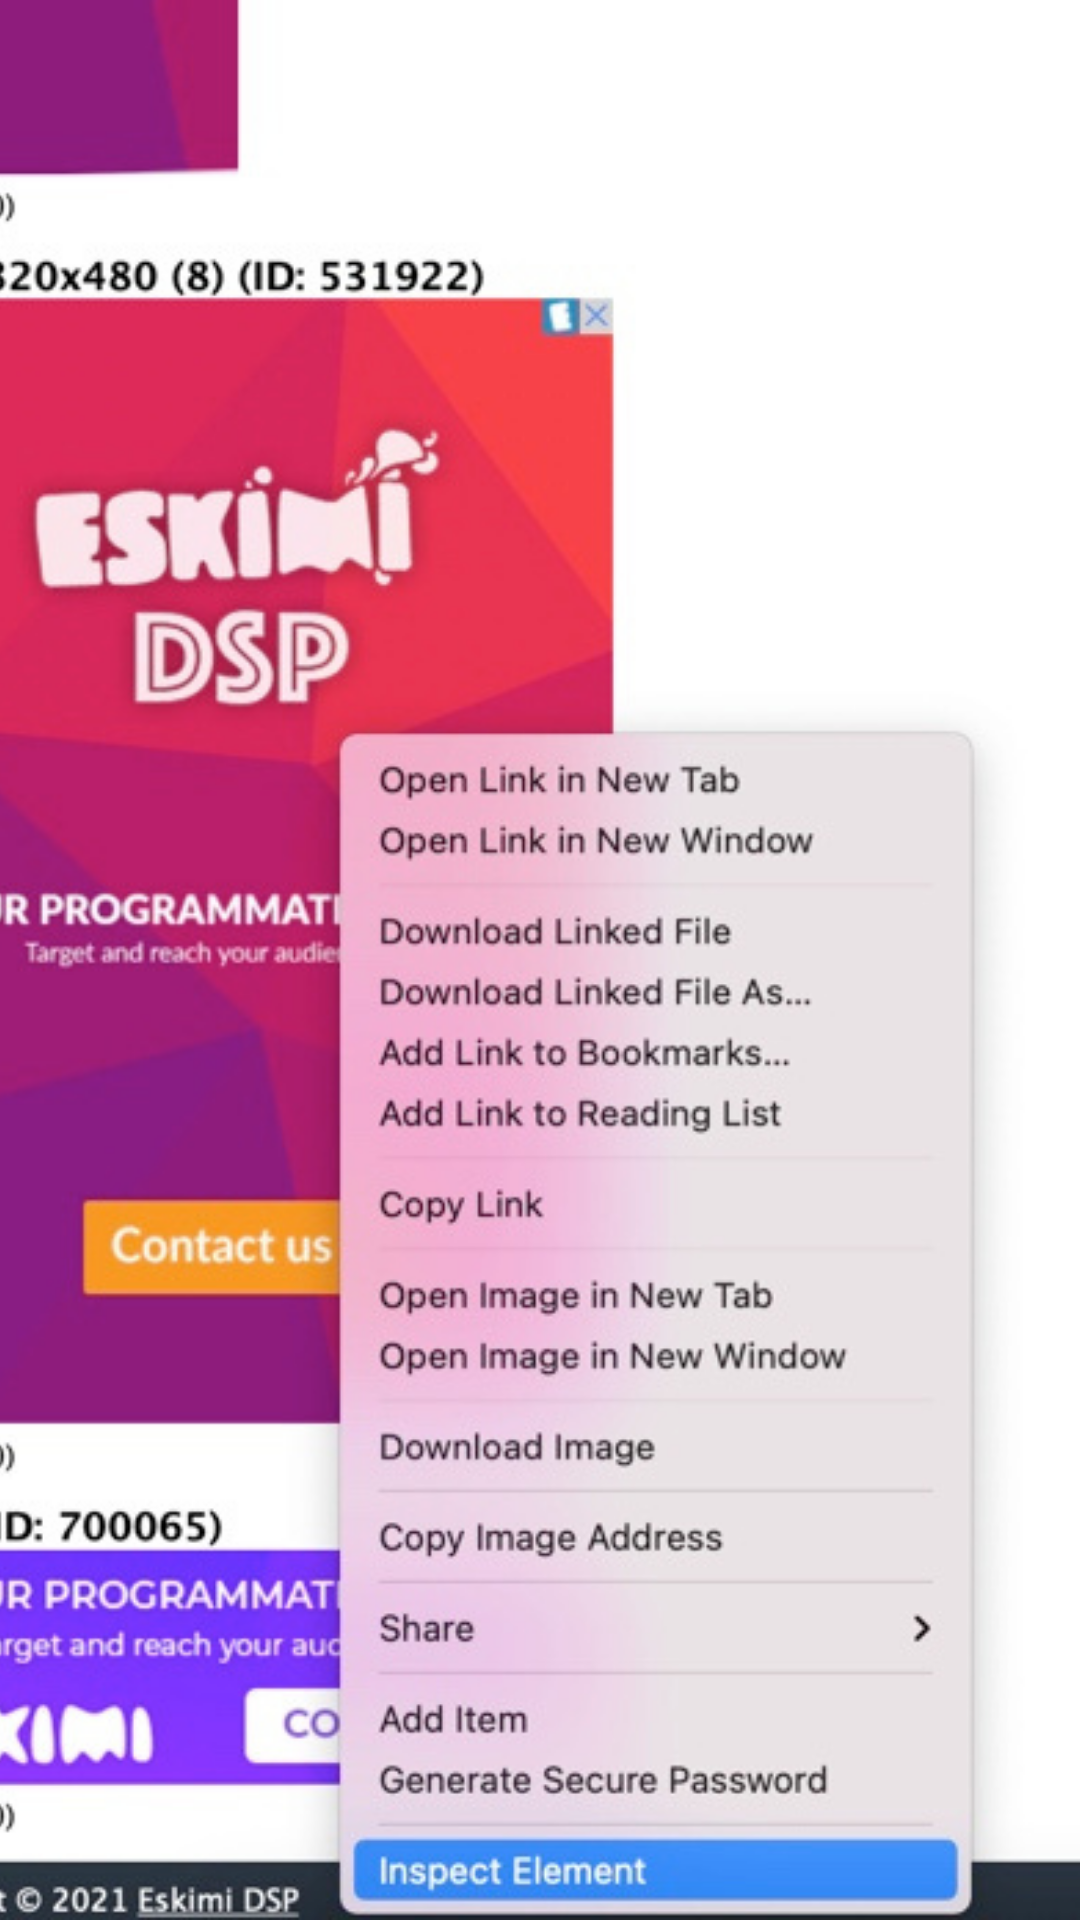
Access the preview page of the campaign.
-
Right-click on the creative and select "Inspect Element", or navigate to the developer's tools.
5. Locate the <img src= tag within the code and copy the URL associated with it. Paste the URL into an Excel spreadsheet or a notepad for future reference.
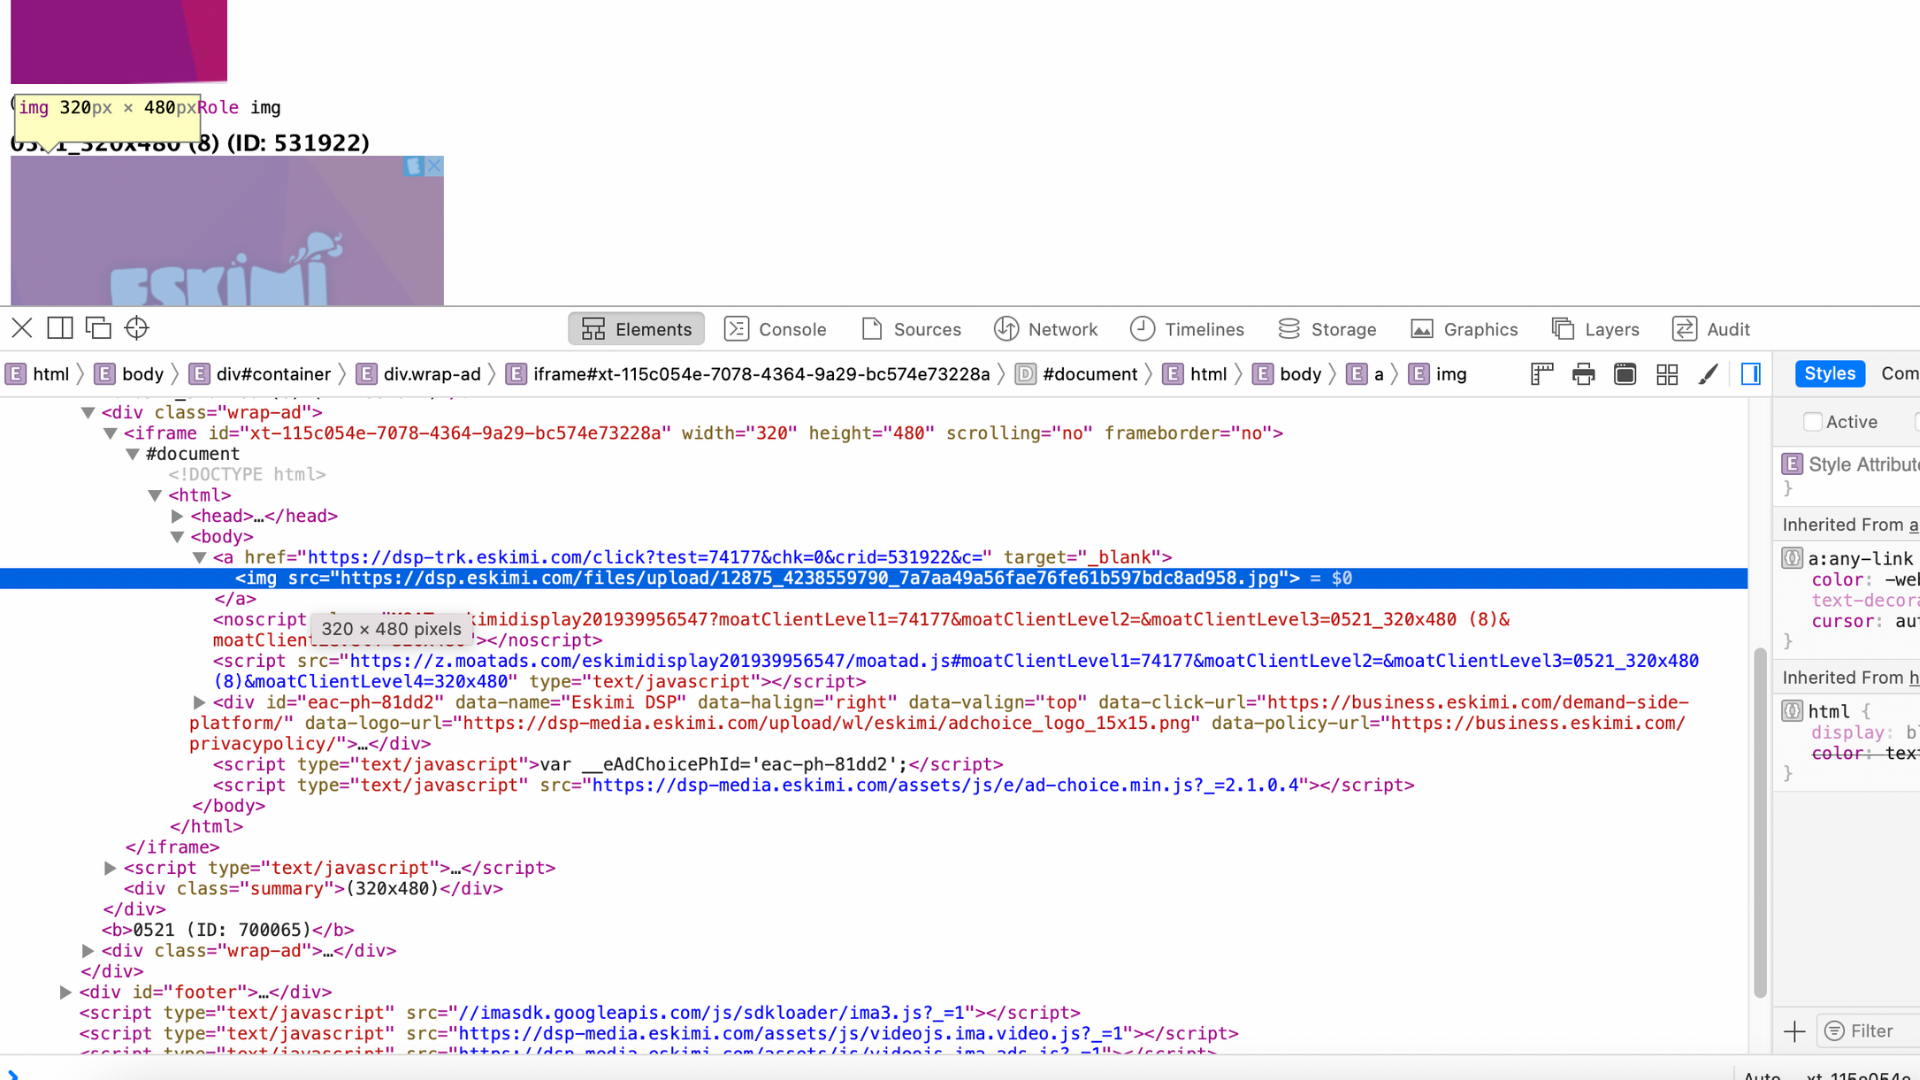
6. Replace "dsp.eskimi.com" in the image file URL with "dsp-media.eskimi.com". This step is crucial to ensure the proper functioning of the dashboard when re-uploading the wrapped creatives.
7. Place the modified image file into a JavaScript tag, following the format:
<a target="_top" href="{CLICK_URL}"><img src="[changed image file]" width="300" height="250" /></a>-
Adjust the width and height attributes according to the specific creative size.
-
Repeat the above steps for all the creatives associated with the campaign.
-
Review the creatives either by yourself or by seeking input from your colleagues.
-
Ensure your final file resembles the following example: Example Link
-
Share the completed Excel file containing the wrapped creatives with the 3rd party platform team.
-
The 3rd party support team will integrate the shared tags into their own tag, which may take between 1-3 working days depending on the platform.
-
Once you receive the wrapped tags, upload them to the creative setup and launch the campaign according to the client's requirements.
Exploring Rich Media Integrations within 3rd Party Verification Platforms
Introduction
In the dynamic landscape of digital advertising, where capturing and retaining users' attention is paramount, the role of third-party verification platforms has become increasingly vital. Advertisers and publishers alike have sought ways to ensure the transparency, viewability, and brand s afety of their online campaigns. However, beyond their fundamental functions lies a lesser-known yet innovative aspect that is pois ed to revolutionise the industry - the integration of creative wrapping. In this article, we delve into the practical implications how Rich Media ads executed through Eskimi should be wrapped into a 3rd party verification platform.
Rich Media Wrapping Process for Ad Operations Team
-
Begin by uploading the Rich Media zip through the creative setup page.
- Copy all the JavaScript which was updated with necessary Eskimi trackers.
3. Paste the JavaScript code to and Excel or notepad.
4. Repeat the above steps for all the creatives associated with the campaign.
5. Review the creatives either by yourself or by seeking input from your colleagues.
7. The 3rd party support team will integrate the shared tags into their own tag, which may take between 1-3 working days depending on the platform.
8. Once you receive the wrapped tags, upload them to the creative setup and launch the campaign according to the client's requirements.