Troubleshooting and Trackers Configuration Guides
- Troubleshooting guide for 3rd party trackers
- Adform creative tag implementation (updated)
- Sizmek Tags
Troubleshooting guide for 3rd party trackers
How to check if the tracker is a pixel:
Easiest way to check if the tracker you’re using is a 1x1 pixel or not is just to open it in a browser, for example:
https://pixel.adsafeprotected.com/jload?anId=931059&advId=Eskimi&campId={campaign_id_enc}&pubId=
{site_domain_enc}{app_bundle_enc}&chanId={creative_id_enc}&placementId={placement_id}
not an impression pixel
https://pixel.adsafeprotected.com/?anId=931059&advId=Eskimi&campId={campaign_id_enc}&pubId=
{site_domain_enc}{app_bundle_enc}&chanId={creative_id_enc}&placementId={placement_id}
correct impression pixel
If you implement the pixel incorrectly (for example if you use the first URL) there might be huge discrepancies between us and the 3rd party platform (they might even not track anything), so it’s very important before you launch a campaign that uses 3rd party trackers to double check if the trackers are correctly implemented.
https://ad.doubleclick.net/ddm/trackimp/N705418.1727343ESKIMI.COM/B28985587.353603375;dc_trk_aid=
545020201;dc_trk_cid=182974786;ord=[timestamp];dc_lat=;dc_rdid=;tag_for_child_directed_treatment=;tfua=;
gdpr=${GDPR};gdpr_consent=${GDPR_CONSENT_755};ltd=?https://track.adform.net/adfserve/?bn=60266225;1x1inv=1;srctype=3;ord={cachebuster}Some other ways to recognize if it’s a pixel:
<script type="text/javascript" src="https://pixel.adsafeprotected.com/jload?anId=931059&advId=Eskimi&campId={campaign_id_enc}&pubId={site_domain_enc}{app_bundle_enc}&chanId={creative_id_enc}&placementId={placement_id}">
</script>
<noscript>
<img src="https://pixel.adsafeprotected.com/?anId=931059&advId=Eskimi&campId={campaign_id_enc}&pubId={site_domain_enc}{app_bundle_enc}&chanId={creative_id_enc}&placementId={placement_id}" height="1" width="1" alt="">
</noscript>
This is a our internal IAS JS tracker, but you can extract a pixel from this tracker. Most of the tracking pixel will be placed inside the <img> element:
<img src="https://pixel.adsafeprotected.com/?anId=931059&advId=Eskimi&campId={campaign_id_enc}&pubId={site_domain_enc}{app_bundle_enc}&chanId={creative_id_enc}&placementId={placement_id}"
height="1" width="1" alt="">
If you look closely you we will that the height and the width are set to 1x1 for this element (witch almost always indicates that it’s 1x1 pixel). So just extract the URL part from this element and use it as a tracking pixel (it’s not always possible to extract the pixel from JS trackers, keep that in mind).
How to validate that you have a 3rd party JavaScript tracker:
- The tag will be in a
<script><script> - It will be a code rather than a clickable pixel/image
- Allow various macros. Eskimi macros have to be implemented into the tag (ex.: {creative_id}, {site_id} etc.). Any 3rd party macros will not be supported and Eskimi system will not be able to fetch the data. (Eskimi macros can be found in campaign setup page, under click URL parameters).
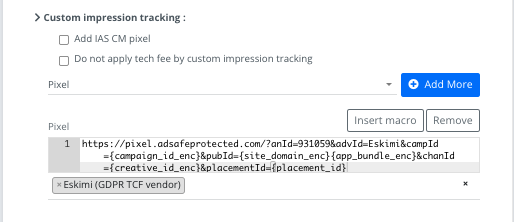
Third party trackers can be implemented two ways (both JS and Pixels):
1. Campaign level in the campaigns approval page:
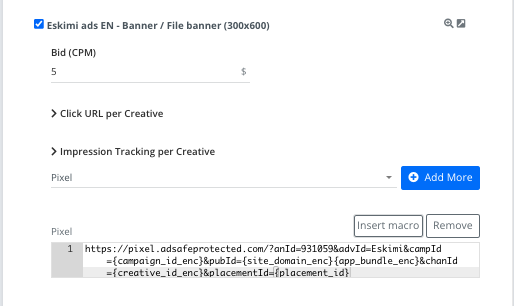
2. Creative level in the campaigns edit page under each creative:
How to check if the trackers are firing:
1. Launch a campaign with trackers applied and leave it as pending.
2. Copy part part of the trackers name/id, for example:
https://pixel.adsafeprotected.com/?anId=931059&advId=Eskimi&campId={campaign_id_enc}&pubId=
{site_domain_enc}{app_bundle_enc}&chanId={creative_id_enc}&placementId={placement_id}
From this pixel you just can take adsafeprocted part or 931059 (this differs from tracker to tracker)
3. Open campaigns preview page.
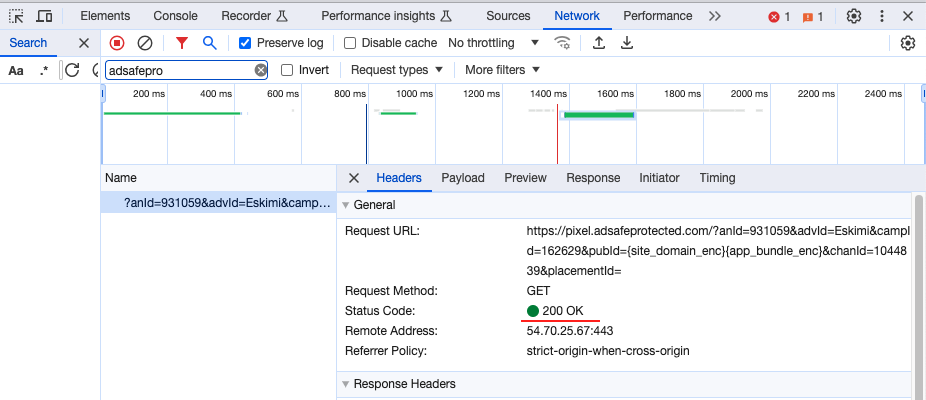
4. In the preview page open developer tools by right clicking anywhere on the screen and click "Inspect", then navigate to the network tab and search for the trackers name (the part that was copied the step before), then refresh the page:
5. After you do the previous step, you we see a log pop up after the page refresh, click on that log, and if you see status 200 in the request header, it means that it's firing correctly:
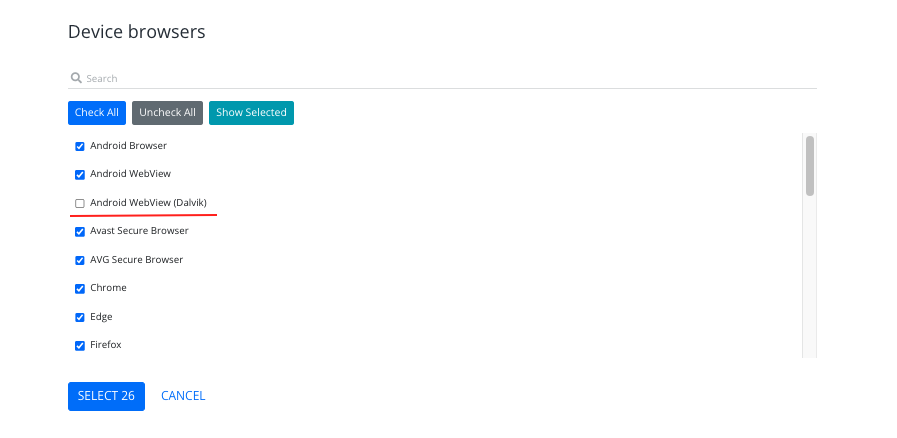
Android WebView (Dalvik):
What to share to tech support:
1. Report - always include a report from 3rd party platform where we can clearly would see that there is discrepancy. Also in the report we only need to see impressions (or other metrics) by day and campaign. We do not require other splits in the clients report (for example we sometimes receive report by app/site, often those reports have over 100k rows in the sheets, witch makes the report almost unreadable for us). If tech support will require additional report with other splits, they will inform regarding it.
2. Trackers - Include original tracker csv/txt file. (Helps tech support understand if the trackers were implemented correctly).
3. Documentation - If you'll ever receive trackers from the client that you or your colleagues never seen before, then ask the client for the documentation for those trackers and share it in the ticket with tech support, as there is a high chance they tech support is not familiar with those trackers as well (test campaign would be recommended here as well, to be sure that the trackers will work).
Things to remember:
1. Discrepancies up to 15% are considered normal.
2. The tag should be implemented exactly as you got it from the 3rd party vendor.
3. There are supply limitations as there are publishers that will not support JS tags on their page.
4. Always change [timestamp] to {CACHEBUSTER} in the 3rd party tracker as it might impact numbers that the clients sees.
5. Majority of 1x1 pixels will track only impressions.
6. DC trackers need to be modified a bit for In-Game campaigns, more information in this manual
Adform creative tag implementation (updated)
The following article presents the approach how adform tags should be implemented in Eskimi DSP.
<script language="javascript" src="https://track.adform.net/adfscript/?bn=50747383"></script>
<noscript>
<a href="https://track.adform.net/C/?bn=50747383;C=0" target="_blank">
<img src="https://track.adform.net/adfserve/?bn=50747383;srctype=4;ord=[timestamp]" border="0" width="300" height="250" alt=""/>
</a>
</noscript>
2. To continue tag implementation, you need to create banner type creative set, then add creative as JS/HTML banner and copy the tag from spreadsheet manually.
3. Once the code is copied, you need to adjust tag with click macro in order to track clicks in campaign.
3.1 add ;click={click_url} into the redirect string.
3.2 To ensure proper cache-busting, replace [timestamp] with {CACHEBUSTER}.
Once all 2 steps completed the tags should look like
<script language="javascript" src="https://track.adform.net/adfscript/?bn=50747383;click={click_url}"></script>
<noscript>
<a href="https://track.adform.net/C/?bn=50747383;C=0" target="_blank">
<img src="https://track.adform.net/adfserve/?bn=50747383;srctype=4;ord={CACHEBUSTER}" border="0" width="300" height="250" alt=""/>
</a>
</noscript>
4. Press save and later you can link this creative to your campaign.
Notes:
The {CLICK_URL} Macro in Adform creative JS tags should be automatically added/updated after uploading saving, but it's good to always re-check and confirm.
Possible issues and troubleshooting:
According to our experience we noticed that the adform create tags might be created in multiply variations. Unfortunately, sometimes the creatives might be prepared incorrectly, not follow adform requirements. Therefore sometimes you might notice that after you followed the guide of tag adjustment the tag don't track clicks properly. In such cases suggest to client double check how the creatives were created, and if they follow all adform requirements. In that scenario client can refer to adform support team, or refer to official adform documentation:
The documentation of how the creative should be created below:
https://www.adformhelp.com/s/article/UUID-ba1da05a-285e-ade0-1165-a33481f90b35
Please also note that there are three important things to be taken into consideration when talking about Adform clicks to work correctly and tracker to fire well:
- Adform DHTML library;
- manifest.json file;
- Click function.
Adform Tag Creatives – Eskimi.com Domain Whitelisting
When working with client-supplied Adform tags, please be aware of a recurring issue: creatives may not render in our system due to domain whitelisting restrictions on the Adform side.
Root Cause:
Adform requires domains to be explicitly whitelisted to allow tag calls and asset serving. If eskimi.com is not whitelisted in the client’s Adform settings, the creative might not appear in our preview or live delivery environments.
What to Check / Do:
-
If a creative from Adform is not visible after tag upload, verify if eskimi.com is whitelisted in Adform.
-
Communicate this to the client and request their Adform team to add eskimi.com to the allowed domains list.
-
Once confirmed, recheck the creative visibility in the system.
Sizmek Tags
Sometimes it may happen that you will receive JS banner tags for Sizmek. But the tags may not be compatible with our DSP platform, without any additional changes.
Lets take an example of a bad tag:
 <script src="https://bs.serving-sys.com/Serving/adServer.bs?c=28&cn=display&pli=107430544984&w=300&h=250&ord=[timestamp]&z=10000"></script>
<noscript>
<a href="https://bs.serving-sys.com/Serving/adServer.bs?cn=brd&pli=1074305984&Page=&Pos=-956631125" target="_blank">
<img src="https://bs.serving-sys.com/Serving/adServer.bs?c=8&cn=display&pli=107430445984&Page=&Pos=-9566431125" border=0 width=300 height=250></a>
</noscript>
Upon looking at the tag there are a few things:
- First of all our {CLICK_URL} macro is missing.
- And no use of {CACHEBUSTER} macro.
- The URL in the <a> needs to be encoded.
In order to fix the tag, we need to make several changes.
To start let's look at the correct tag.
<script src="https://bs.serving-sys.com/BurstingPipe/adServer.bs?cn=rsb&c=28&pli=2601744794&PluID=0&w=300&h=250&ord={CACHEBUSTER}&ucm=true&ncu=$${CLICK_URL}$$"></script>
<noscript>
<a href="{CLICK_URL}https%3A%2F%2Fbs.serving-sys.com%2FBurstingPipe%2FadServer.bs%3Fcn%3Dbrd%26FlightID%3D2601447794%26Page%3D%26PluID%3D0%26Pos%3D57039442024" target="_blank"><img src="https://bs.serving-sys.com/BurstingPipe/adServer.bs?cn=bsr&FlightID=2644017794&Page=&PluID=0&Pos=574044392024" border=0 width=300 height=250></a>
</noscript>
1. {CLICK_URL} macro is added in two places, the <script> part of the tag, and the <noscript> part of the tag.
<script> part of the tag: to insert the {CLICK_URL} macro you have to add the "&ncu=$${CLICK_URL}$$" of the first URL.
<noscript> part of the tag: insert {CLICK_URL} before the href="" url
2. Enable Cachebuster. Cachebuster in Sizmek is enabled, by using the [timestamp] property of the URL. To enable this from our DSP end, that has to be changed to {CACHEBUSTER}.
3. Encode the <noscript> URL: the after the {CLICK_URL} part has to be encoded. To encode the URL use this tool: https://meyerweb.com/eric/tools/dencoder/.