**Note:** If you are using **Strict** or **Best Match**, ensure your campaign's product category is correctly configured, as this determines which pages your ads will be eligible to serve on.
### How to enable Apps/Sites Categories targeting for your campaigns The apps/sites category feature helps users target ads based on the market verticals of the page. Apps/sites categories contain already pre-created lists of domains and app bundles of related topics such as Finance, Sports or Games. These categories cover 98.6% of supply. Categories are grouped into two bigger groups - General topics & Sensitive topics. To set up category targeting, you need to: 1. Open your selected campaign. 2. Scroll down to the **Contextual Targeting** section. 3. Under **Target apps/sites categories**, select the relevant categories. 4. Click **Save**. [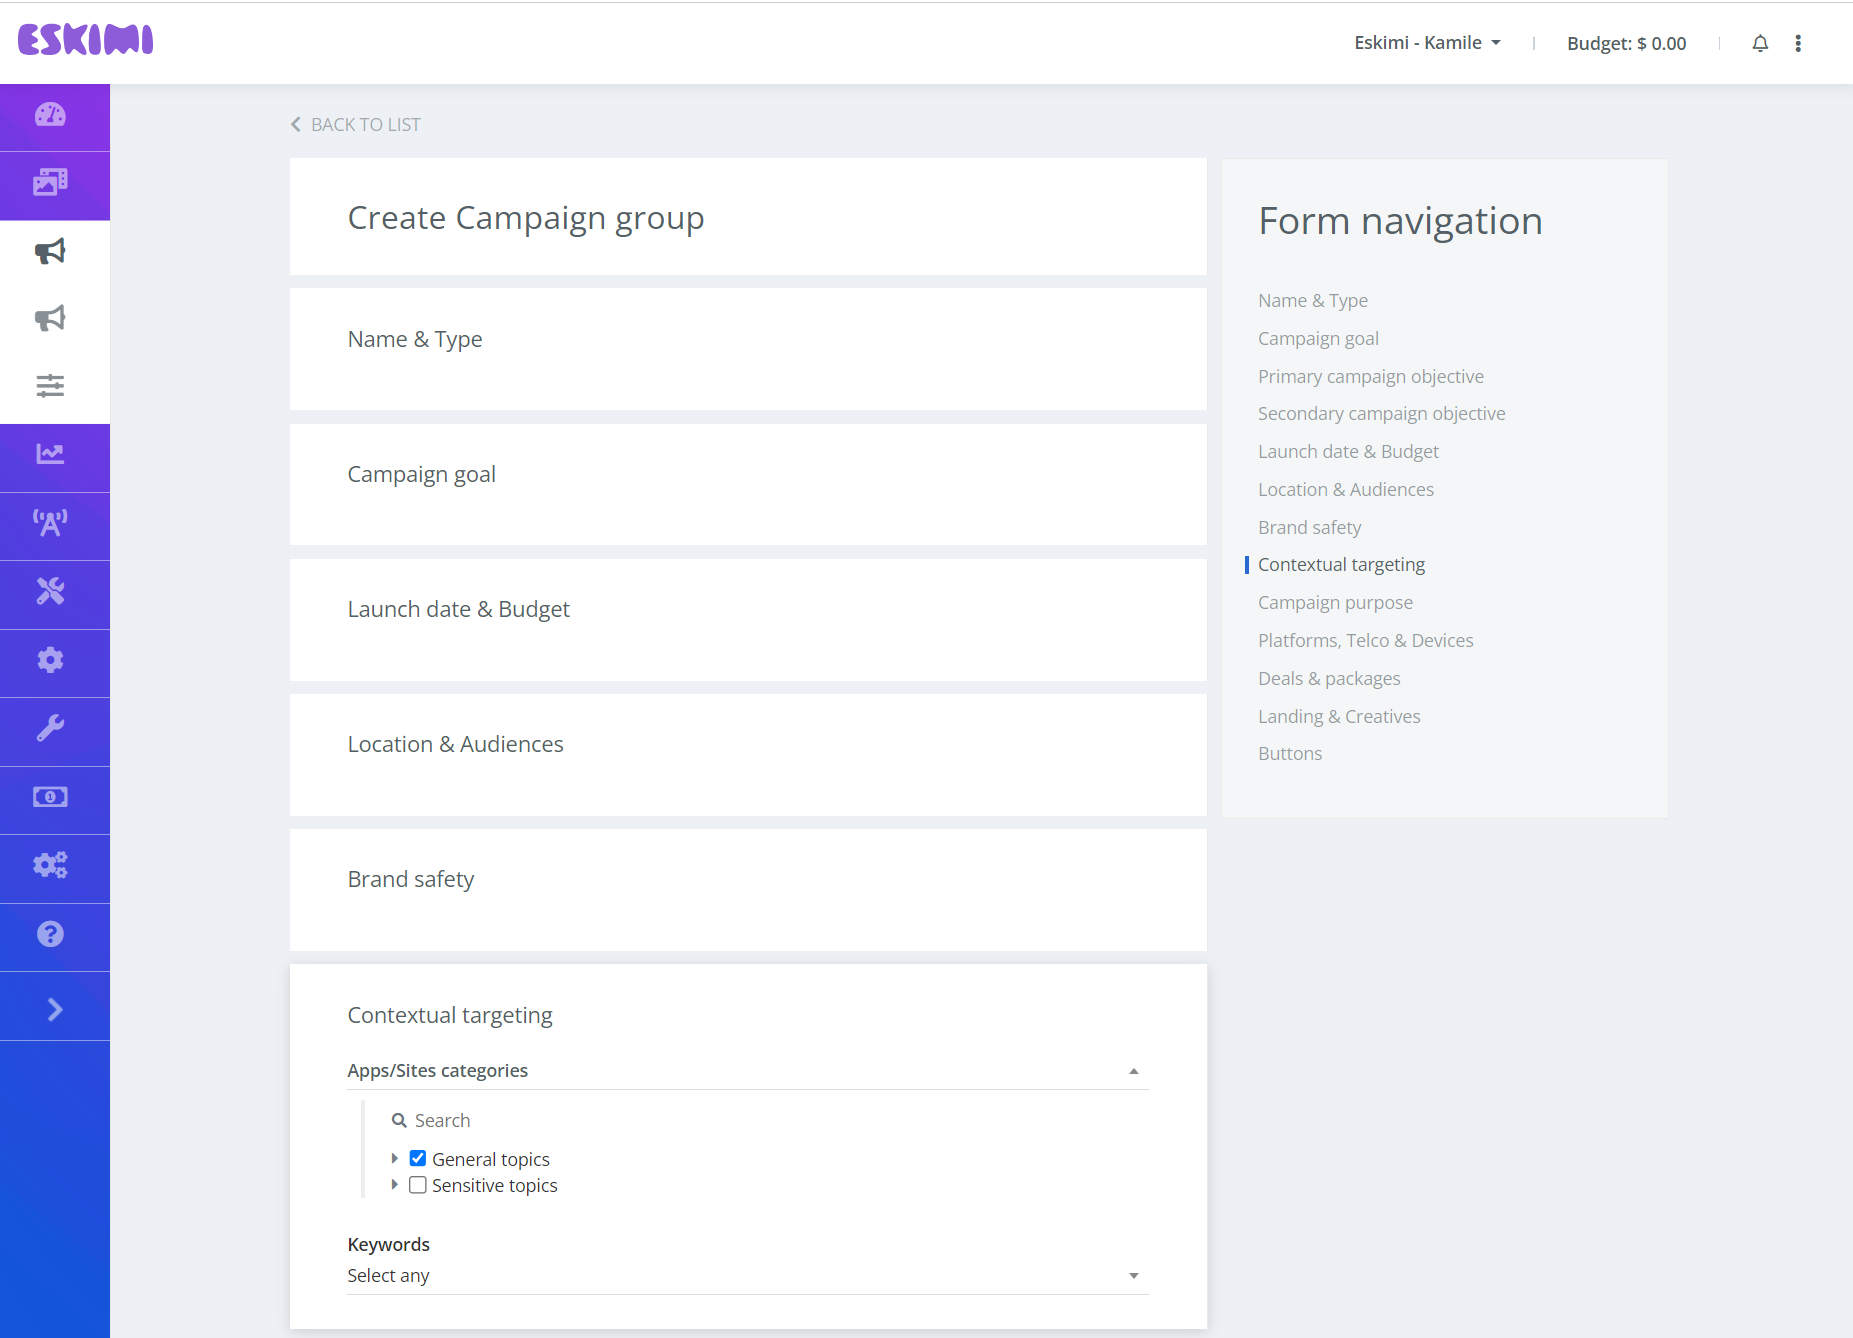](https://manual.eskimi.com/uploads/images/gallery/2026-05/adj13h9KpE9Asrsy-categories-targeting.png)Keep in mind that if apps/sites categories targeting is also enabled under **Brand Safety** on the same campaign, both settings will be taken into account. If both brand safety and contextual targeting have the same categories selected, the matching domains or app bundles will be excluded. Eskimi ensures that the Brand Safety setting is always prioritized.
Our categorization system works on two levels: **Page-level**: Our AI engine analyzes individual page content to determine precise categories (e.g., a sports article on a news site will be categorized as "Sports"). **Domain/app bundle level**: Used as a fallback when page-level analysis is not yet available. The system prioritizes page-level categorization for better targeting precision, while maintaining domain-level categorization for comprehensive coverage.
--- ### Enabling Keyword Targeting for your campaign #### Step 1: Preparing and creating a Keyword List Before enabling keyword targeting in a campaign, you must first prepare and create a Keyword List. ##### Step 1.1: Preparing a Keyword List 1. **Determine your target keywords** - Identify relevant keywords based on your brand, campaign goals, and audience. - Avoid single letters or very short words, as this may result in overly broad targeting. E.g. if you added letter 'a' to the set and chose 'contains type match', all sites containing letter 'a' would be included. - Consider variations of key terms to capture a wider audience. 2. **Organize keywords in a spreadsheet** - Create a CSV file with a list of keywords. - Ensure that each keyword is in a separate row without duplicates. ##### Step 1.2: Creating a Keyword List in Eskimi DSP 1. Go to the **Keywords** page under the **Tools** menu. 2. Click **Create** (top right corner). 3. Enter a **Title** for your keyword list. 4. Select at least one **Context Option**: - **Find in URL:** The system checks if the keyword appears in the full URL. - **Find in Content:** The system crawls website content and only shows ads if the page contains the selected keywords. - *Note: You can select both options to target ads based on both URL and page content.* 5. Select a **Match Option**: - **Contains Type Match:** Finds words with similar meanings (e.g., if you target "photo," it will also match "photography" and "photographer.") - **Exact Word Type Match:** Targets only the exact word (e.g., if you have 'photo' in the set, it will only look for 'photo', not 'photography' or 'photographer'). 6. Upload your prepared keyword list from your CSV file. 7. Click **Save**. [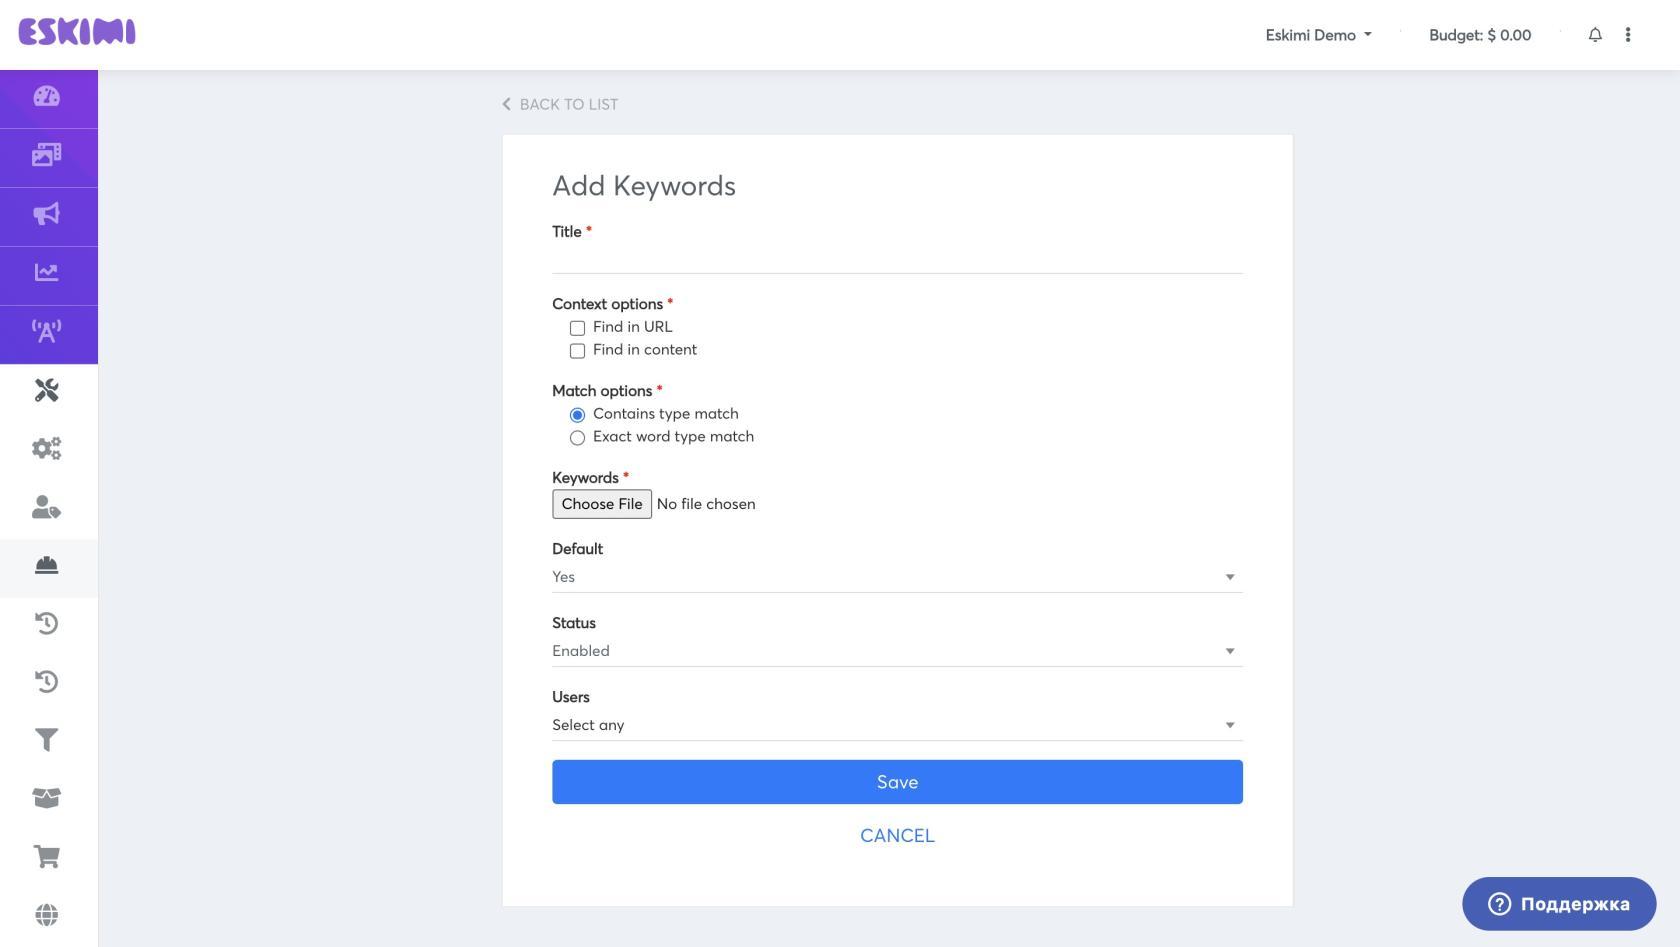](https://manual.eskimi.com/uploads/images/gallery/2026-05/euKsJxEwwBgxLOHn-keywords-creation.jpg)If you choose Contains Type Match, be careful with broad keywords, as they can significantly increase traffic volume.
Keywords only work on full URLs. E.g. randomsite.com/randomsite, randomsite.com/notsorandom, and randomsite.com are treated as 3 different sites.
If you select both Find in URL and Find in Content, your campaign will only target placements where the keyword appears in either the URL or the page content.
#### Step 2: Enabling keyword targeting on a campaign Once you have created a keyword list, you can add it to your campaign: 1. Open the selected campaign. 2. Scroll down to **Contextual Targeting**. 3. Select one or more keyword sets under **Target keywords**. 4. Click **Save**. [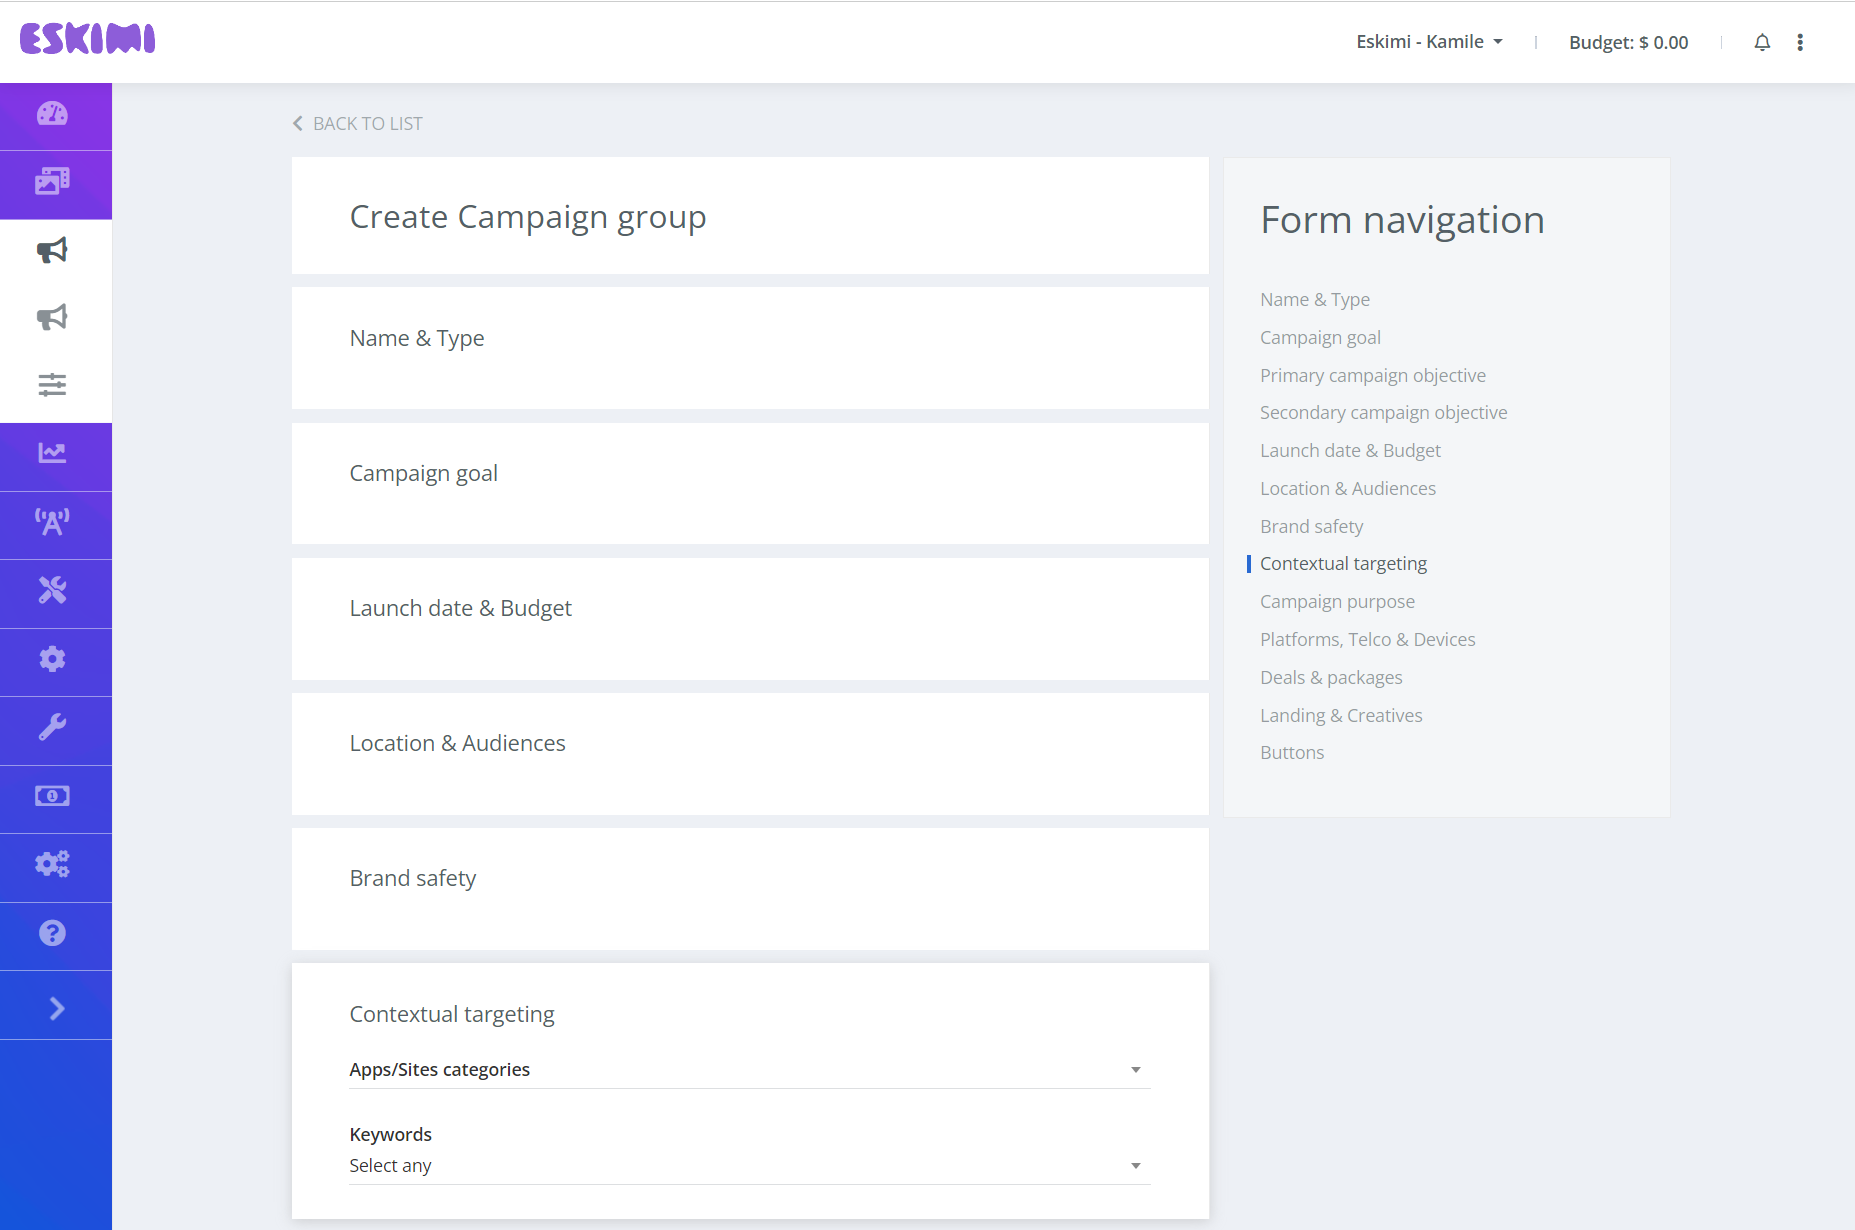](https://manual.eskimi.com/uploads/images/gallery/2026-05/cfV228CI85EARY5t-enabling-keywords-targeting.png)Keep in mind that if brand safety is enabled on the same campaign, both settings will be taken into account. If both brand safety and contextual targeting keyword sets have the same words, the matching keywords will be excluded. Eskimi ensures that the Brand Safety setting is always prioritized.
--- ### How to enable Sentiment targeting for your campaigns The sentiment targeting feature helps users target ads based on the emotional tone of the content. Our AI analyzes page content to determine if the overall tone is Positive, Negative, or Neutral, allowing you to align your campaigns with content that matches your brand's messaging goals. To set up sentiment targeting, you need to: 1. Open your selected campaign. 2. Scroll down to the **Contextual Targeting** section. 3. Under **Target sentiments**, select the relevant sentiment options: - **Positive:** Ideal for campaigns that benefit from association with uplifting or inspiring content. - **Negative:** Useful for specific strategies or, more commonly, for exclusion. - **Neutral:** Targets informational, objective, or educational content. - **Unknown:** Targets inventory that has not yet been analyzed by our sentiment engine. 4. Click **Save**.Keep in mind that if sentiment targeting is used alongside brand safety settings on the same campaign, both settings will be taken into account. Eskimi ensures that the Brand Safety setting is always prioritized.
Our sentiment analysis works at the page level, analyzing the actual content to determine its emotional tone. This provides precise targeting based on the context in which your ads will appear, ensuring better alignment with your campaign objectives.