Google Web Designer (GWD) banner creation
There are a few requirements that have to be met when you are creating a banner using Google Web Designer (GWD). This article will help you to understand those requirements and will allow easy deployment of your created banners.
Requirements:
1. The target window for the click-through URL must be set to "blank" so the click-through will open in a new window. Do not leave the target statement undeclared. Declare this as if you are doing the click-through HTML tags. Most importantly the banner should be clickable!
2. If you are defining the click use the window.open() function, if you are making the click as a JavaScript solution.
3. All creatives made with GWD should contain our click URL macro. So the banners landing page should be set as {CLICK_URL}. This is very important, as we take the banners landing page based on the campaign.
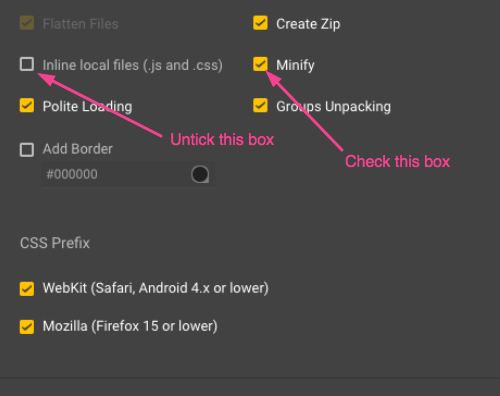
4. When publishing the creative from GWD, two settings have to be changed:
- Uncheck: In-line local files and
- Check: Minify
The main creative file ( index.html ) should contain no more than 10,000 symbols. This is because part of the exchanges only supports this limit of symbols in bid response.
See the screenshot below to see how your publishing settings screen should look like.
After publishing you should get a ZIP file.
5. Consider this as a TIP: when making animated elements, it is best practice to turn the whole animated creative to a .GIF image file, this is to reduce the creative size and reduce the loading time.