Eskimi Conversion Pixel
- Conversion tracking
- Simplified Conversion Pixel Implementation
- Eskimi Conversion Pixel Implementation on Action Button
Conversion tracking
Conversion tracking is a tool that shows you what happens after a customer clicks on your advertisement - whether they purchased your product, signed up for your newsletter, or filled out a form to receive more information. By tracking conversions, you will be able to know which campaigns, sites, or apps bring you business. This helps you invest more wisely in the best ones and boost your return on investment (ROI).
Eskimi DSP can provide these enhanced metrics by implementing a conversion tracking pixel on your side. The conversion pixel is a tiny (1x1 pixel) transparent image.
A variety of things can be tracked:
Websites
What it means: track when a customer completes an action on your website. This could be, for example, making a purchase, signing up for a newsletter, clicking a button, or any other valuable action a customer can take on your website.
Apps
What it means: track when a customer installs your app or completes an in-app action, such as a purchase.
Phones
What it means: track when a customer calls you from a phone number in your ads or from a phone number on your website, or when they click your phone number on your mobile website.
Imports
What it means: track when an ad click leads to a conversion in the offline world, such as a sale in your office or over the phone. To do this, you’ll import your conversions into Eskimi DSP by uploading a file or transmitting data through our API.
The conversion tracking process works a little differently for each conversion source, but for each type besides offline conversions, it tends to fall into one of these categories:
- You add a conversion tracking tag, or code snippet, to your website or mobile app code. When a customer clicks on your ad from selected Eskimi DSP sites, or when they view your video ad, a temporary cookie is placed on their computer or mobile device. When they complete the action you defined, our system recognises the cookie (through the code snippet you added), and we record a conversion.
- Some kinds of conversion tracking don’t require a tag. For example, to track phone calls from call extensions or call-only ads, you use a Google forwarding number to track when the call came from one of your ads, and to track details like call duration, call start and end time, and the caller's area code.
Once you’ve set up conversion tracking, you can see data on conversions for your campaigns, ad groups, ads, and keywords. Viewing this data in your reports can help you understand how your advertising helps you achieve important goals for your business.
Simplified Conversion Pixel Implementation
This article is dedicated to users and developers who have to implement the tracking pixel to the website.
Disclaimer: all example codes are used from a testing account.
Step 1:
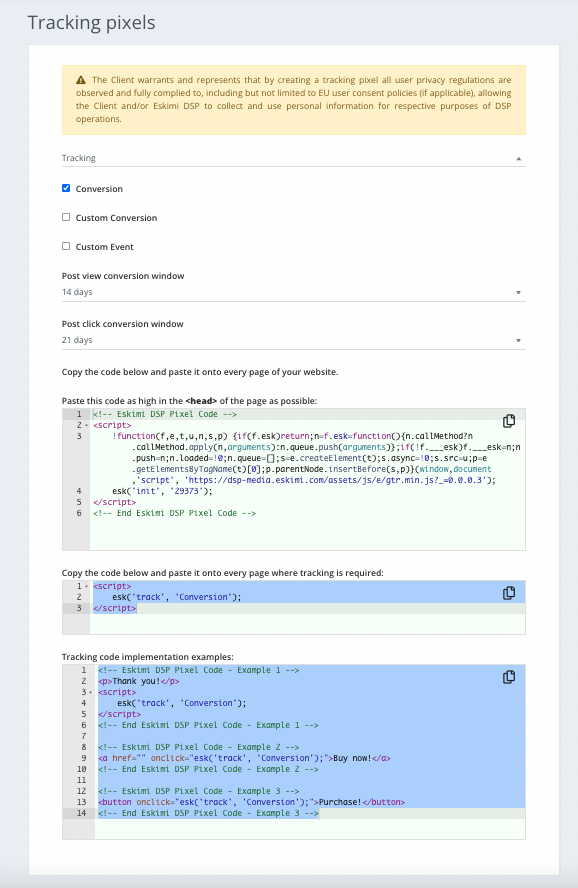
Firstly obtain the base pixel code.
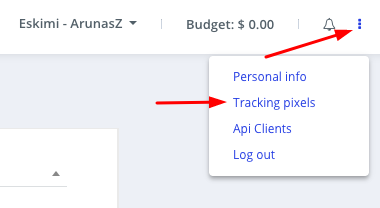
Login to your account, and access the " Tracking Pixels " section.
Step 2:
Customize your tracking code. For this example, we want to track conversions of a specific campaign.
- Tick the "Campaign" checkbox, and select the appropriate campaign.
- Tick the "Conversion" checkbox.
Now your base pixel code should look like this (see image below):
Step 3:
When you have generated the code, forward this to the website developers.
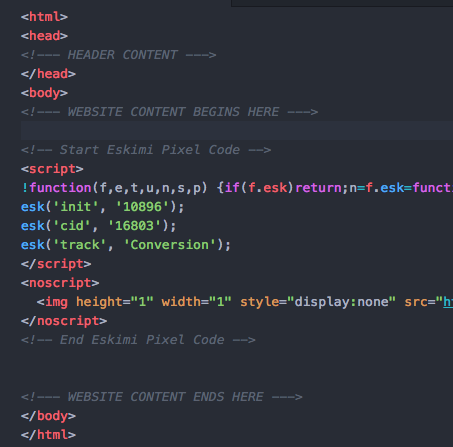
In this situation, since we are tracking conversions, the code has to be implemented between the <body> </body> tags of the success page, like in the example below.
Step 4:
Test your code and see if everything works and if the pixel code is being called.
To test the code, open up the Developer Tools of your browser and using the "Network Traffic" tools check if the pixel code is being launched.
Eskimi Conversion Pixel Implementation on Action Button
On some occasions, you will need to implement a conversion registration when the user clicks a button. This can be done in a few easy steps.
Step 1
Initialize the base pixel.
Paste your base pixel code between your websites success page <body> </body> tags. And if the code is initialised in the <head> </head> tags then everything is set up.
This how it should look when it is initialized between the <body> tags.

Step 2
On the "Submit" button, add an onclick property to the button, with the attribute "esk ('track', 'Conversion');"

Now every time the button is clicked a successful conversion is registered.
Don't forget to view the source code of the page.