Report Builder IAS - Agency account
Introduction
In this article it is described regarding auto-report set up from IAS (Integral Ad Sience) vereficator. Both reports are needed in case to be able to proceed with needed optimisation of campaign. Which is crucial for reaching good campaign KPIs and troubleshoot on data descripency that usually appears due to different methodology of measurement between DSP and 3rd party verificator.
Total report per campaign - this report is needed for the evaluation of campaign performance, and troubleshoot discrepancy of measured stats. Report should include campaign or/and placement as main segment split. It also should include all important KPIs and be established for period from the start till the end day of campaign.
Report per domains/apps - this report is needed for KPIs evaluation across different sites/apps and helps to optimise campaign for reaching better KPIs by excluding site and apps with lower performance. This report should include dates, campaigns and show last 30 days stats.
Total campaign report step-by-step set up guide
1. First of all open your IAS account and go to "Build New Report" menu
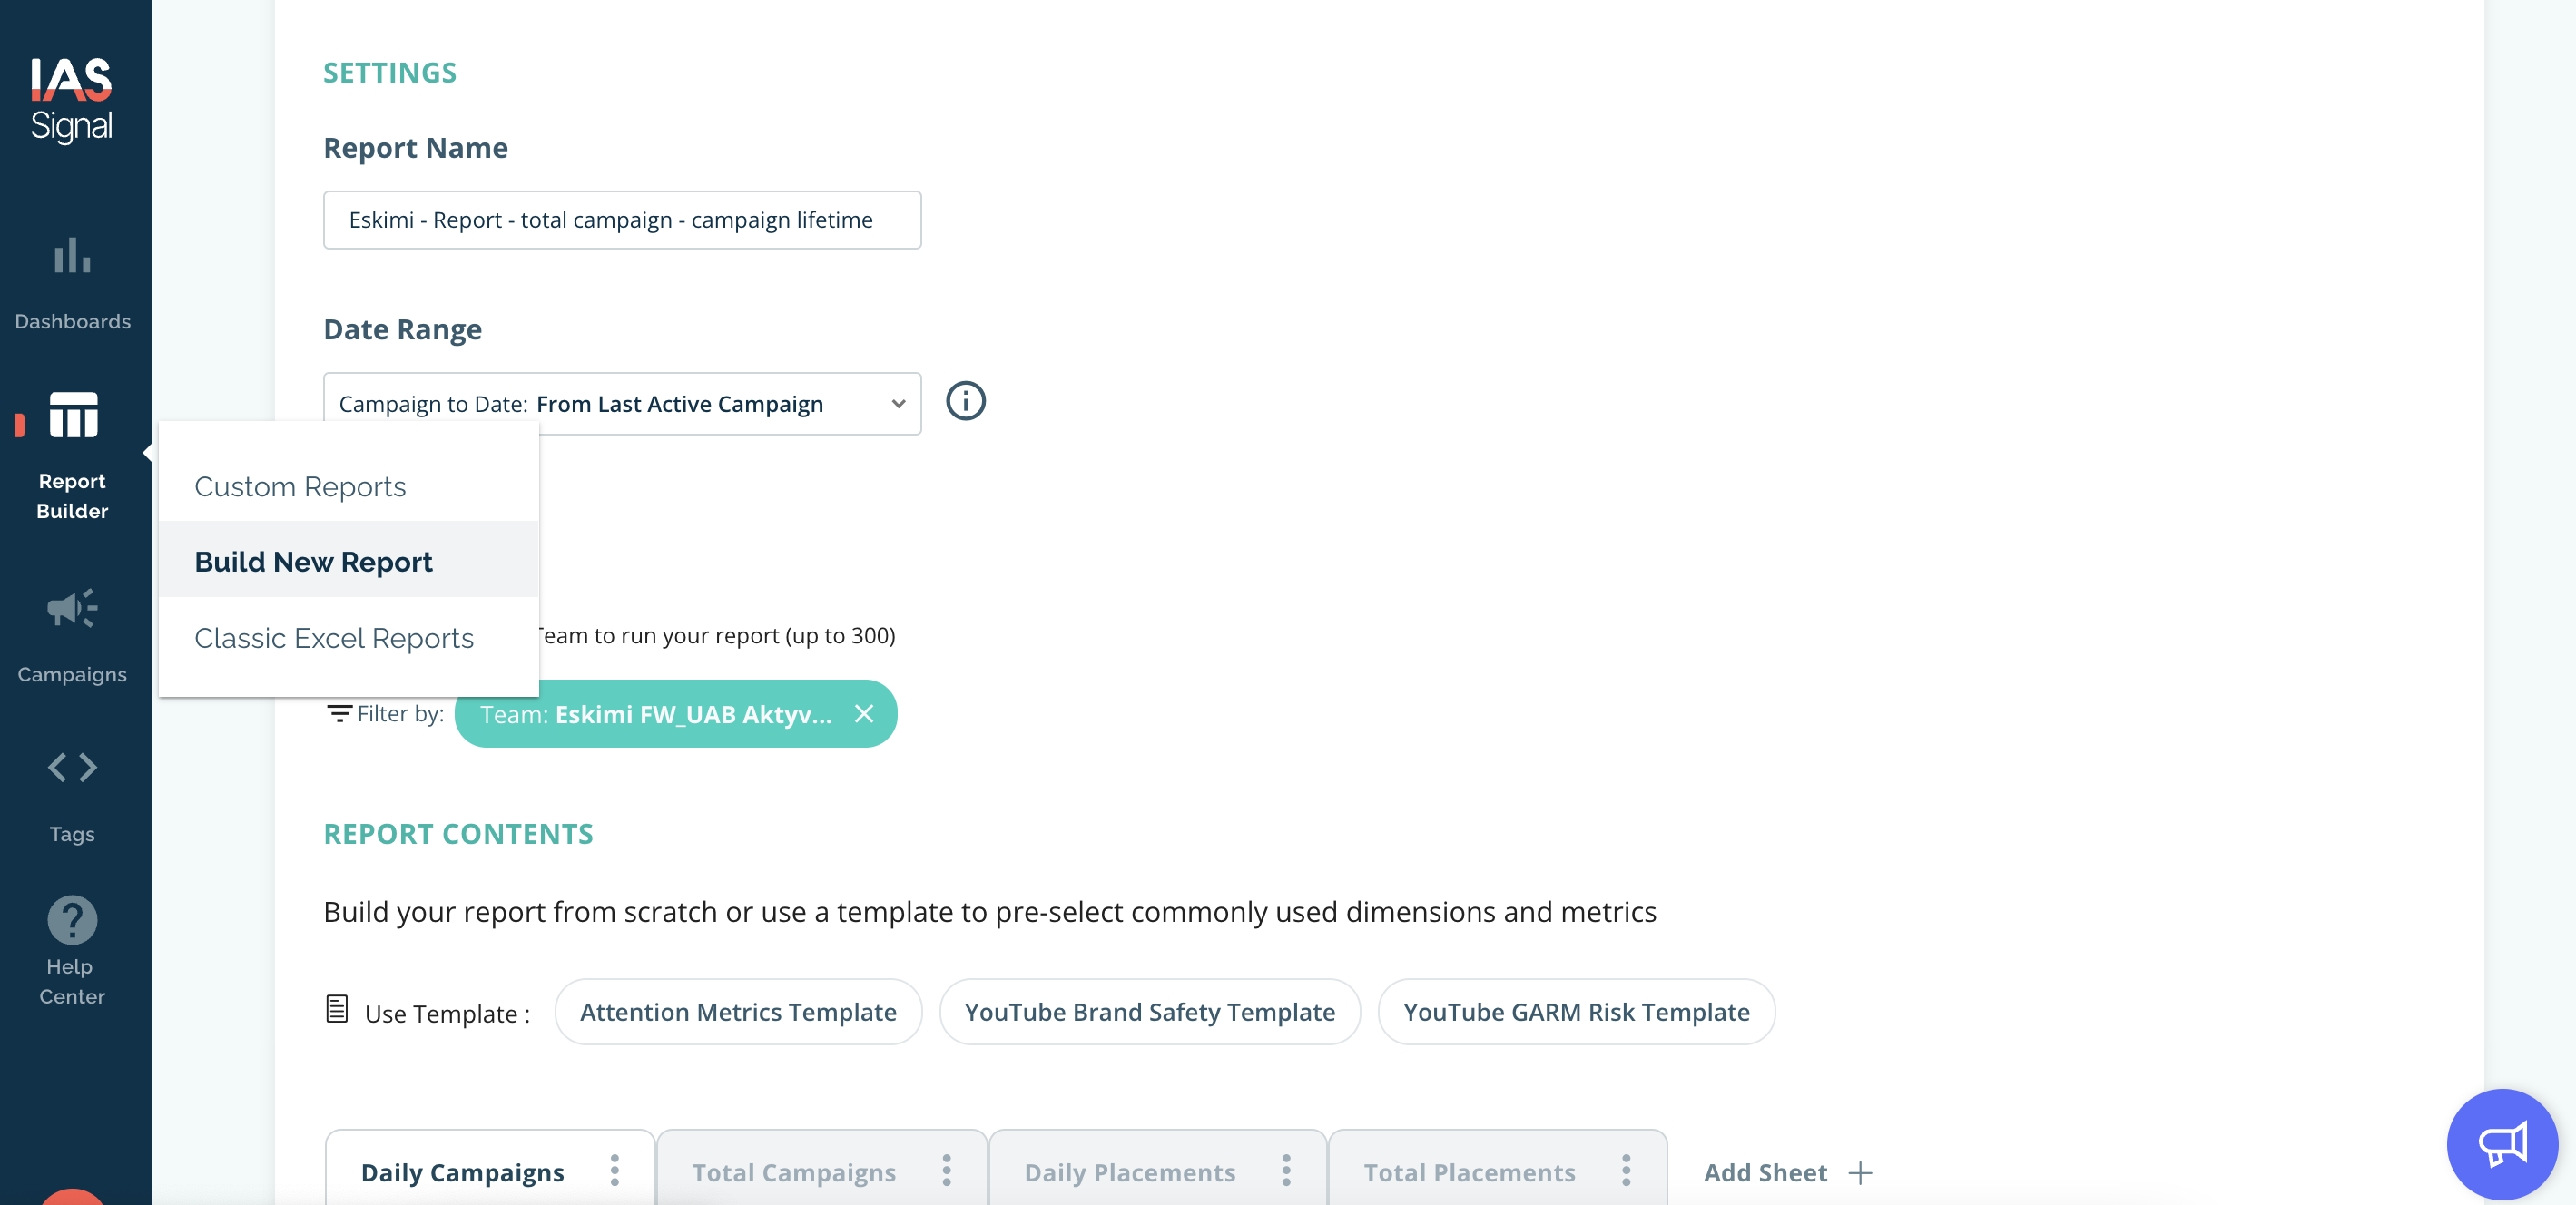
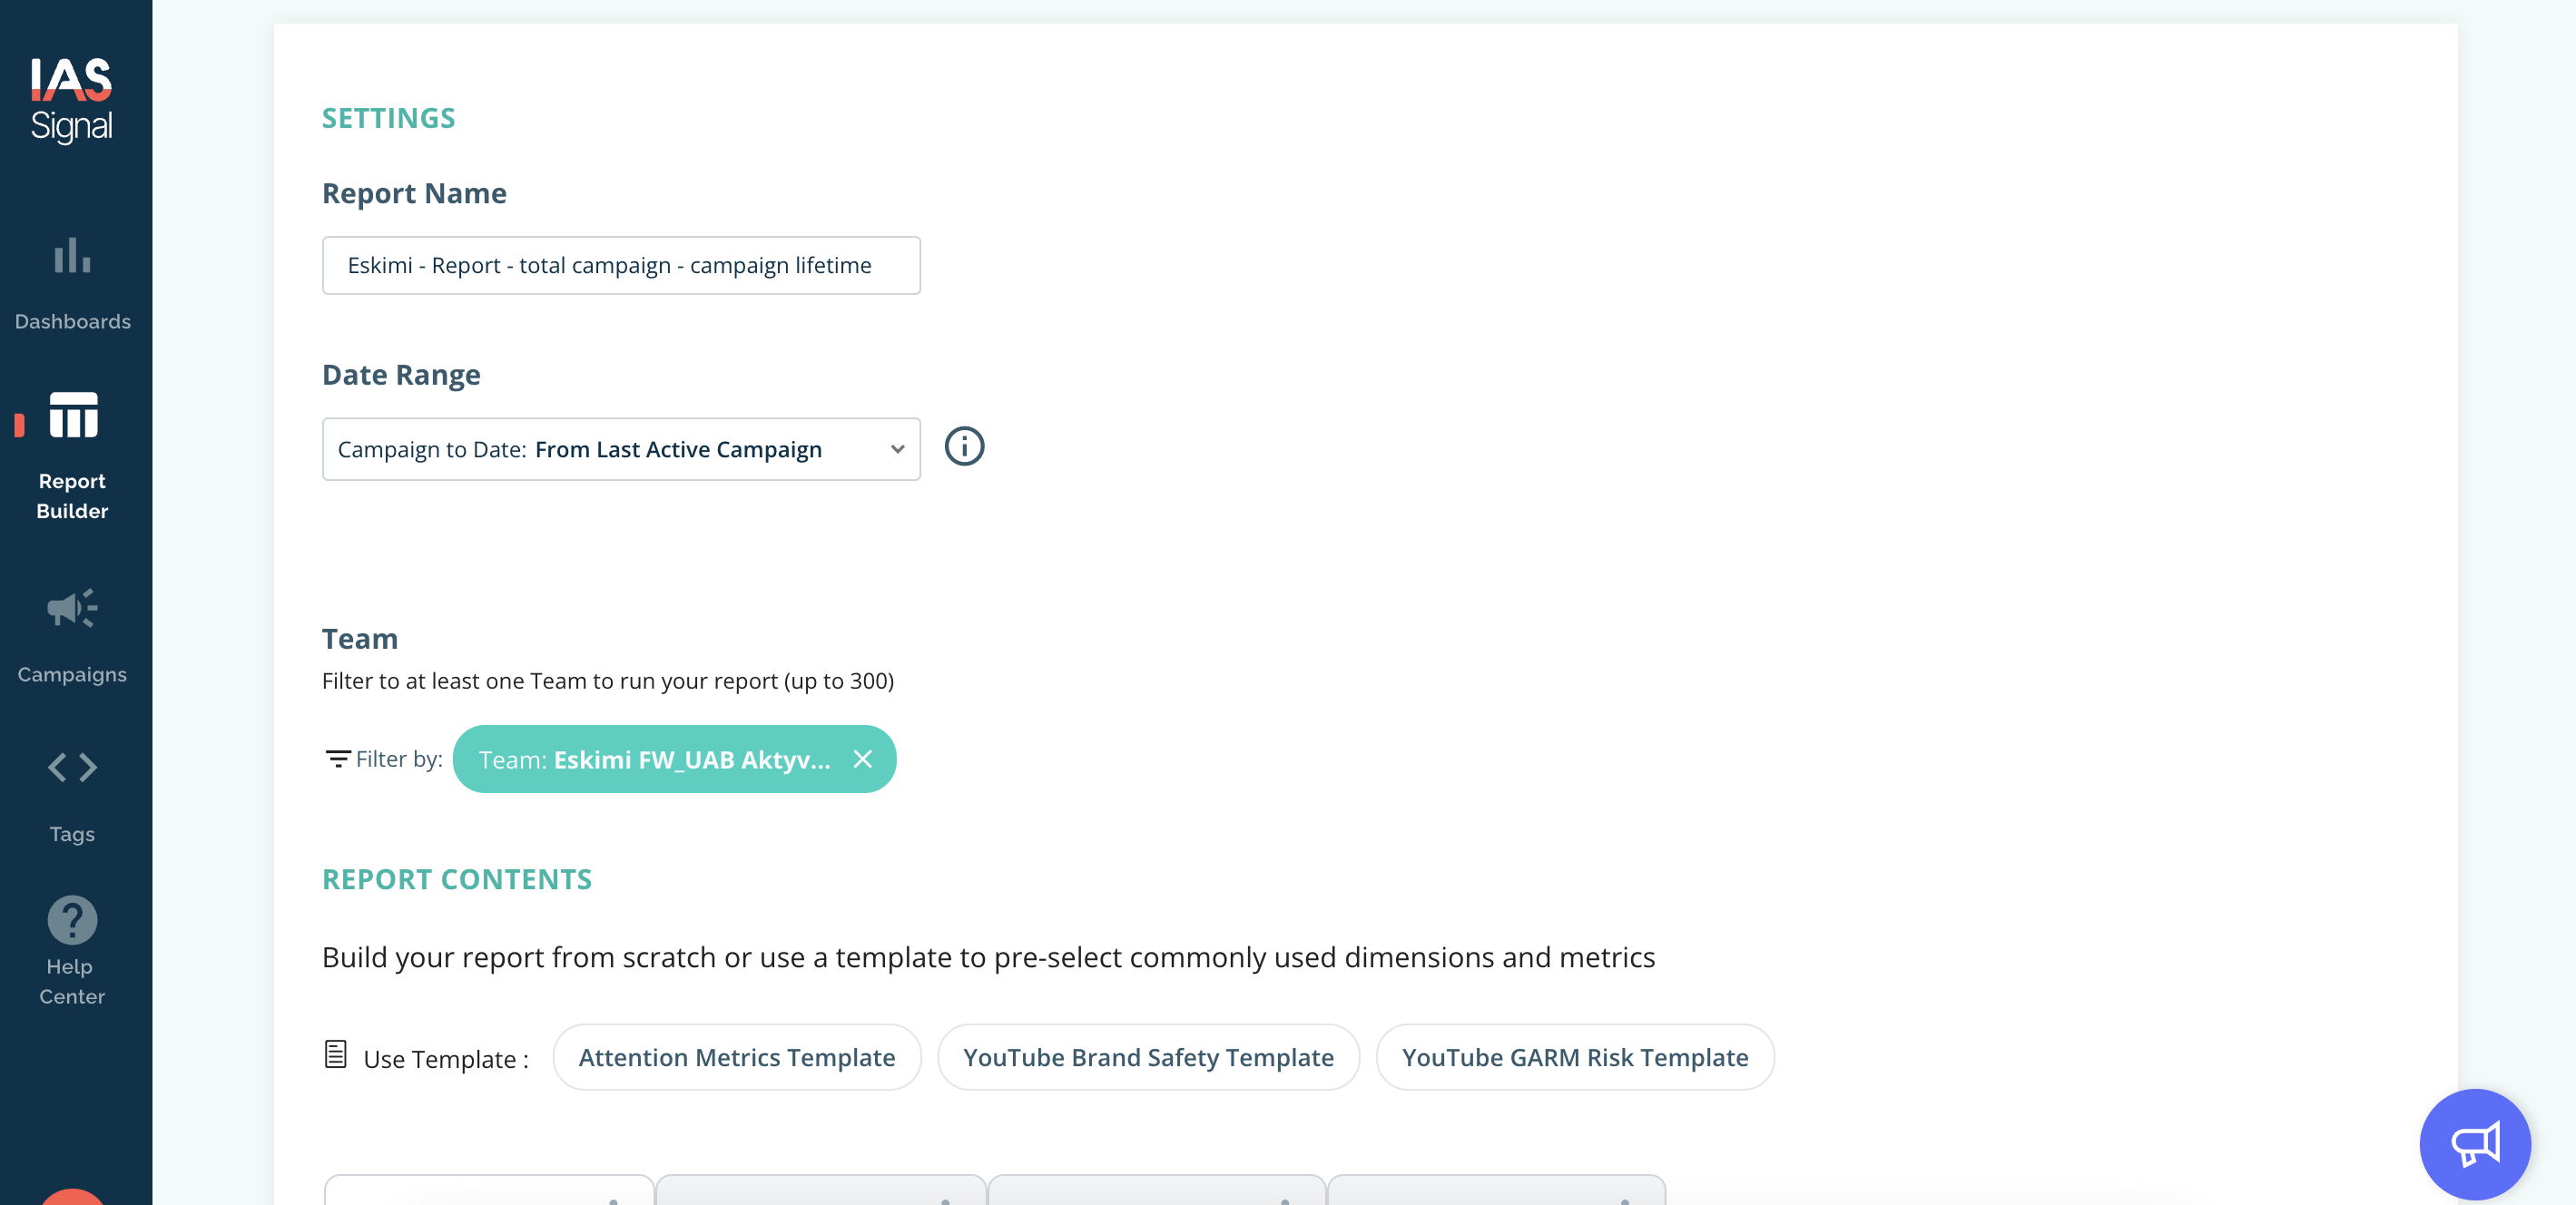
For "Data Range" menu select "Campaign to Date: From Last Active Campaign" and scroll down till the "Report type" section.
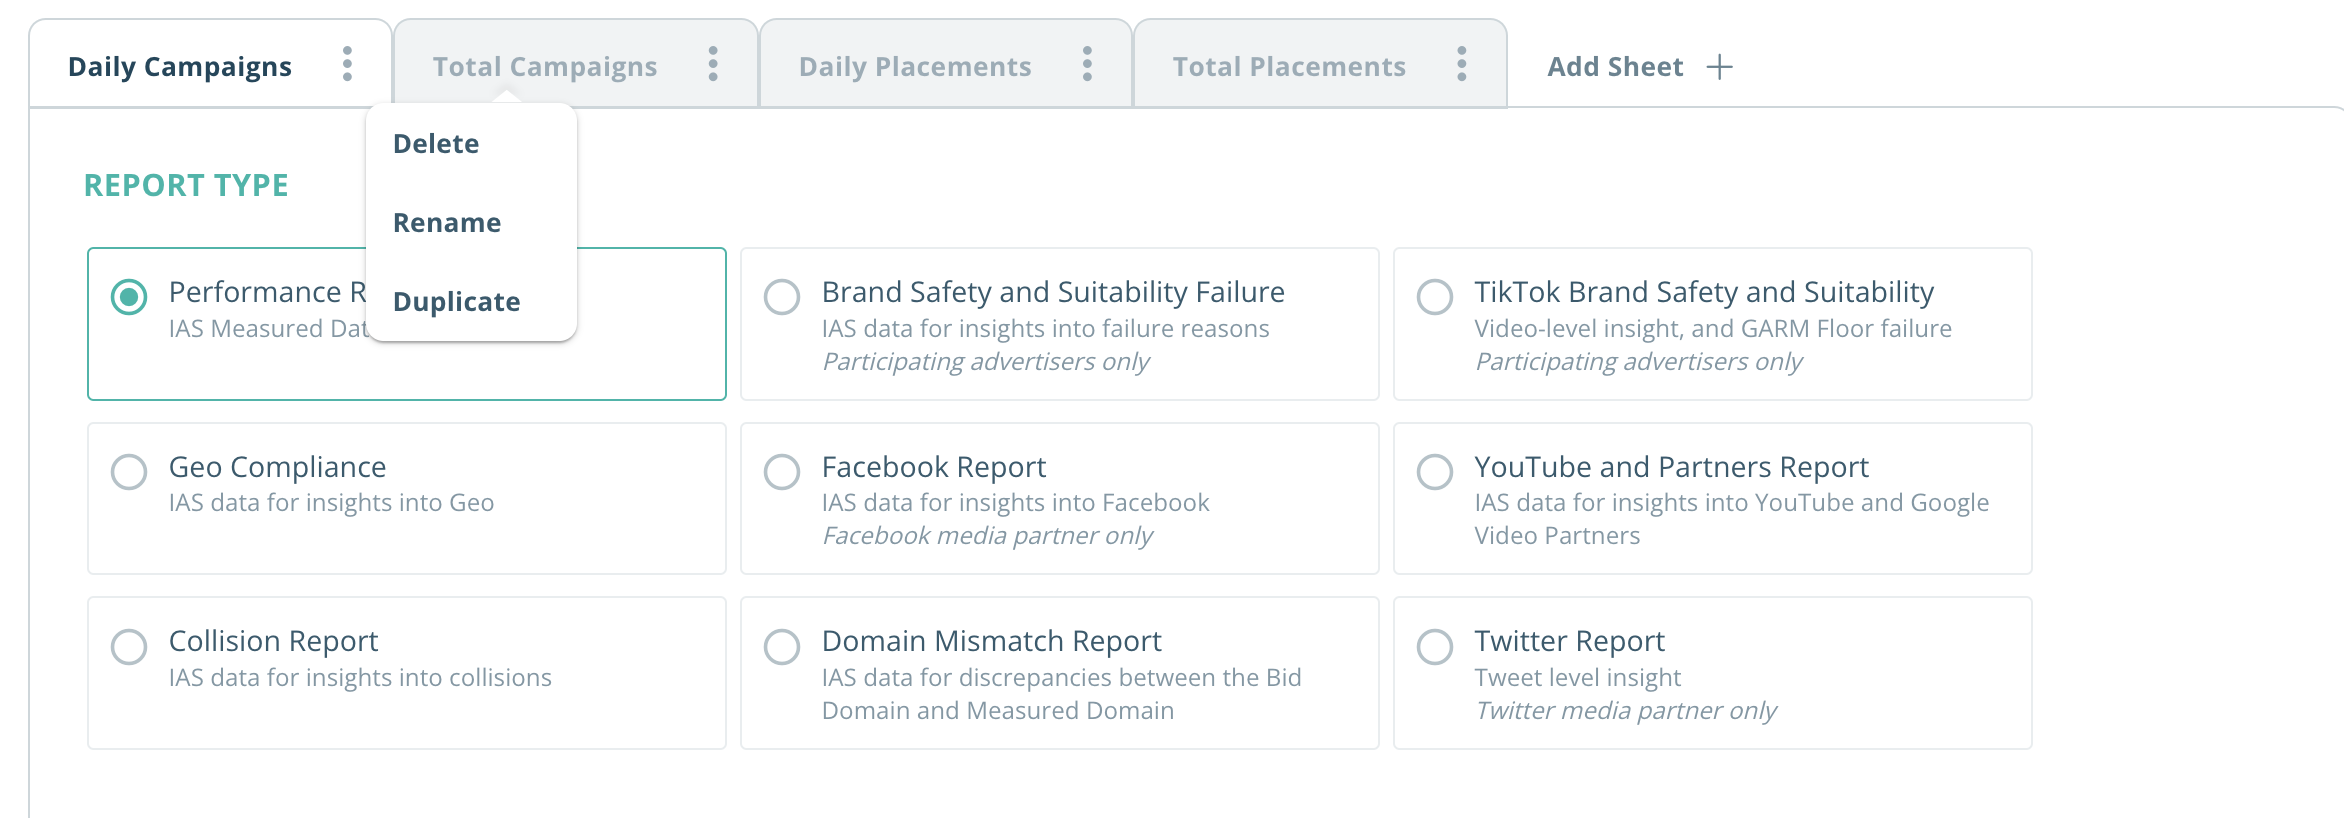
3. In Report Type section you will need to create 4 different sheets as it is shown on the screen below. You can name sheets accordingly "Daily Campaigns", "Total Campaigns", "Daily Placements", "Total Placements". Each sheet will be presented in same xls file which will be generated automatically. Start with one sheet creation, select "Performance Report" and scroll down till "Dimensions" section.
Tip 1: Create 1 sheet at first, for example "Daily Campaigns". And move to next steps. Later on the sheet might be copied so it will simplify process of creation as you will not need go from the scratch on all next steps for each separate sheet.
Tip 2: If you are using separate tracker per each placement, then create reports per placements as well, so it will be 4 sheets in total. However if you are measuring performance per campaign level, it would be enough to create only 2 sheets which is "Daily campaigns" and "Total campaigns"

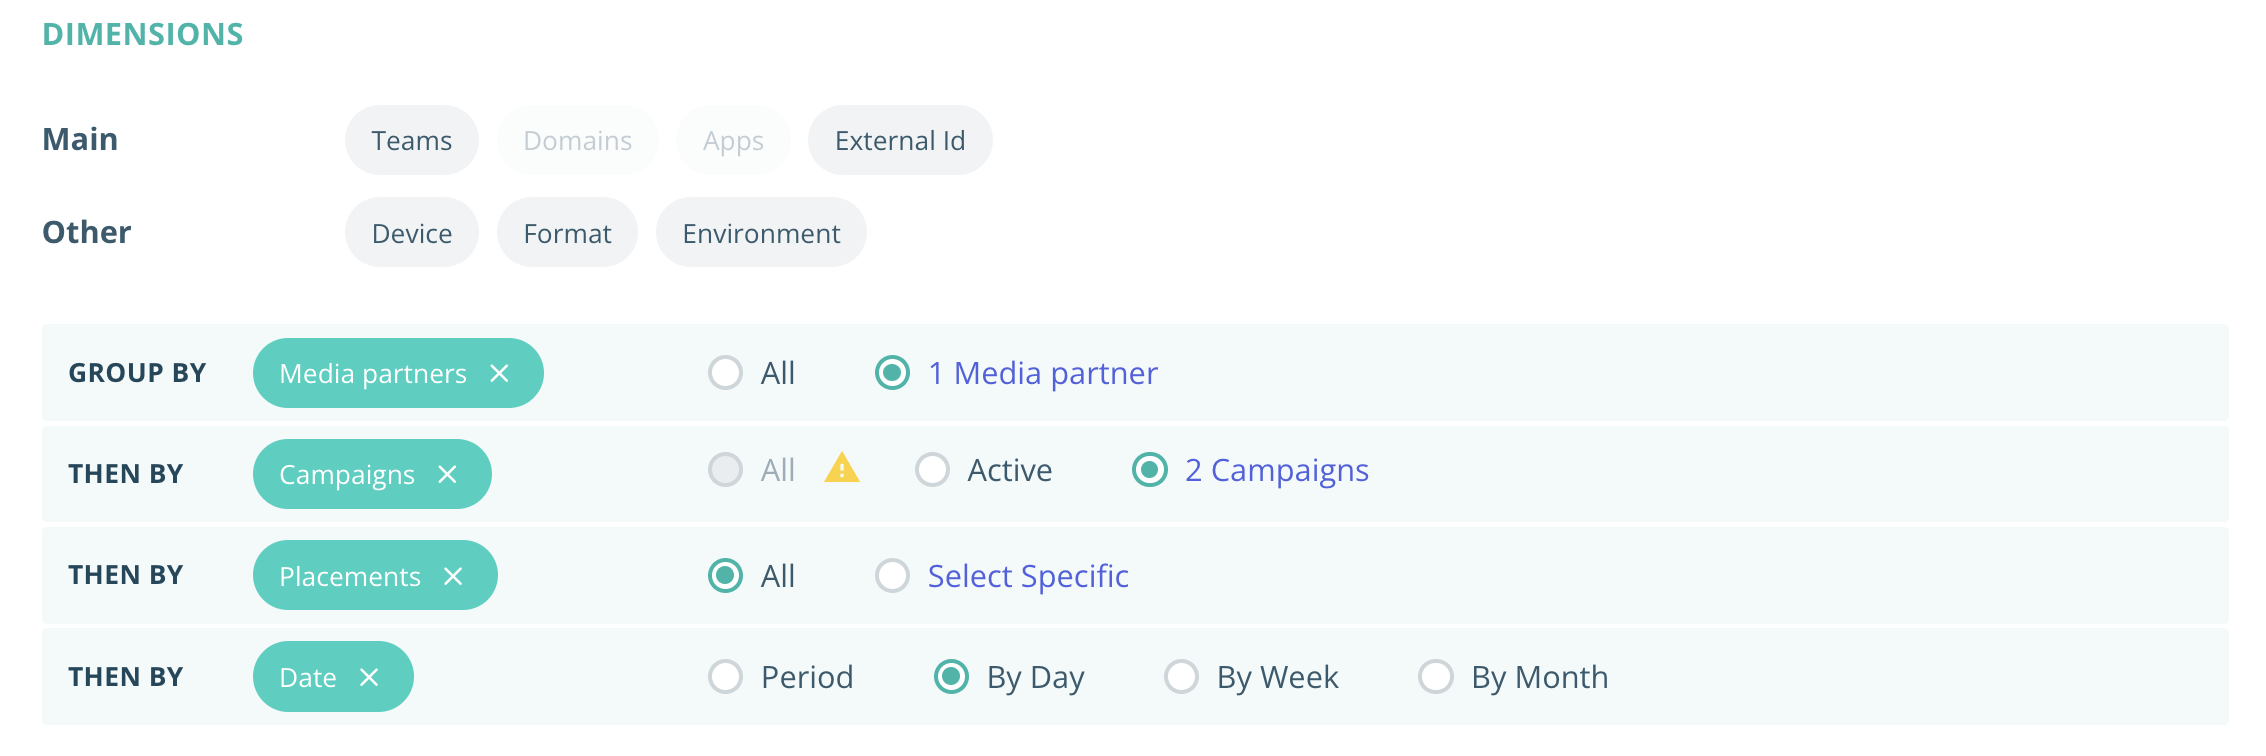
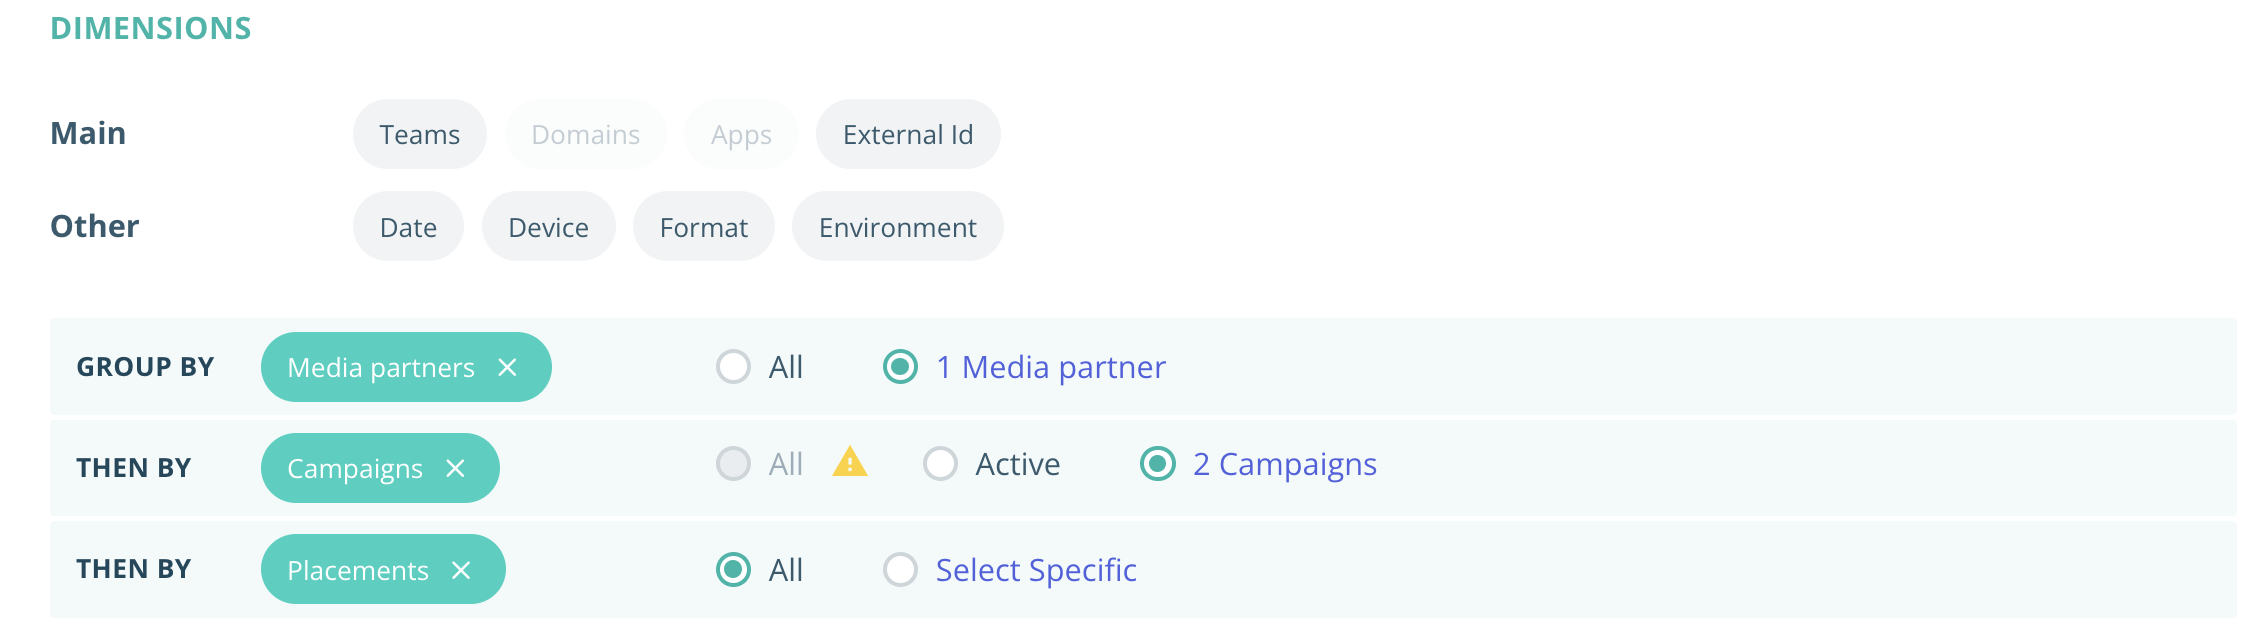
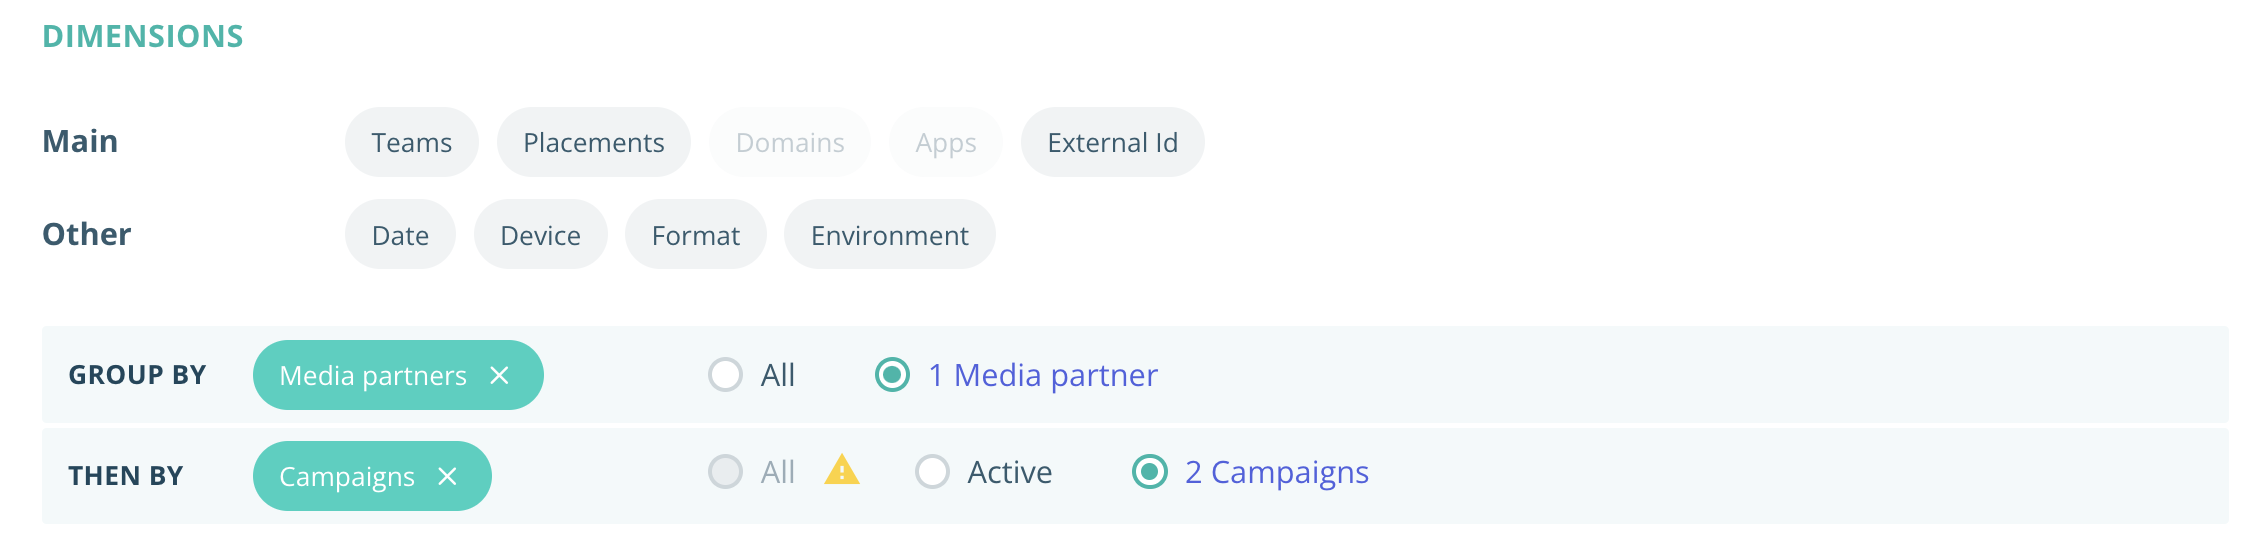
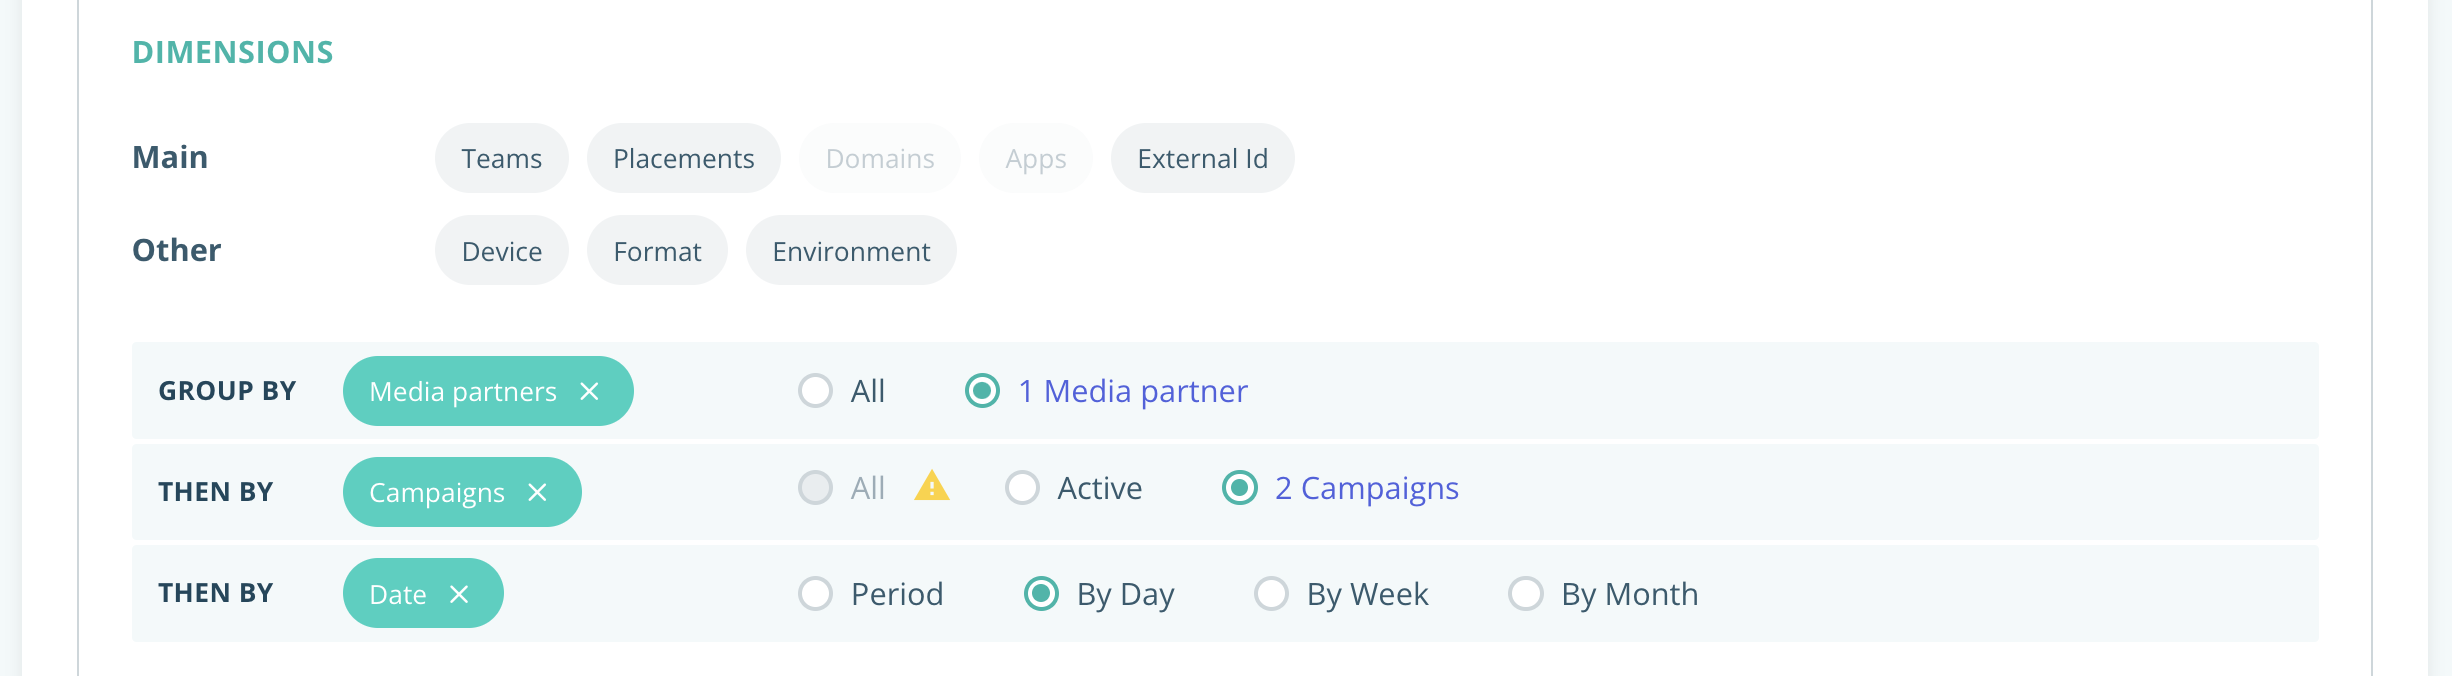
4. For the sheet "Daily Campaigns" for Dimensions section you need to select "Media Partners", "Campaigns", "Dates". Select dimensions in same order.
Also once dimensions are selected specify media partners (it should be Eskimi), also specify campaigns (you need to select campaigns that you want to include for reporting", and as last step select "by day" for Date dimension.
In this case IAS will generate report per selected campaign with daily split. Once this done scroll down till till the section "Minimum Total Tracked Ads Filter".
5. In the "minimum total tracked ads filter" section you need to select "all tracked ads". In this case all measured impressions for dimensions you selected above will be presented in the report. Once selected you need scroll down till "Metric" section
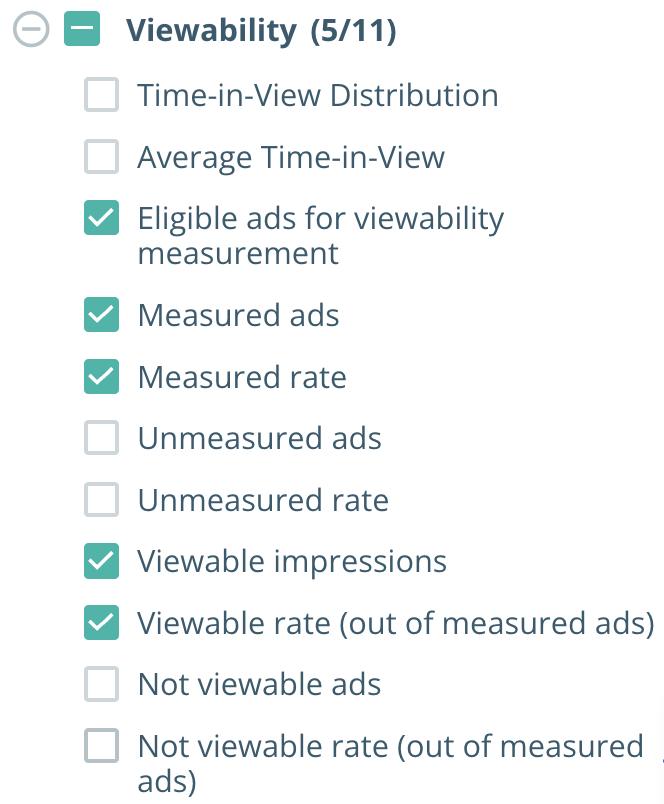
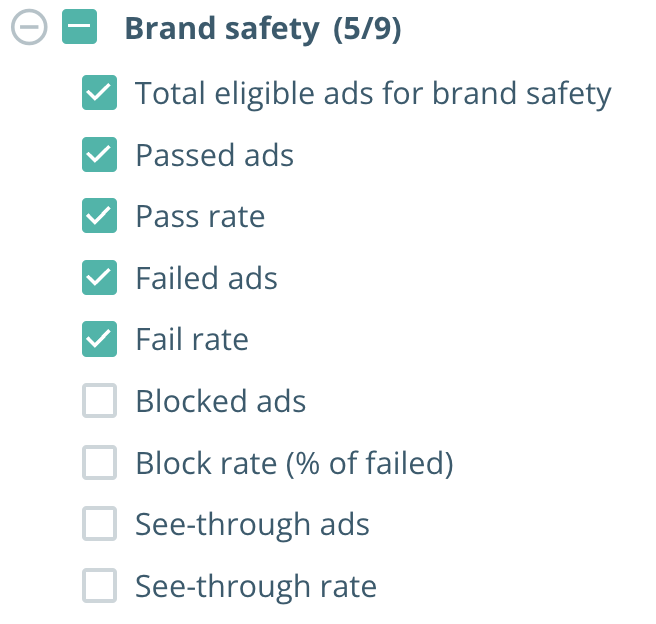
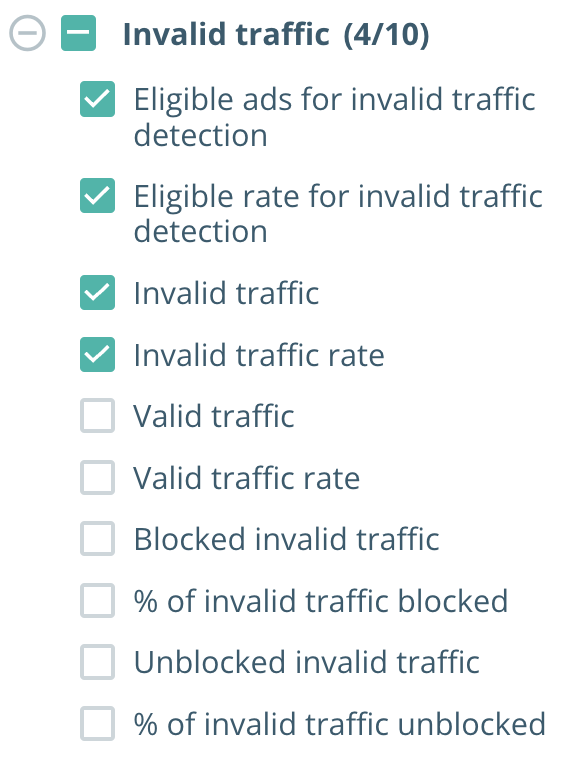
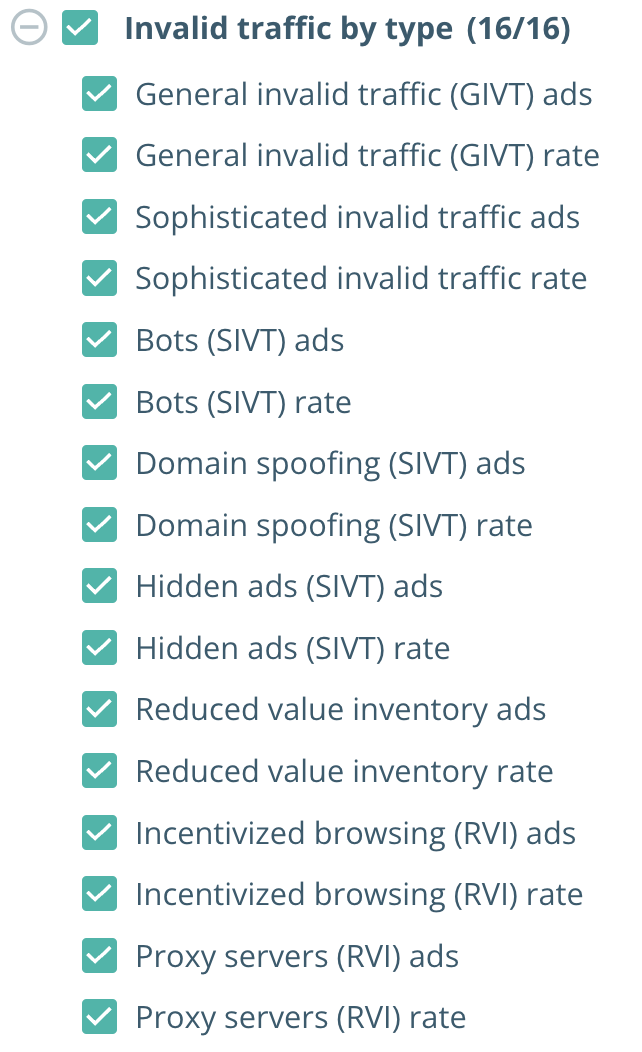
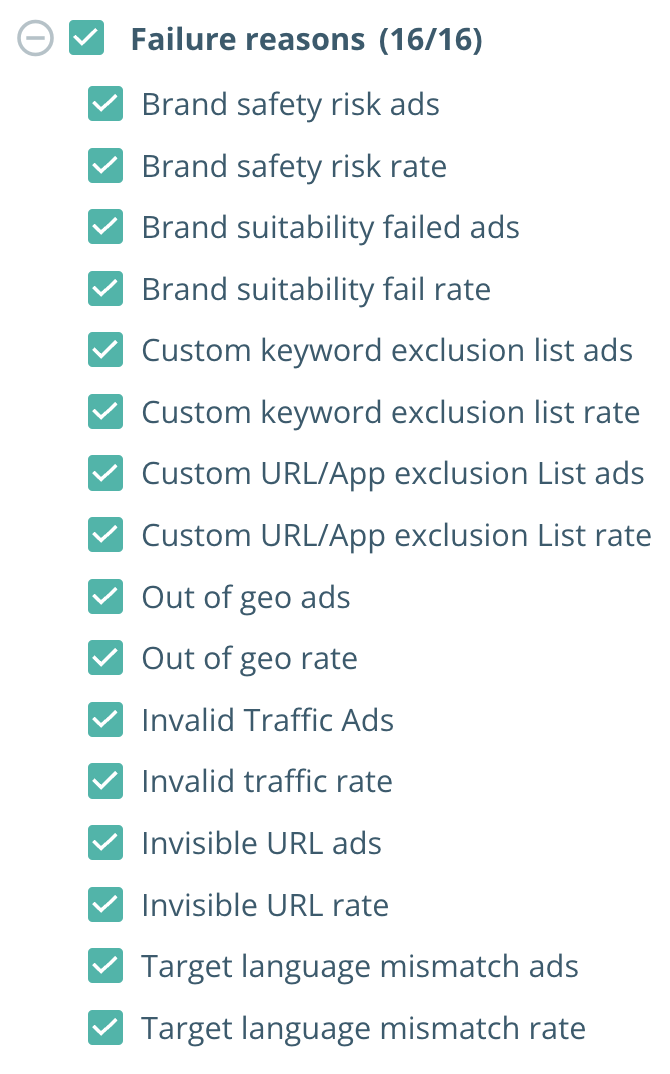
6. In "Metrics" section you need to establish metrics which are important to analyse for campaigns. Below you can see our suggestions regarding metrics to select. Please include them to any report you are creating for Eskimi team.
 |
 |
 |
 |
 |
|
 |