Creating User First Party Audience
First party data is defined as information that collected directly from the customer audience.
How is first party data collected?
First party data is collected by adding a pixel to a customer website that collects information about behaviors and actions of audience and records it. Whenever a visitor lands on or clicks website, looks at products or fills out a survey, that data can be collected.
How to create User First Party Audience:
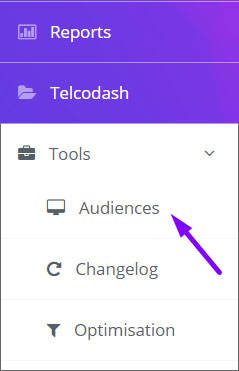
1. Click on Tools (left side of your dashboard) and select Audiences
2. Then click Add Audience (right top corner of the screen)

3. Now the page should look like this
On the audience creation screen you will need to fill in the following:
- Audience name;
- Choose the type - Retargeting ( user first party );
- Choose date interval - here you indicate how long the audience will be collected;
- Choose the rule - "Anyone visiting the website" OR "Users visiting specific web pages"
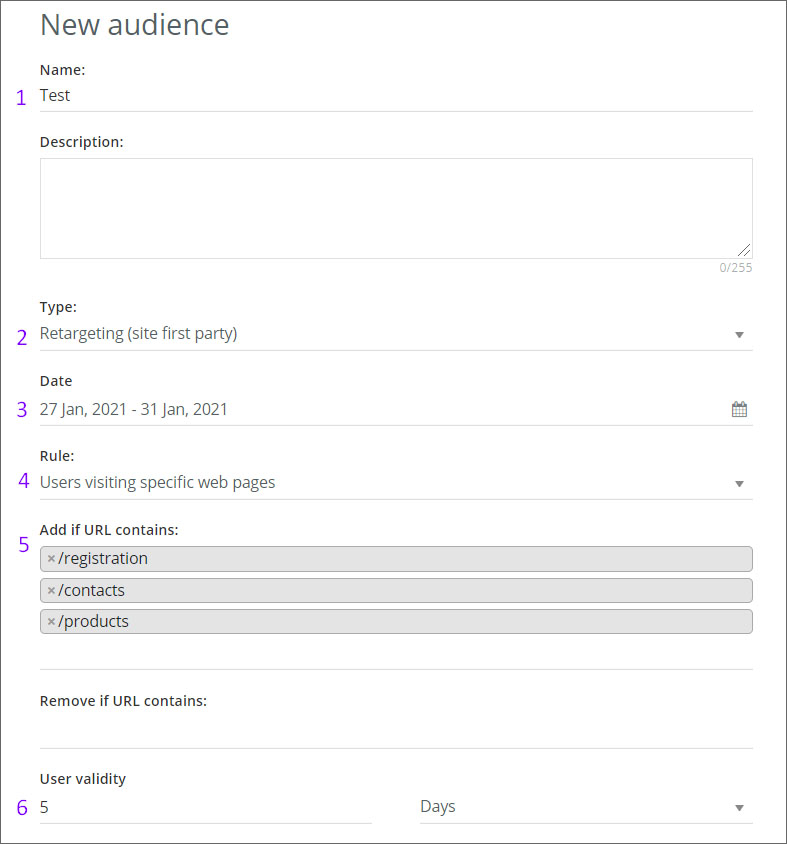
Let's now take a hypothetical situation: customer wants to track audiences who enter the websites registration page, products page, and contact page.
Using the old tracking codes we had to generate 3 separate codes which had to placed in these specific pages. But using the new tracking pixel, only one audience needs to be created, the rest is configured through the dashboard.
- To start the audience configuration, change the Rule from "Anyone visiting the website" to "Users visiting specific web pages"
- A new field named "Add if URL contains:" will appear
-
Since we have a hypothetical situation add the URLs. For example registration URL will be "/registration", products page URL "/products", contacts page URL "/contacts"
After adding the rules your screen should look like this:
IMAGE
- After adding the URL's set the "User validity" - here you indicate how long the collected audience will be saved .
When all variables are set, click "SAVE" and that's it, your Audience is configured and saved.