How to add "View" only to Eskimi channel in Google Analytics
TheThis article presents a step-by-step guide on how it is possible to create filter in Google Analytics and provide the view for one specific source of inventory is presented in this article.inventory. Please follow the steps carrefully and read the actions that have to be taken on the screenshots itself.carefully.
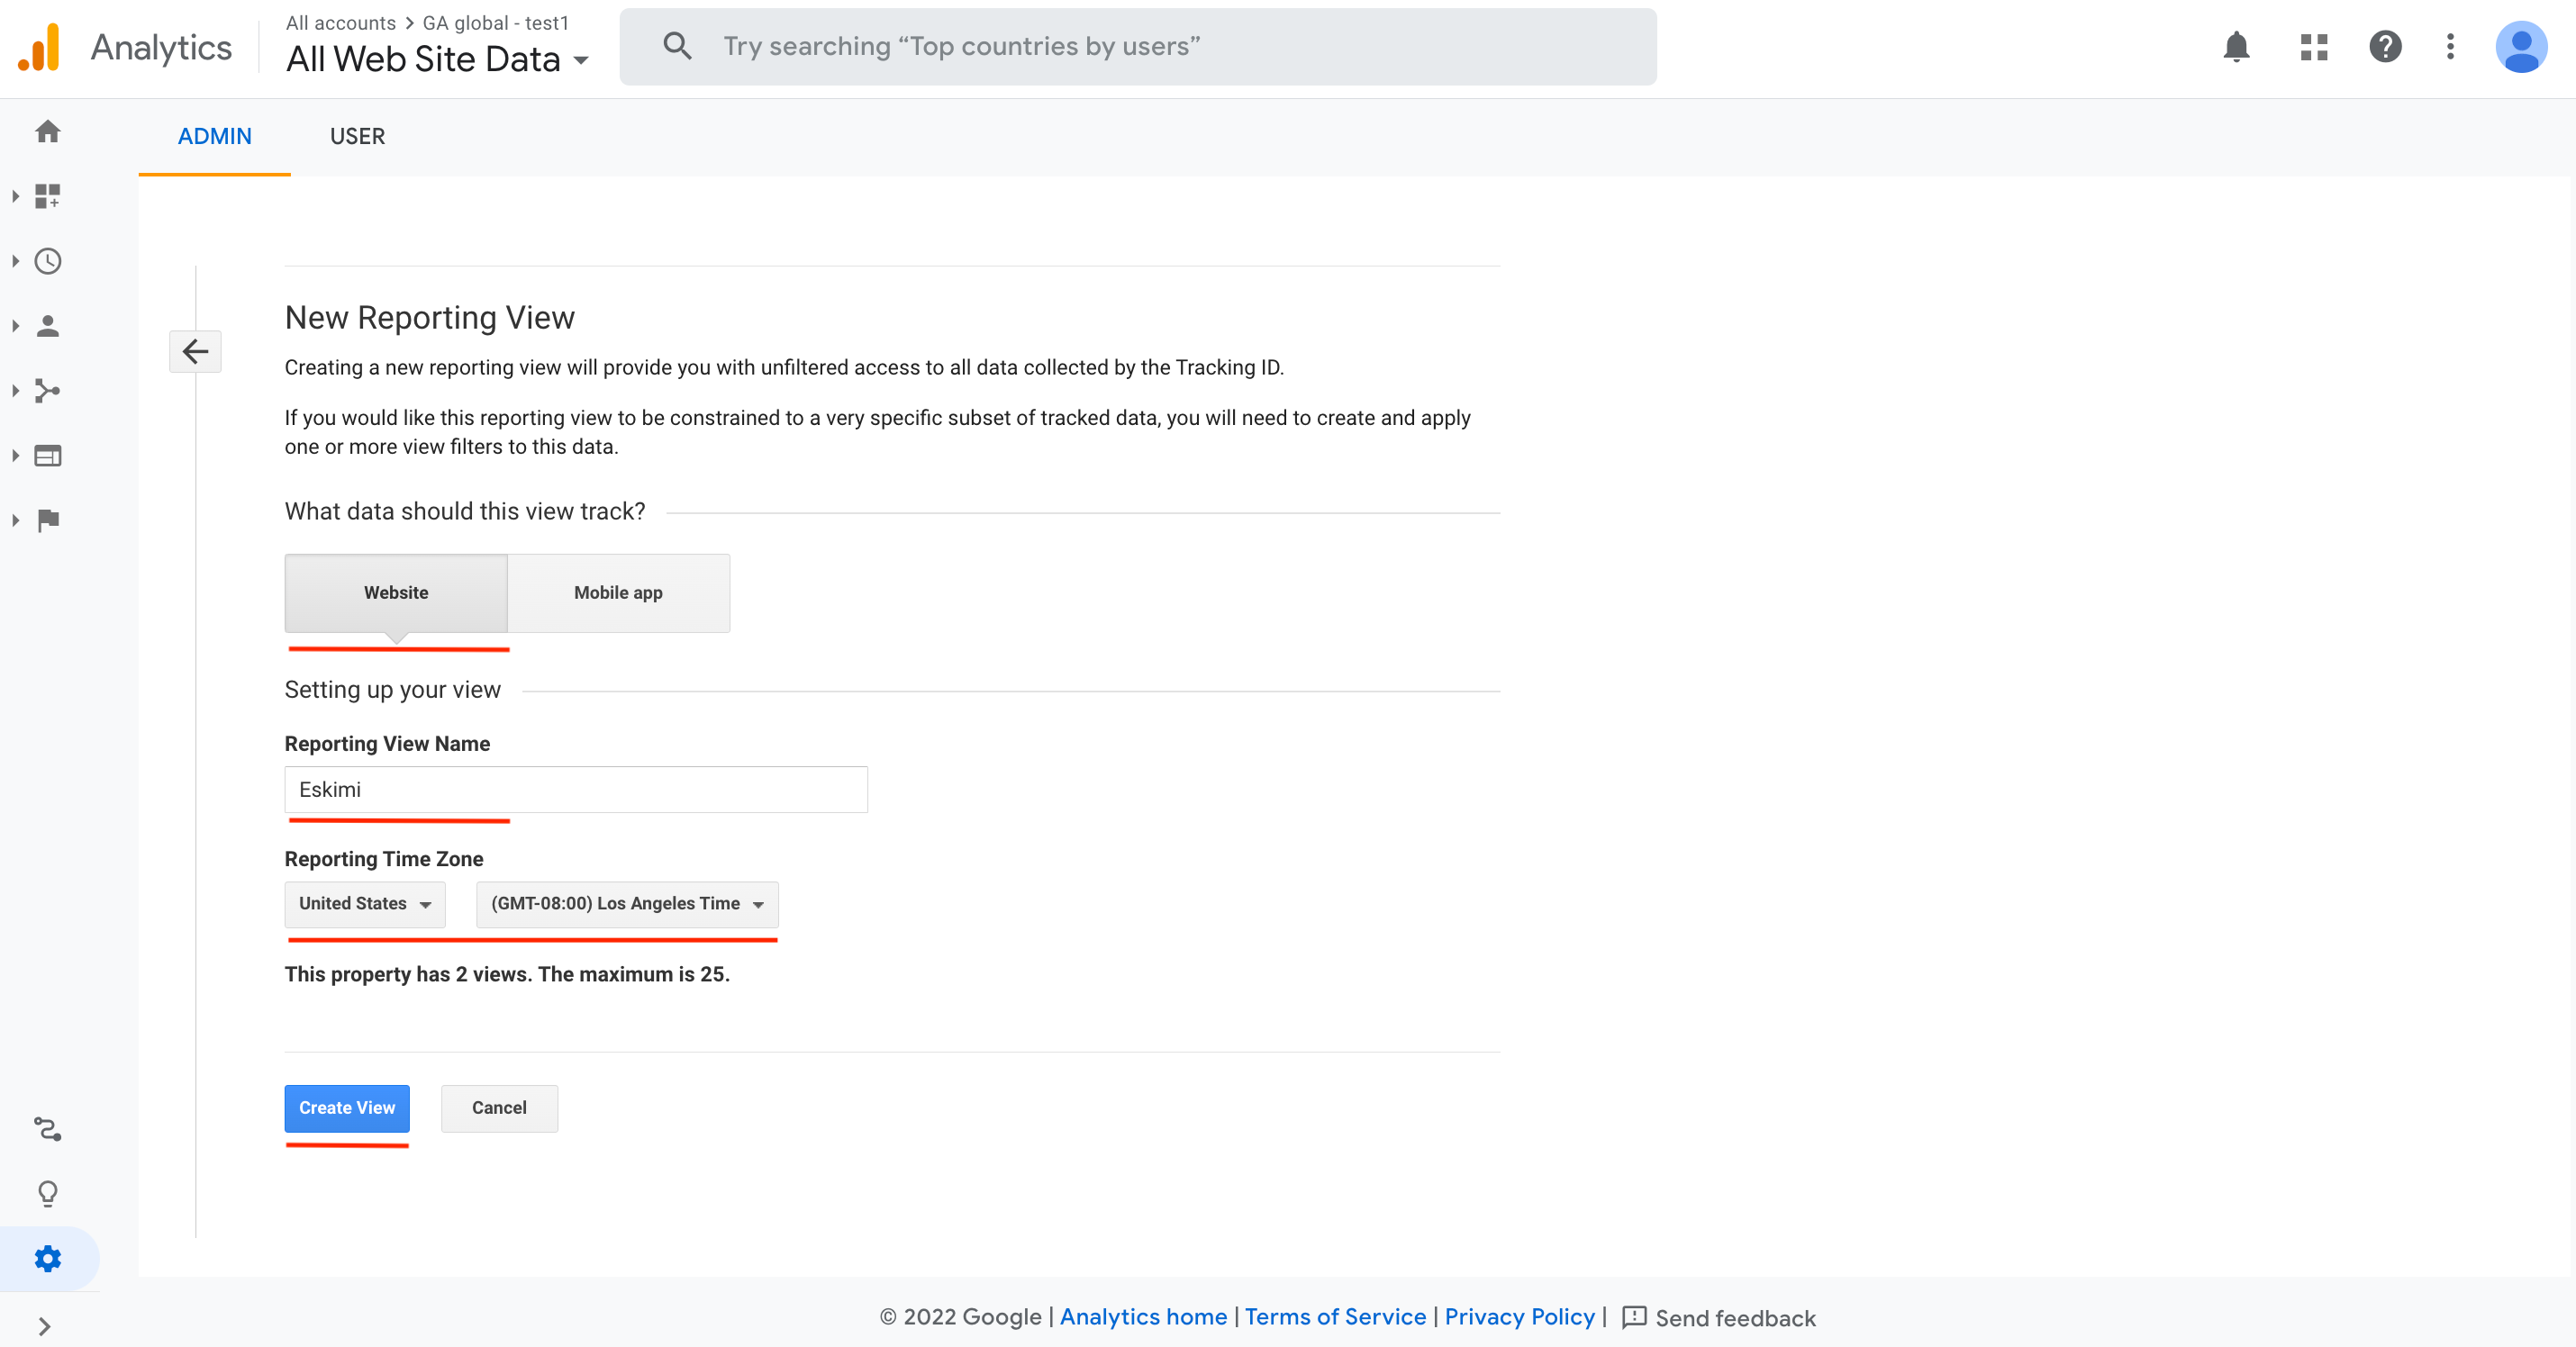
2. Choose "Website", type the name of the view,view in "Reporting View Name" section, choose the Reporting Time Zone and press "Create View":
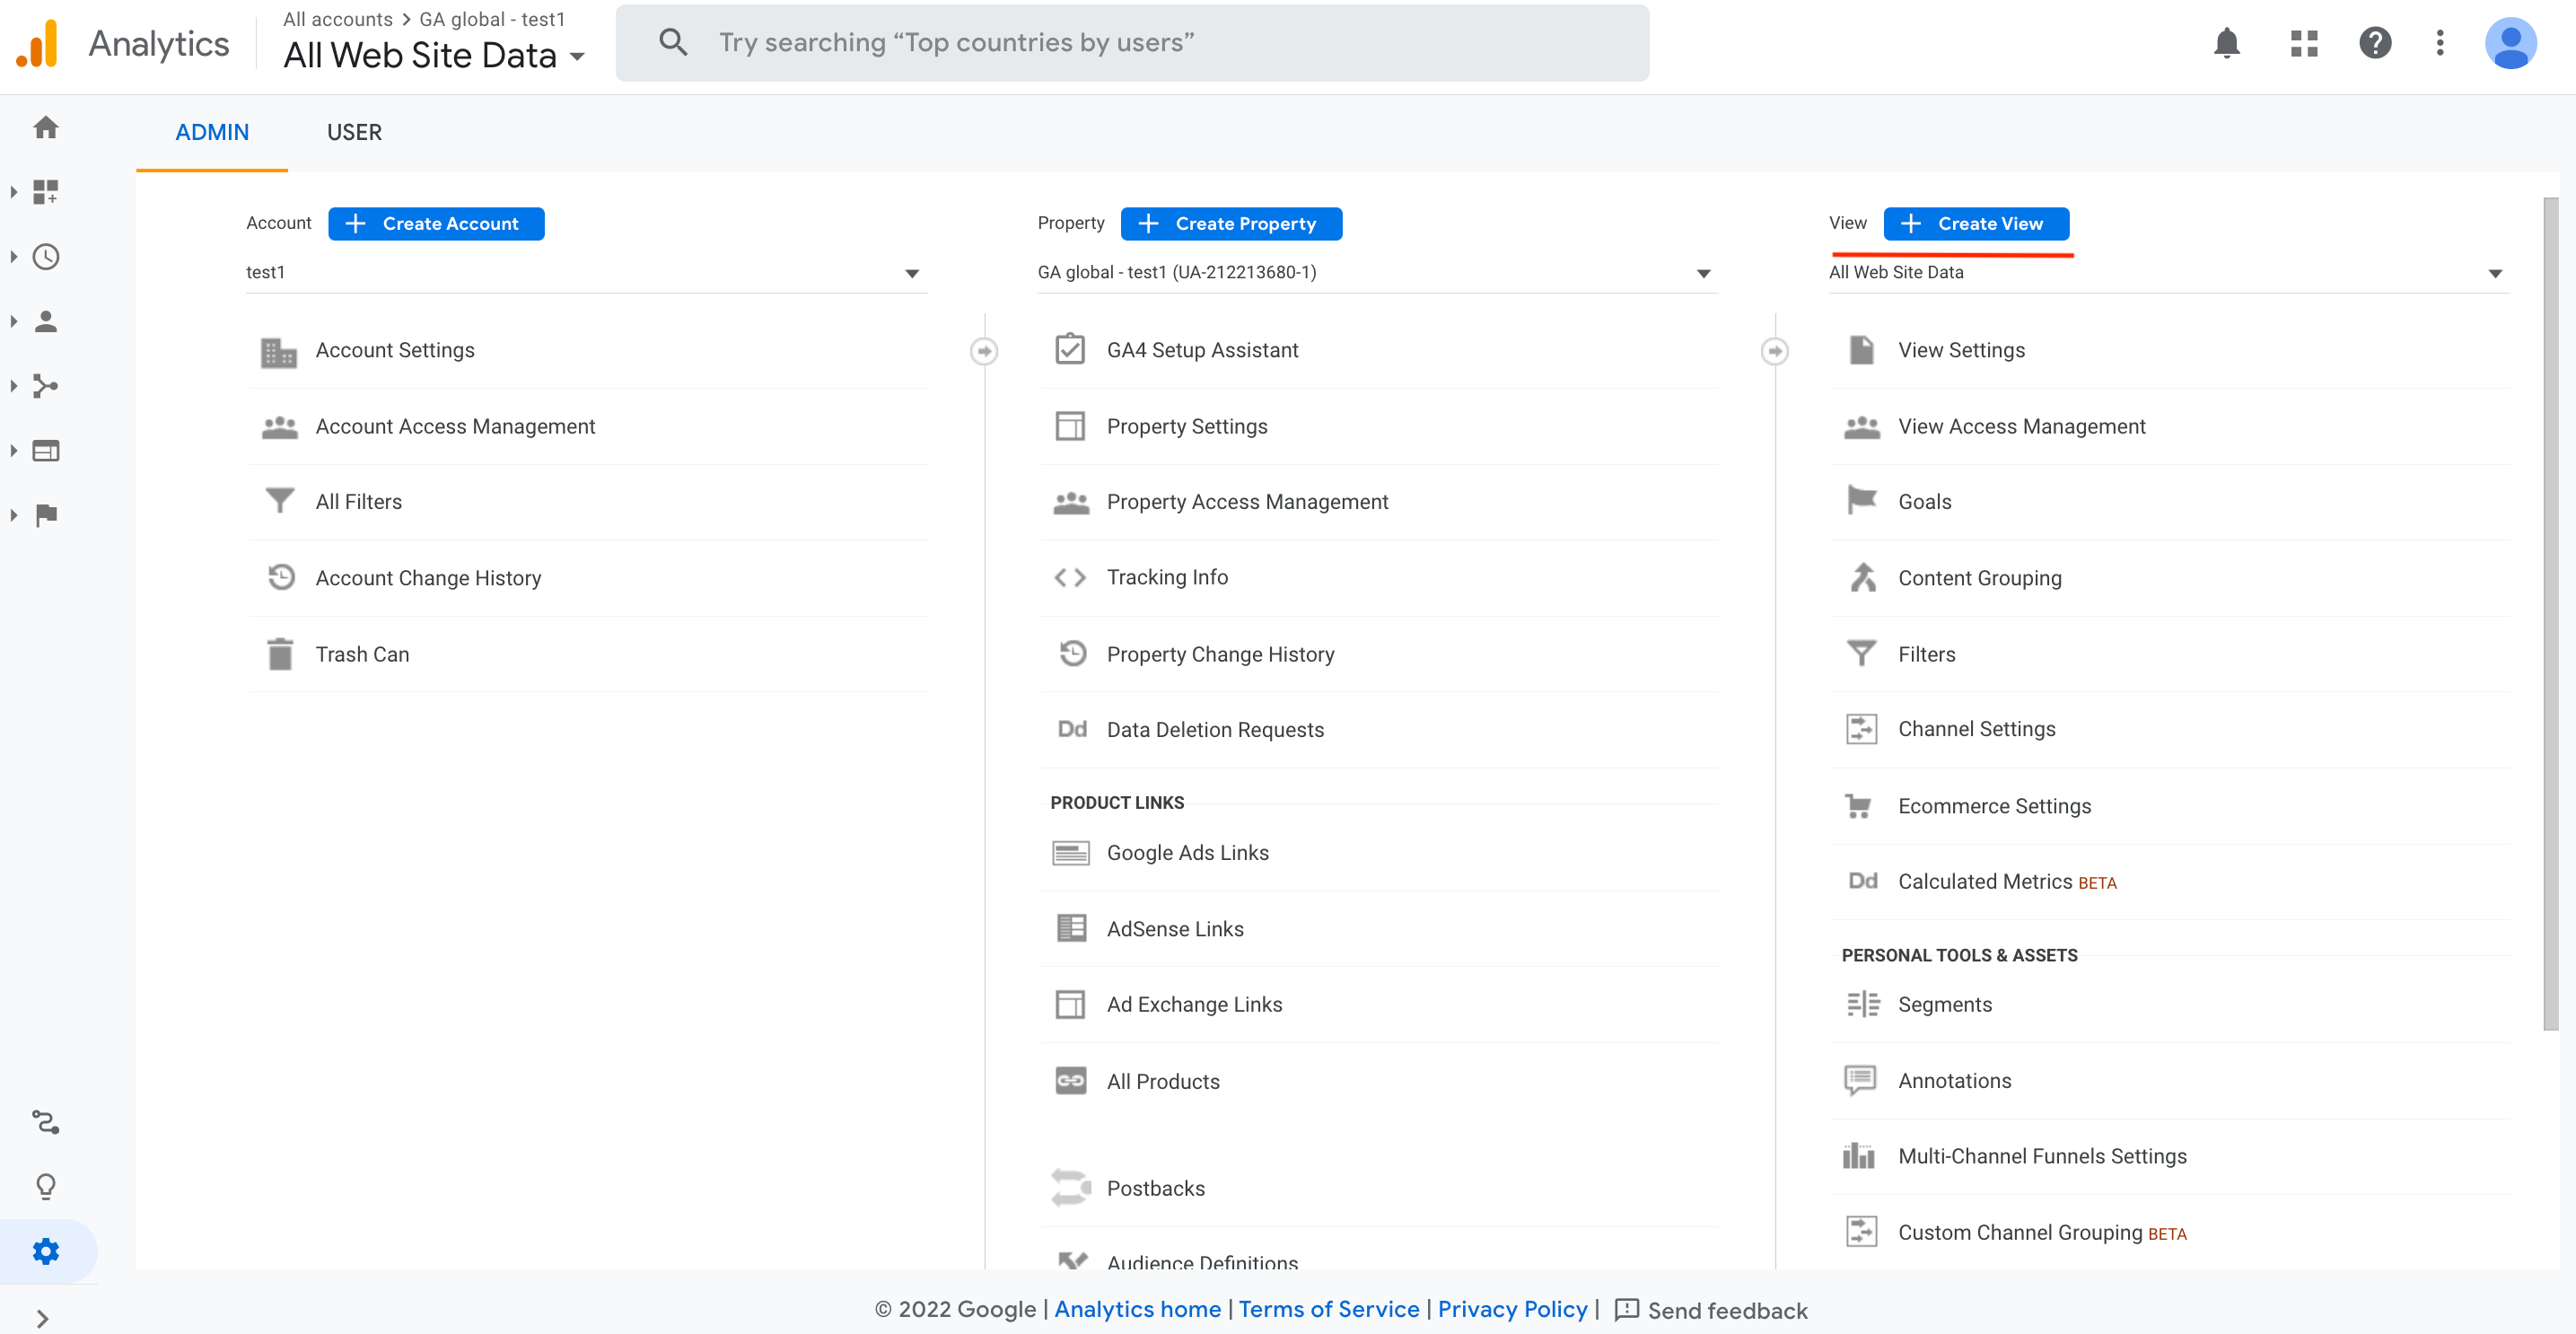
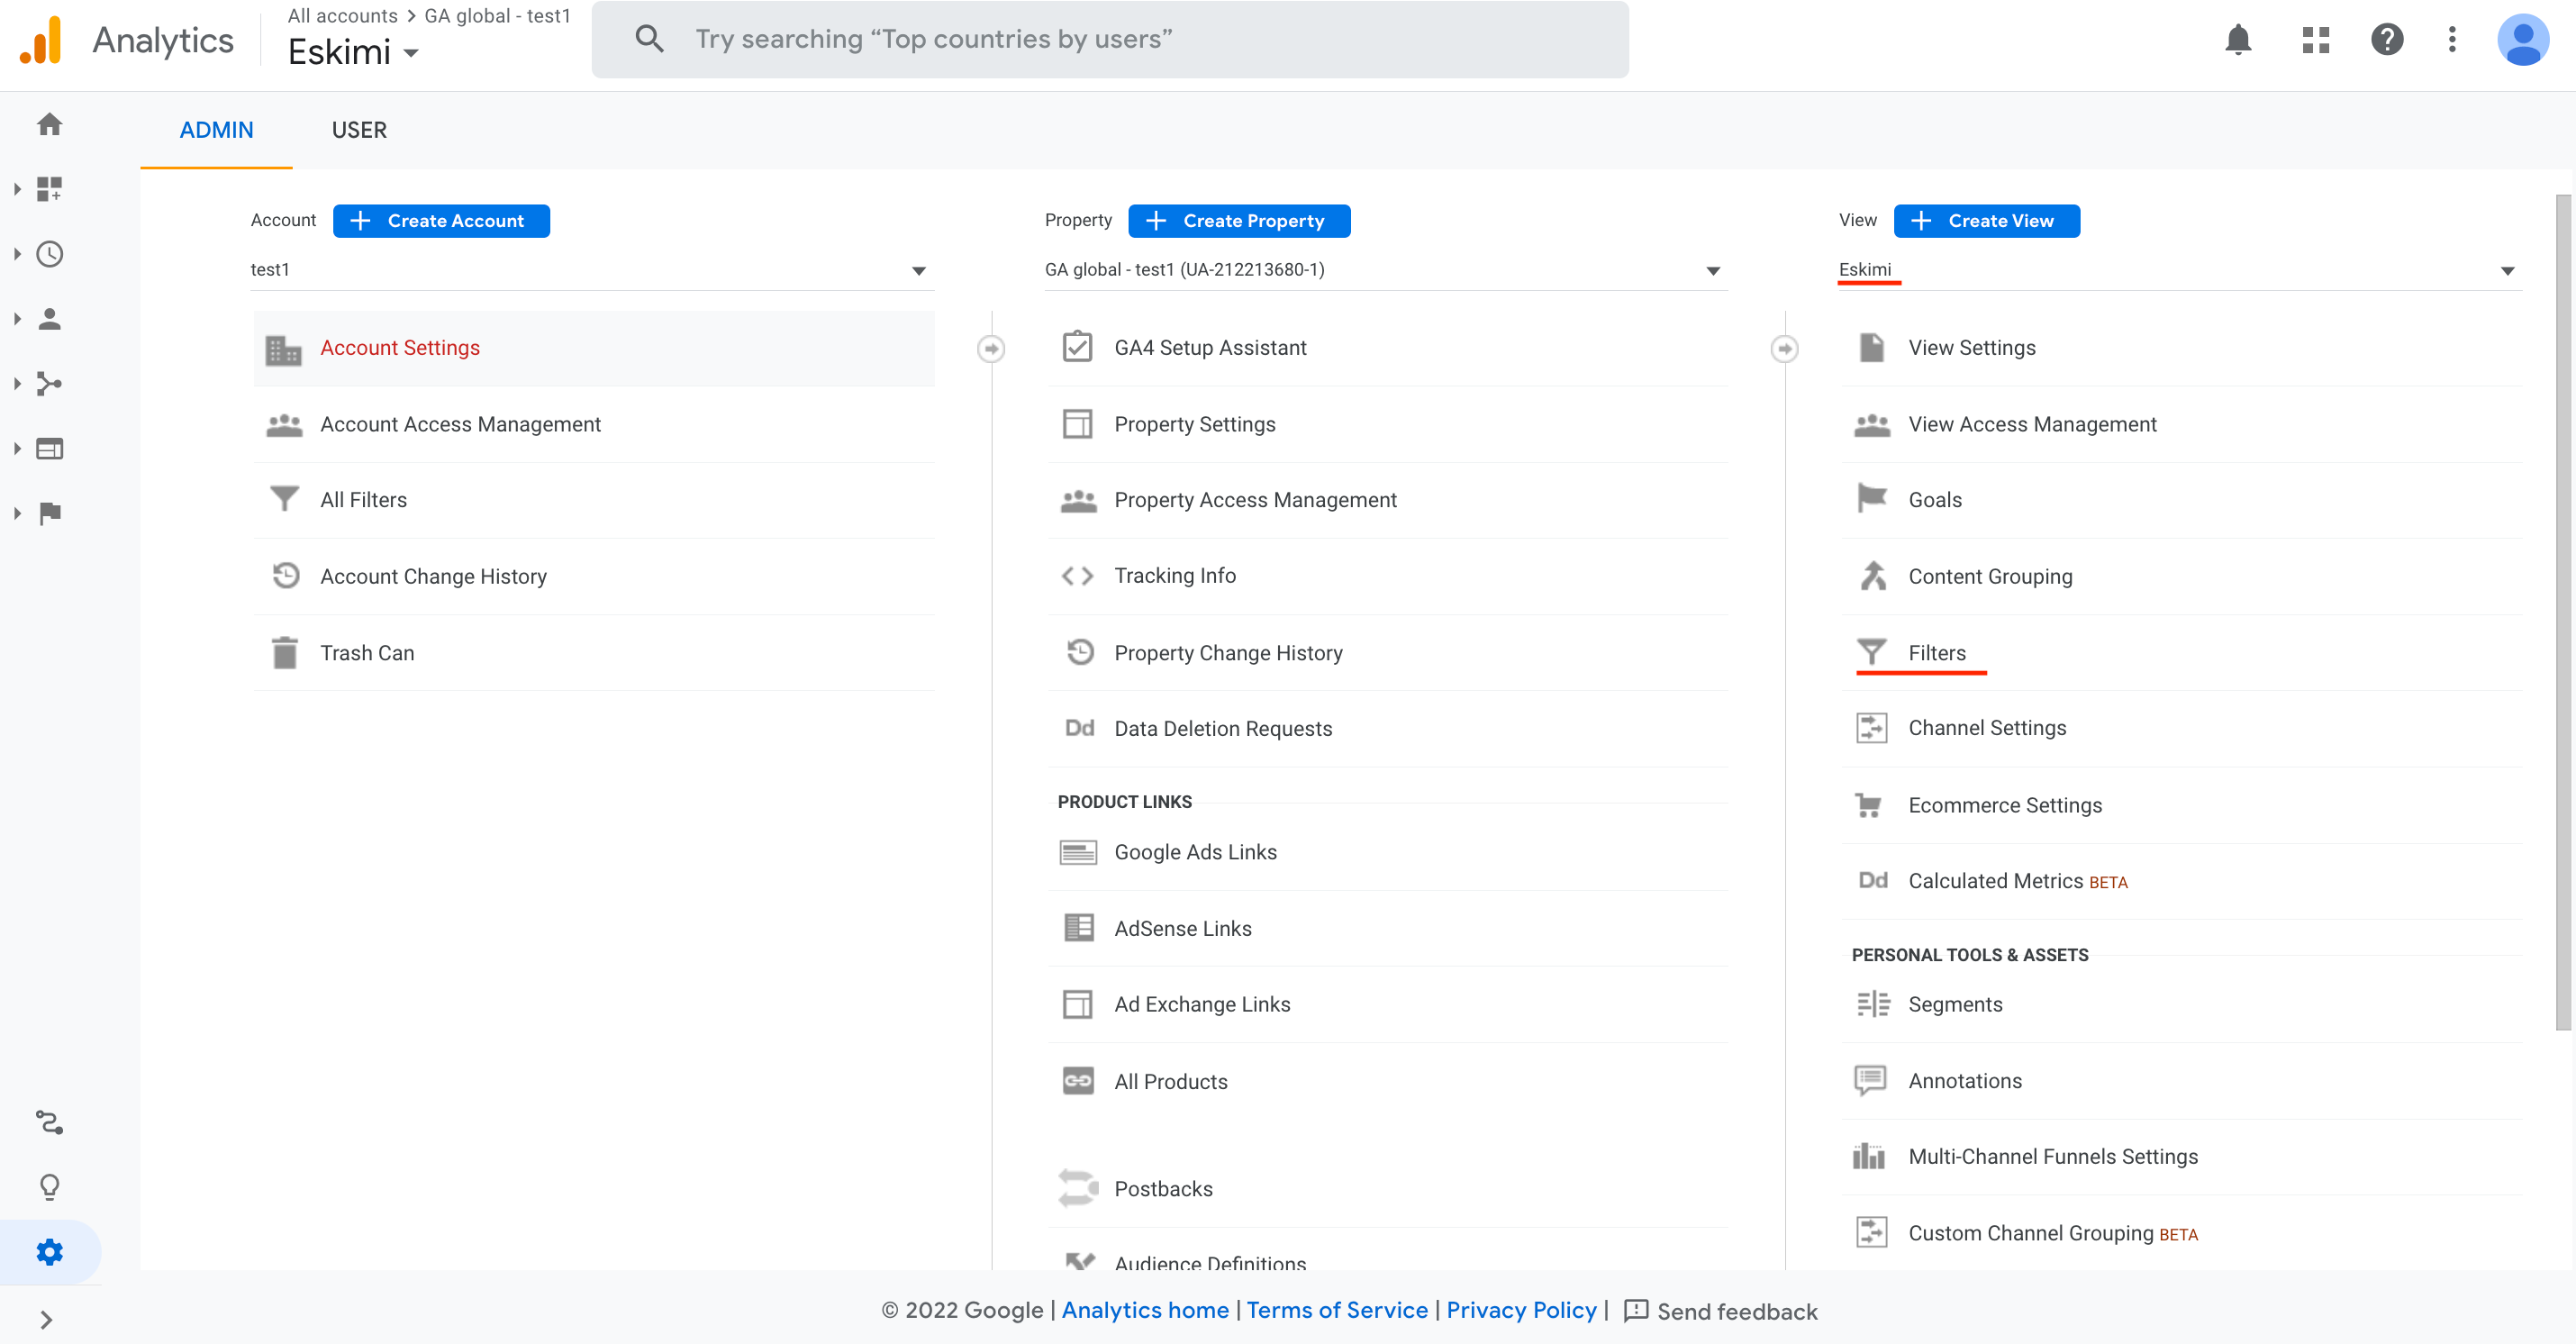
3. Then chooseselect the created viewView and press to "Filters" button:
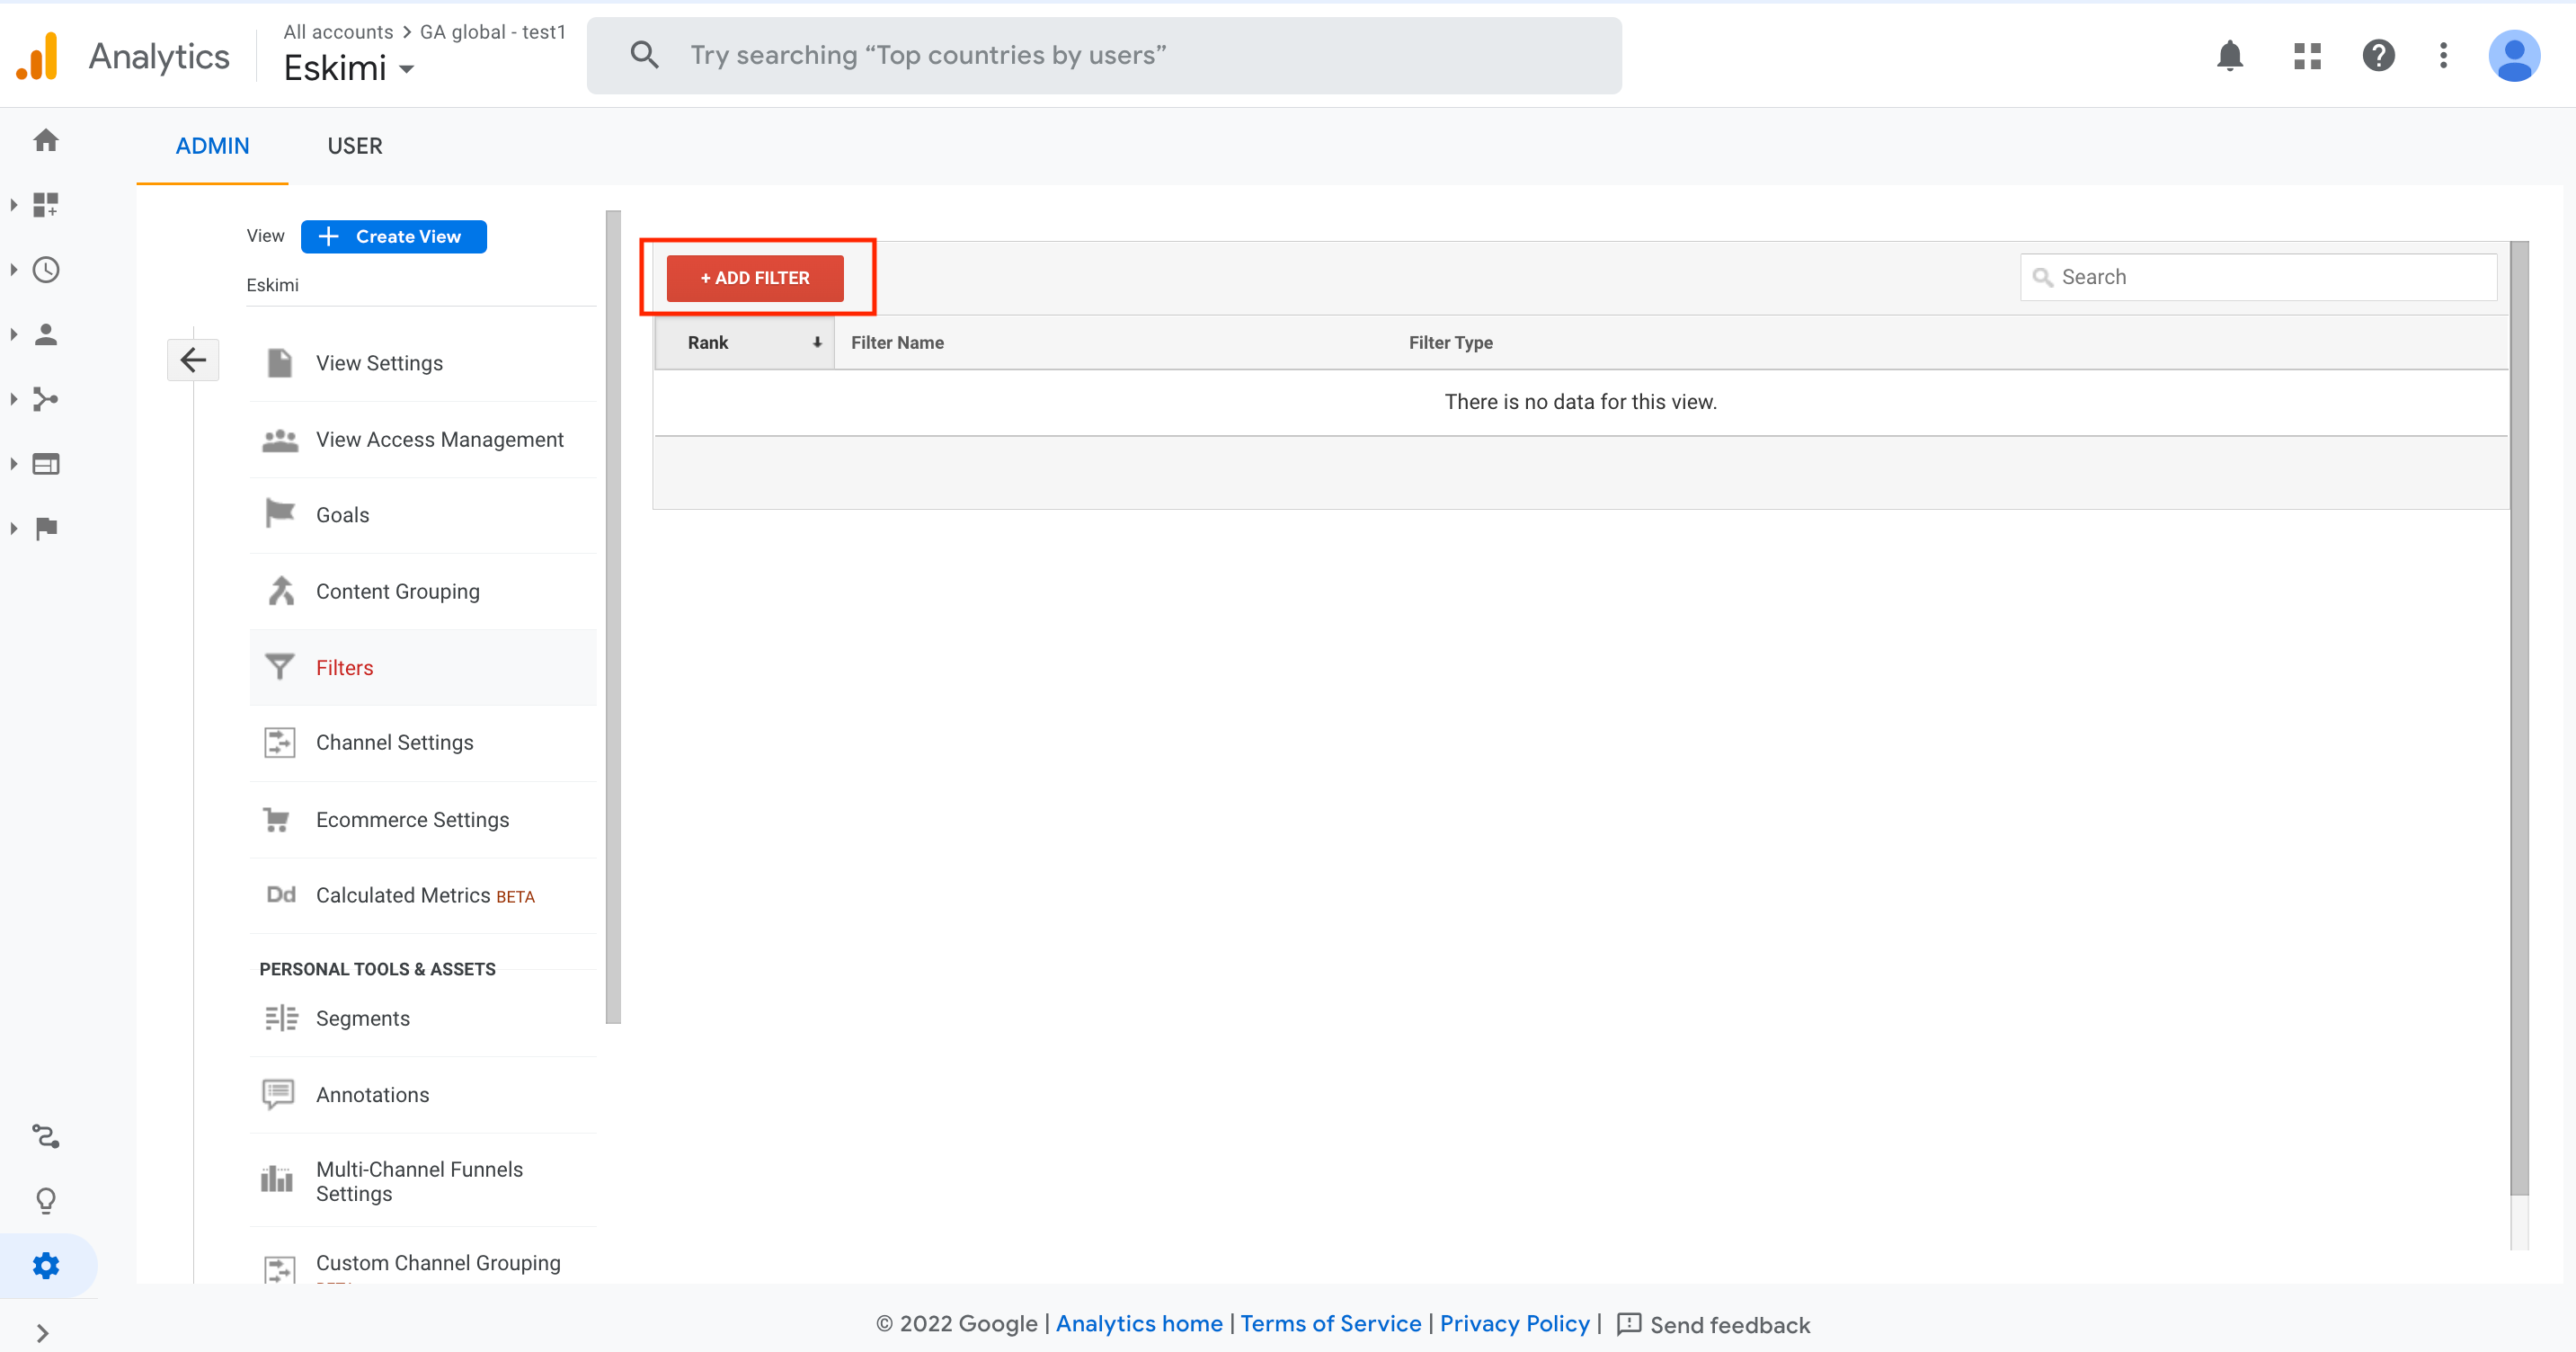
4. Then press to "+ADD FILTER" button:
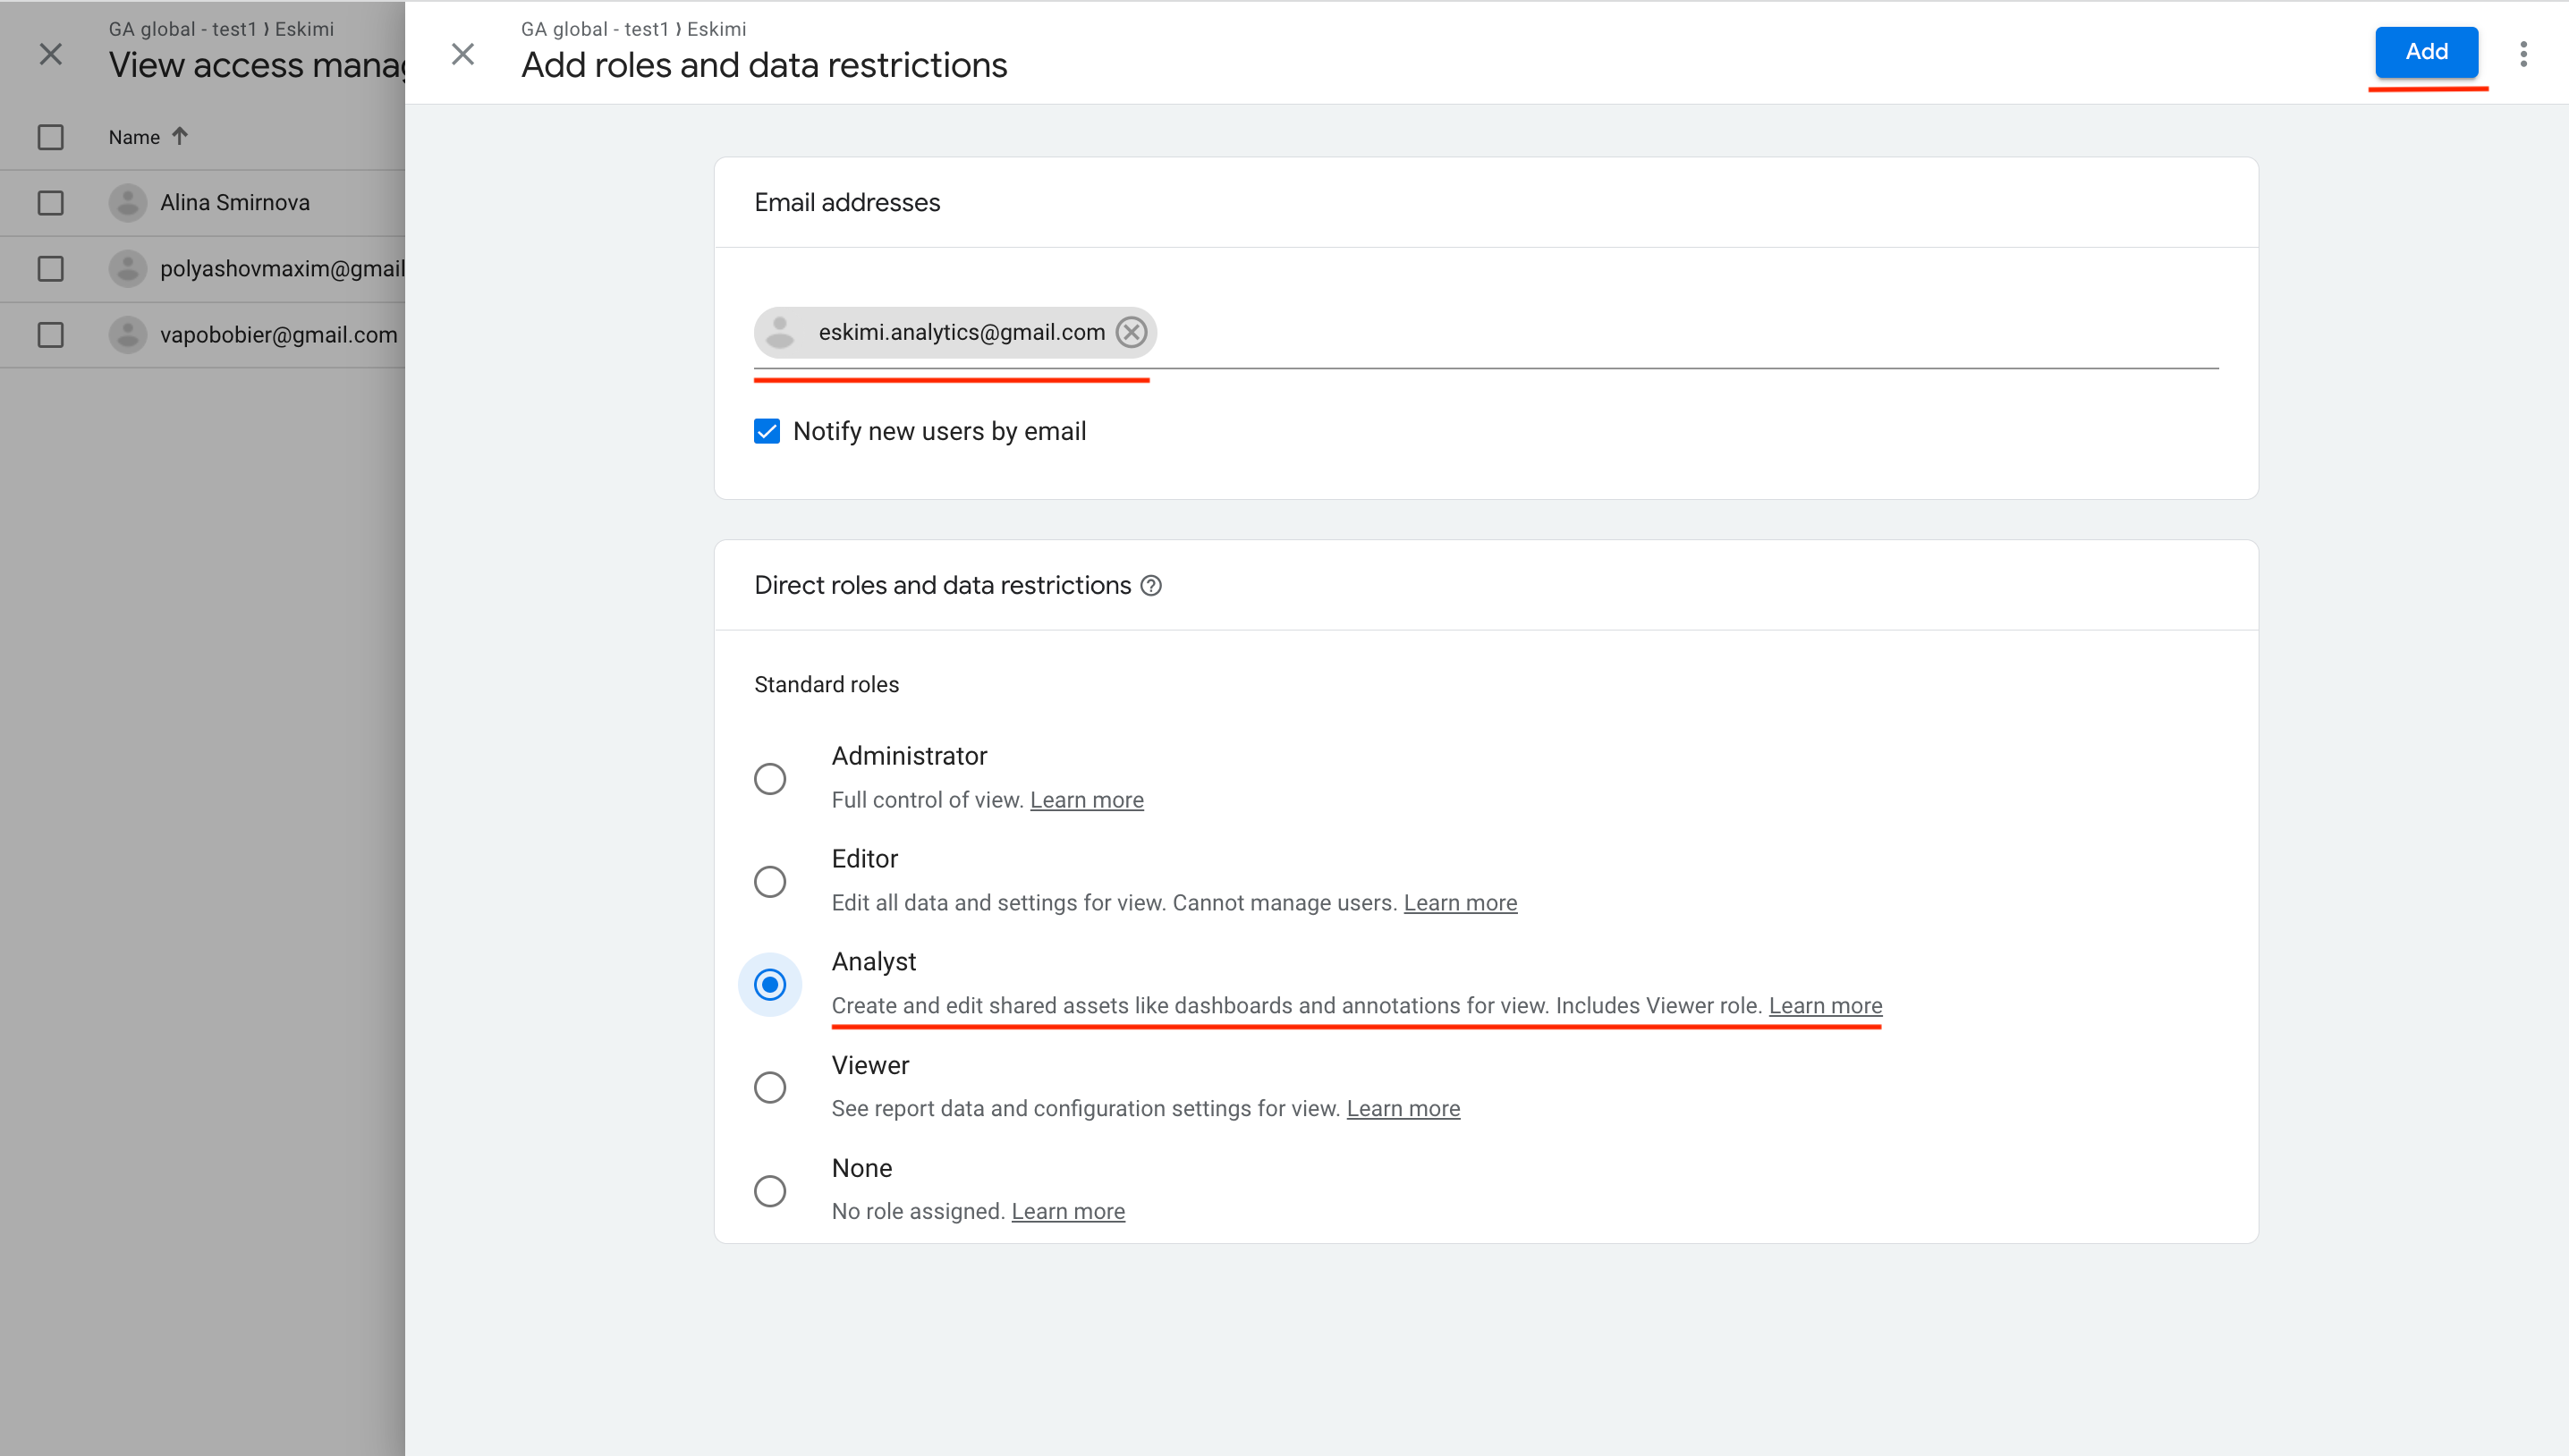
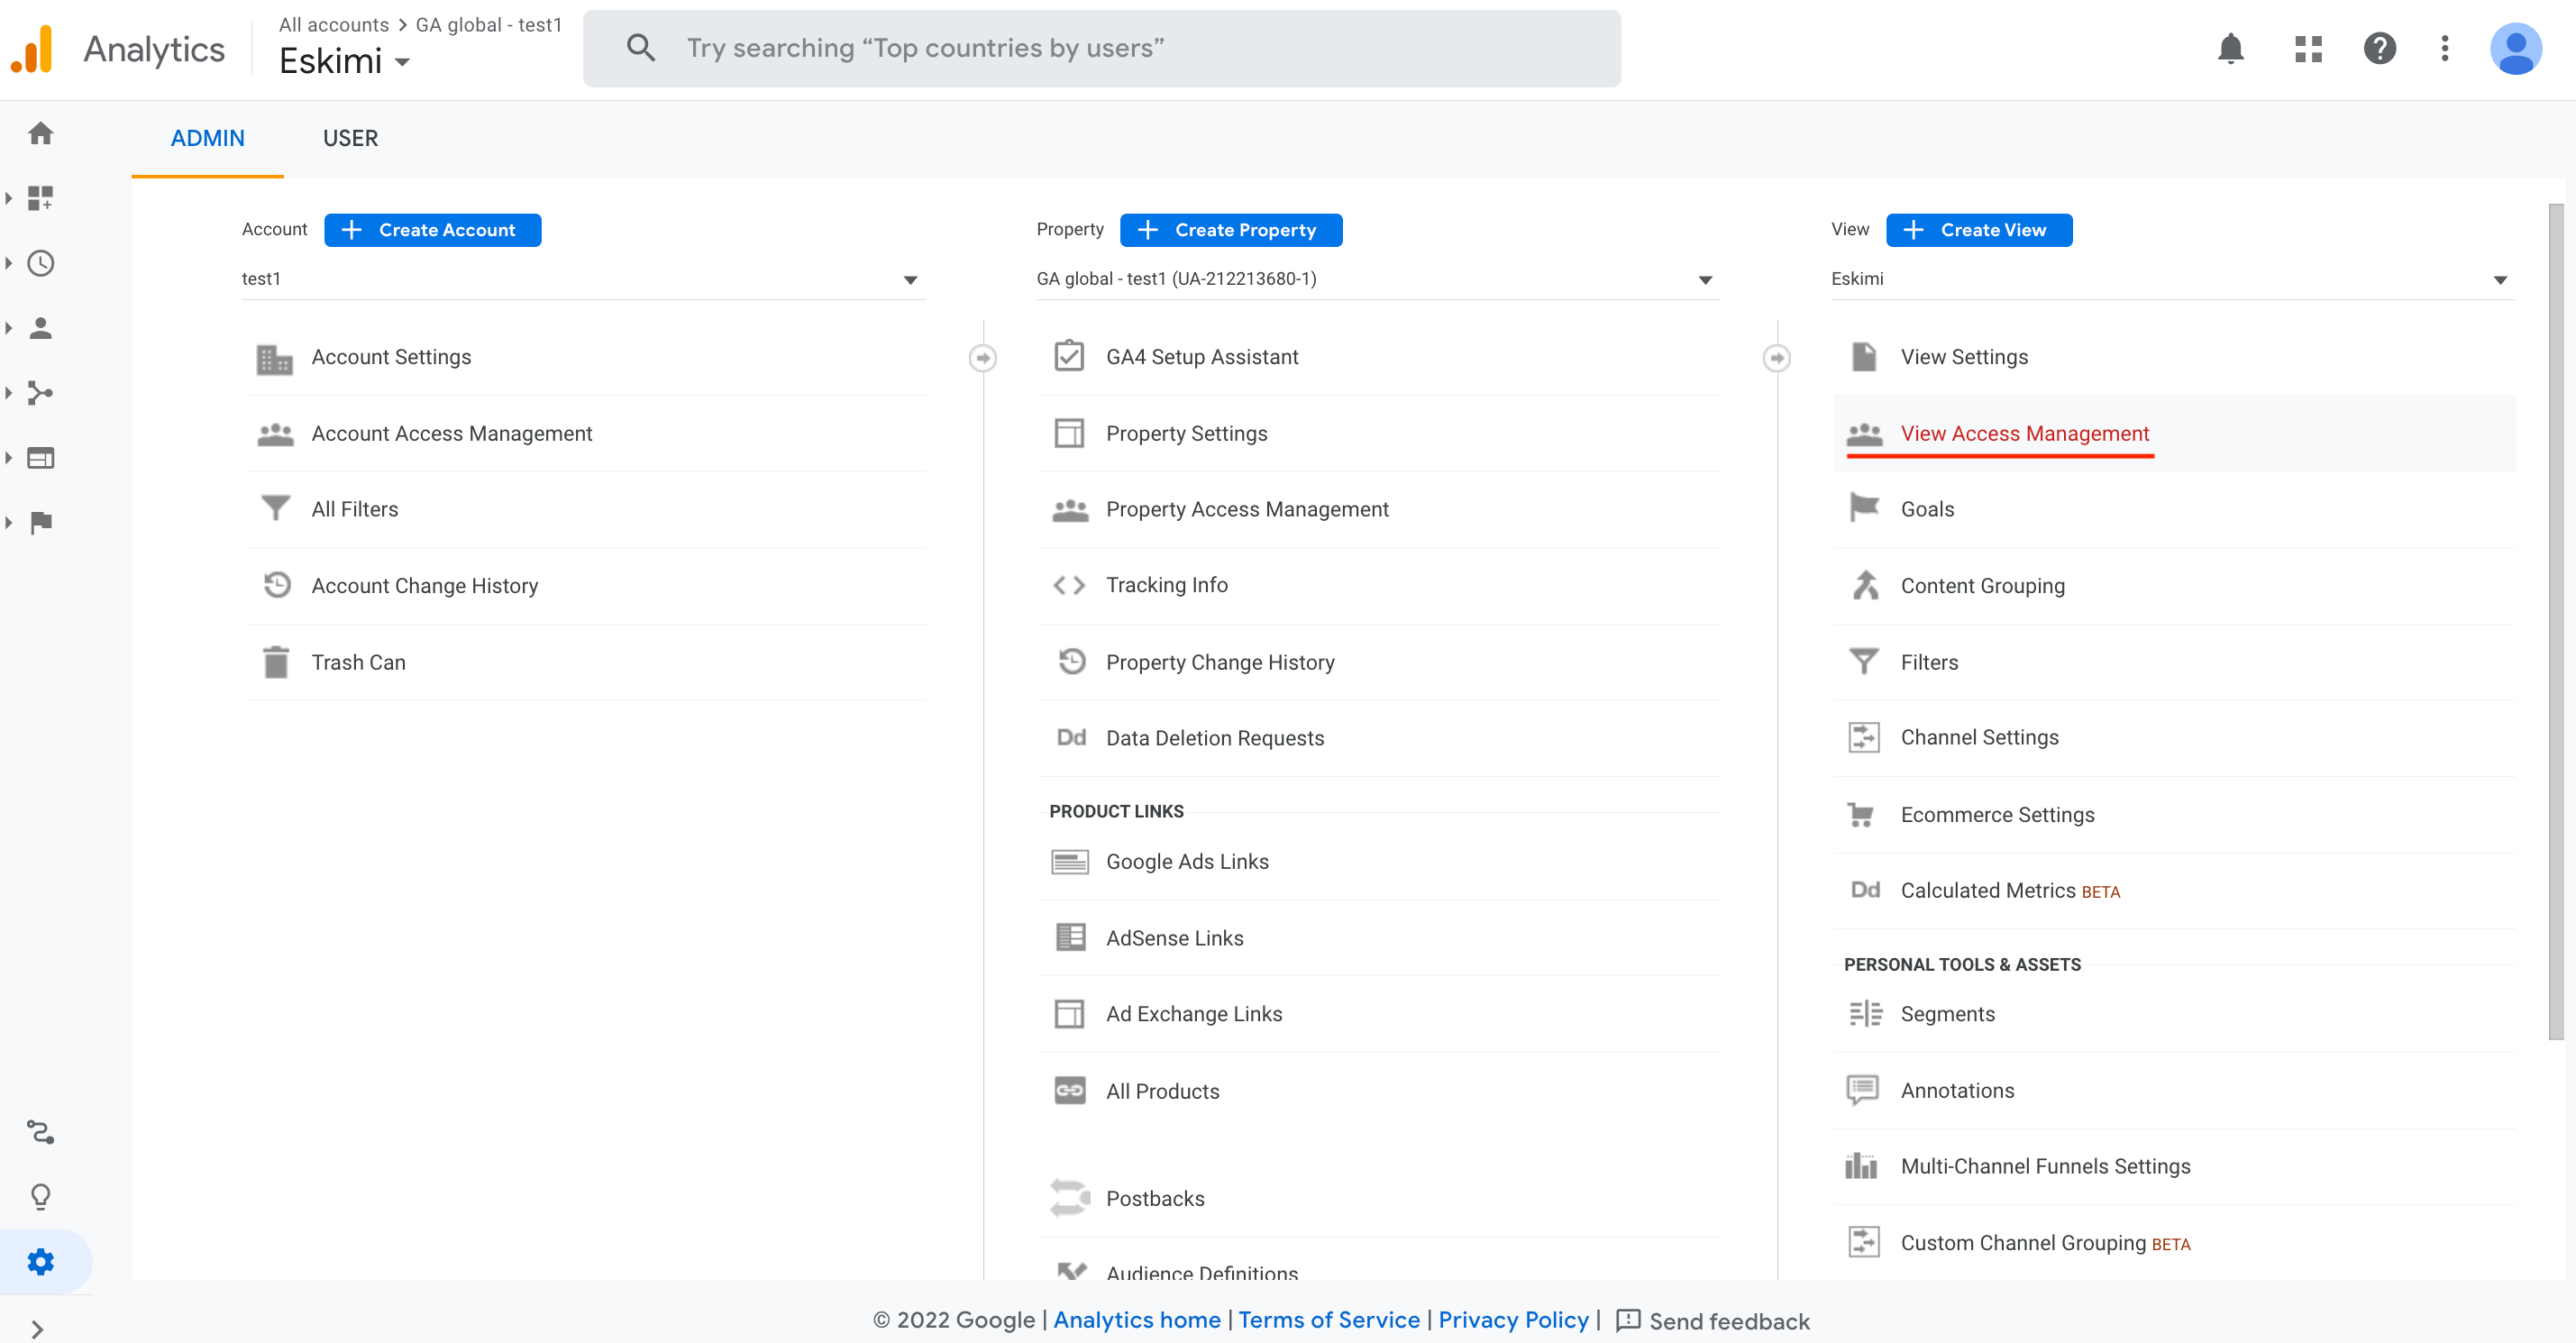
6. In the created viewThen choose "View Access Management": in the created view:
7. In the "Add roles and data restrictions" menu type e-mail "eskimi.analytics@gmail.com", check the box called "Notify new users by e-mail". Choose the "Analyst" role and press "Add":