Eskimi optimisation possibilities
The purpose of optimisation is to improve how well your campaign achieves its objectives. It involves modifying your advertising strategies in accordance with the data you collect. Eskimi DSP supports multiple optimisation techniques which can be used to make adjustments in campaigns. Using these possibilities you will be able to reach the performance which aligns with advertising goals.
The optimisation process itself can look like an easy task, however it is important not to get lost in multiple techniques and focus on the main campaign's objectives. Therefore, it is essential to:
- set the right goal for your campaign
- determine primary and secondary objectives to measure progress
- use tools like Google Analytics (GA) to track and measure post click performance.
Eskimi DSP auto-optimisation
Auto-optimisation is commonly used for setting the campaign's objectives during the campaign's creation process. Determined auto-optimisation allows the system to analyze the placements based on the set objectives.
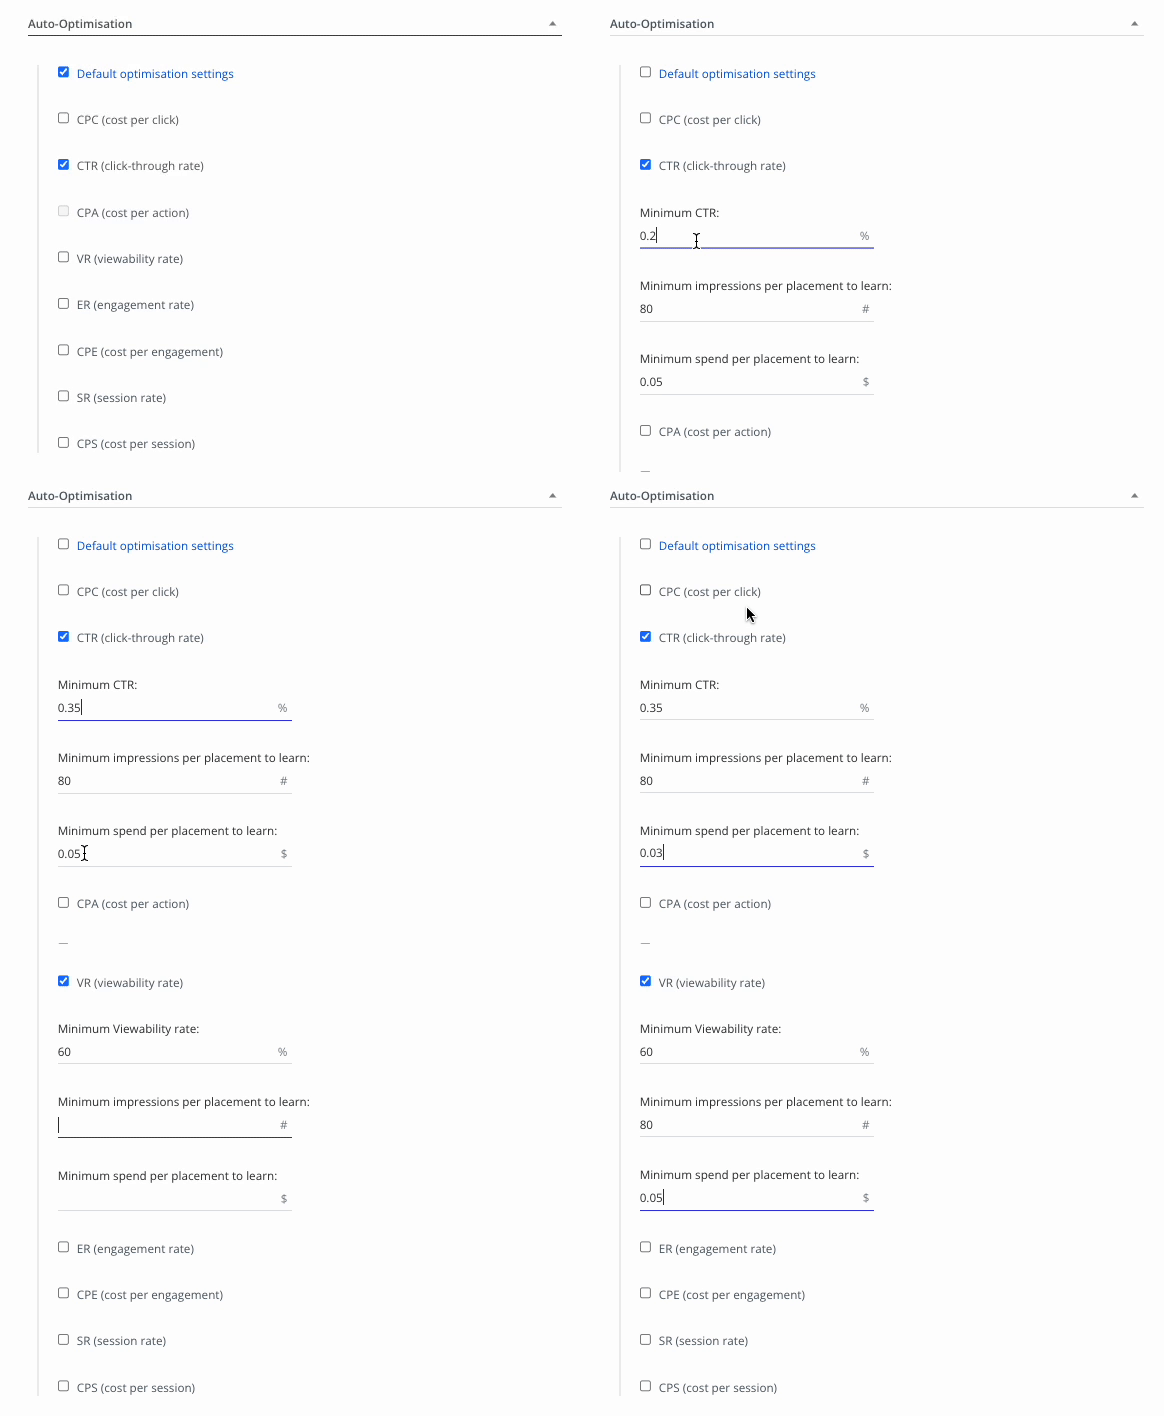
Auto-optimisation works based on the indicated objective (minimum value), minimum impressions per placement to learn and minimum spend per placement to learn. That means that the system will bid on specific placements in order to determine if it meets auto-optimisation values. If the placement will not meet the value, the system won't bid on it anymore.
It is possible to use default optimisation settings which are determined based on the benchmarks of specific markets. Specific optimisation values can be set as well if the campaign requires specific objectives.
The stricter the optimisation will be used the more traffic will be filtered out, therefore it can strongly influence the spend of the campaign.
Auto-optimisation objectives differ based on the campaign's type. Display campaign support auto-optimisation based on: CPC (cost per click), CTR (click through rate), CPA (cost per action), VR (viewability rate), ER (engagement rate), CPE (cost per engagement), SR (session rate), CPS (cost per session). Video campaign support: CPC, CTR, CPA, MVTR (minimum view-through rate), CPCVV (cost per completed video view), VVR (video viewability rate), SR, CPS.
Limitations:
- CPA auto-optimisation is supported only once Eskimi conversion pixel is implemented.
- SR, CPS auto-optimisation is supported only once Eskimi audience pixel is implemented.
- Eskimi DSP supports main and custom conversions' tracking, however the optimisation can be done only by main conversion performance.
Manual optimisation (Targeting optimisation)
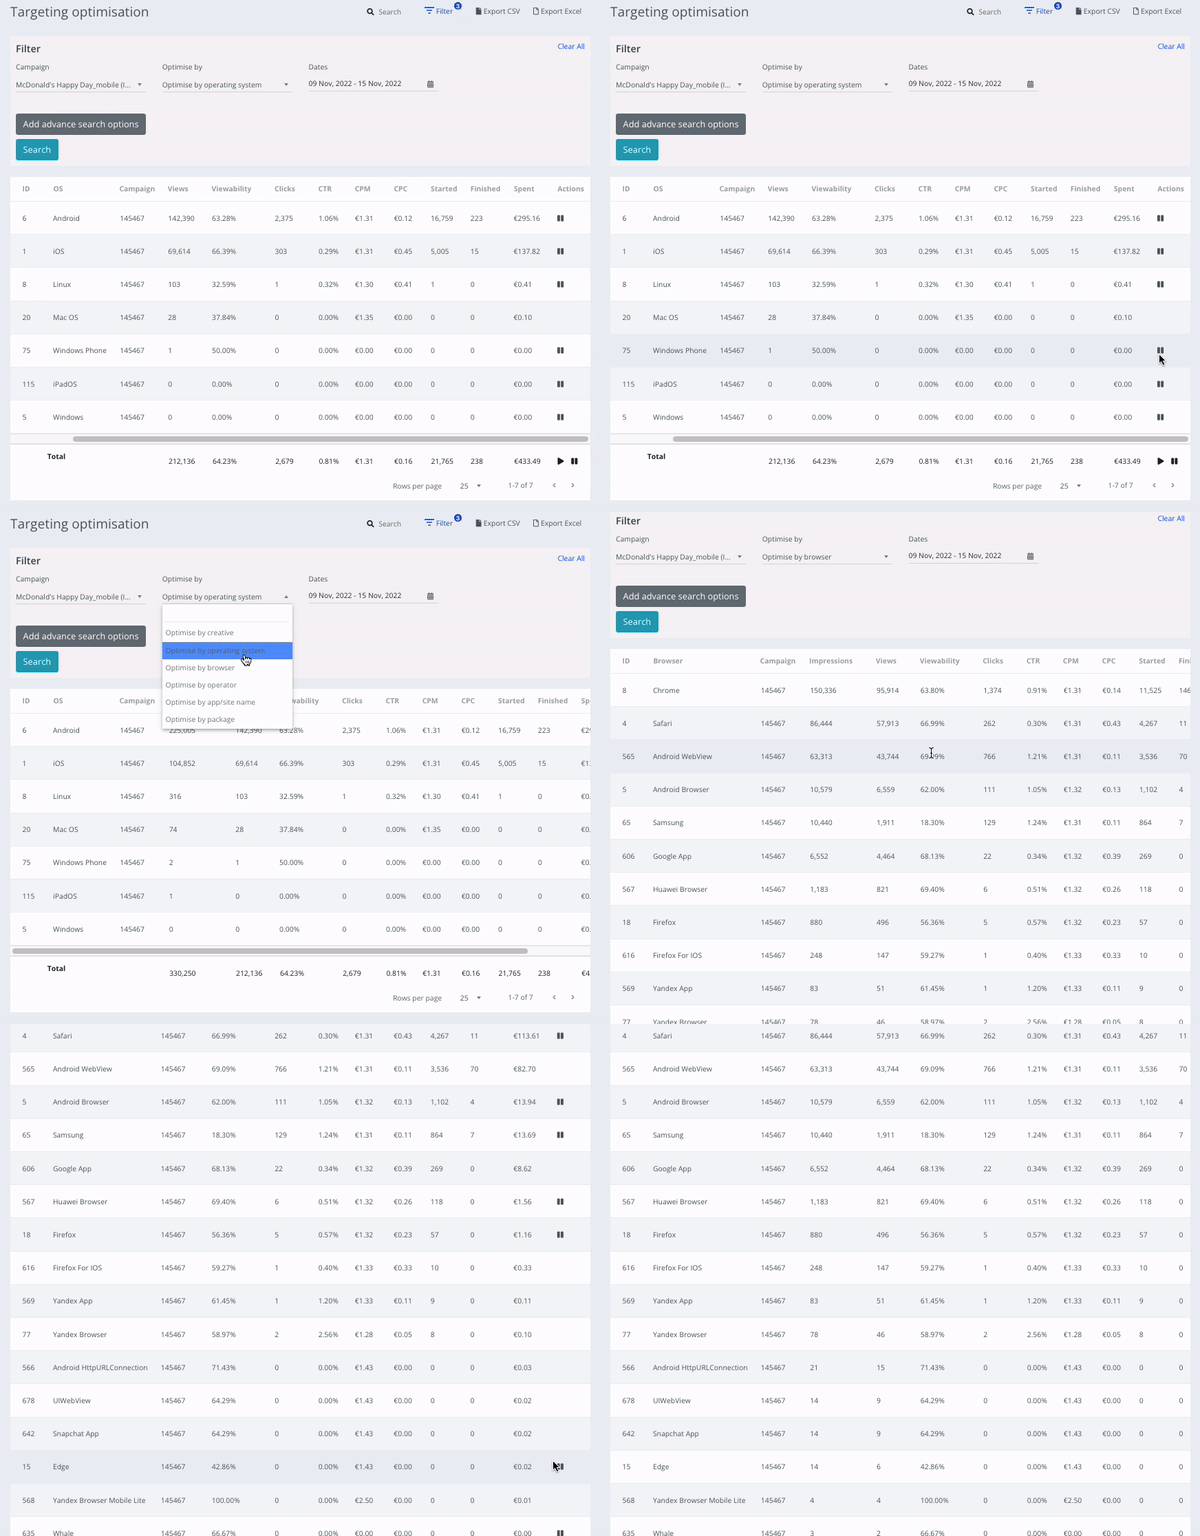
The manual optimisation can be found on Eskimi DSP Targeting optimisation section. It allows to analyze the campaign's performance (historical data) by listed segments and by all performance metrics and optimize by pausing the individual elements such as specific creative, exchange, site.
Manual optimisation can be done by the following segments:
- exchange
- creative
- operating system
- browser
- operator
- app/site name
- package
- placement
Audience and conversion pixels
In order to track retargeting (site first party) audience, engaged sessions and conversions it is necessary to implement Eskimi tracking pixels on the landing page.
Implemented pixels allows you not only to see the metrics but also optimize on them which is significantly important. With implemented pixels you can see (just a few examples):
- from which websites or apps the conversions was made and based on that optimize the inventory
- what is the conversion rate of particular creative which allows to optimize on creatives
- which browsers generate the most sessions which gives opportunity to optimize on browsers.
Audience and conversion pixels give you multiple opportunities to optimize on better performance therefore it is strongly recommended to implement them for multiple campaigns' objectives.
UTM
The UTM helps to indicate performance based on specific segment on Google Analytics side. For example UTM content part {site_id} is crucial if we want to see the performance on GA side by site and site id. This allows you to create the whitelist/blacklist based on the performance with specific site/app ids and use it in Eskimi DSP campaign.
By default ESKIMI UTMs include:
UTM source - eskimi
UTM medium - cpm
UTM campaign - {campaign_title}
UTM term - {creative_size}
UTM content - eskimidsp_{site_id}
The UTMs' values and macroses can be also updated based on the needs.
It is a pretty common case that GA report shows a poor performance of specific campaign in terms of session rate, bounce rate, etc. while the landing page of that particular campaign does not have any UTMs. That means that you are not able to filter the performance by site id or any other segment on GA side, therefore leaving you without any possibility to optimise the campaign on Eskimi DSP side.
IAS, MOAT, DV
Integral Ad Science (IAS), MOAT, Double Verify (DV) trackers are most often used for tracking and evaluation of inventory and traffic quality, viewability. By default all these trackers evaluate performance by domain. However, it is possible to have more segments such as campaign id, creative id and more.
For example Eskimi DSP IAS pixel includes: campaign id, site title, site id, creative size. These macroses indicate that there will be a possibility to analyze the performance by the mentioned splits and to optimize on them.
All of the mentioned trackers provides information on inventory and traffic quality which can be used for manual optimisation on Eskimi DSP side. The manual optimisation can be done on IVT (invalid traffic), viewability and other metrics which can improve the overall performance.


