Creating Standard Rich Media in Eskimi DSP (Rich Media Builder Guide)
Eskimi DSP offers a ToRich Media Builder that allows advertisers to create standardengaging, (templated)interactive rich medias,media userads Eskimiusing reachpre-designed builder.templates. This tool simplifies the process by providing ready-made formats, allowing users to quickly build and customize high-impact creatives for their campaigns.
Accessing Rich Media Templates
All ouravailable Eskimi templated rich medias:media can be found via the following link:
🔗 https://dsp.eskimi.com/campaign/9FlpmtrsEskimi Rich Media Templates
Login
VIDEO TUTORIAL: HOW TO CREATE RICH MEDIA USING RICH MEDIA BUILDER
Step-by-Step Guide to Creating Standard Rich Media
1. Log In to Eskimi DSP
-
Access your Eskimi DSP account using your credentials.
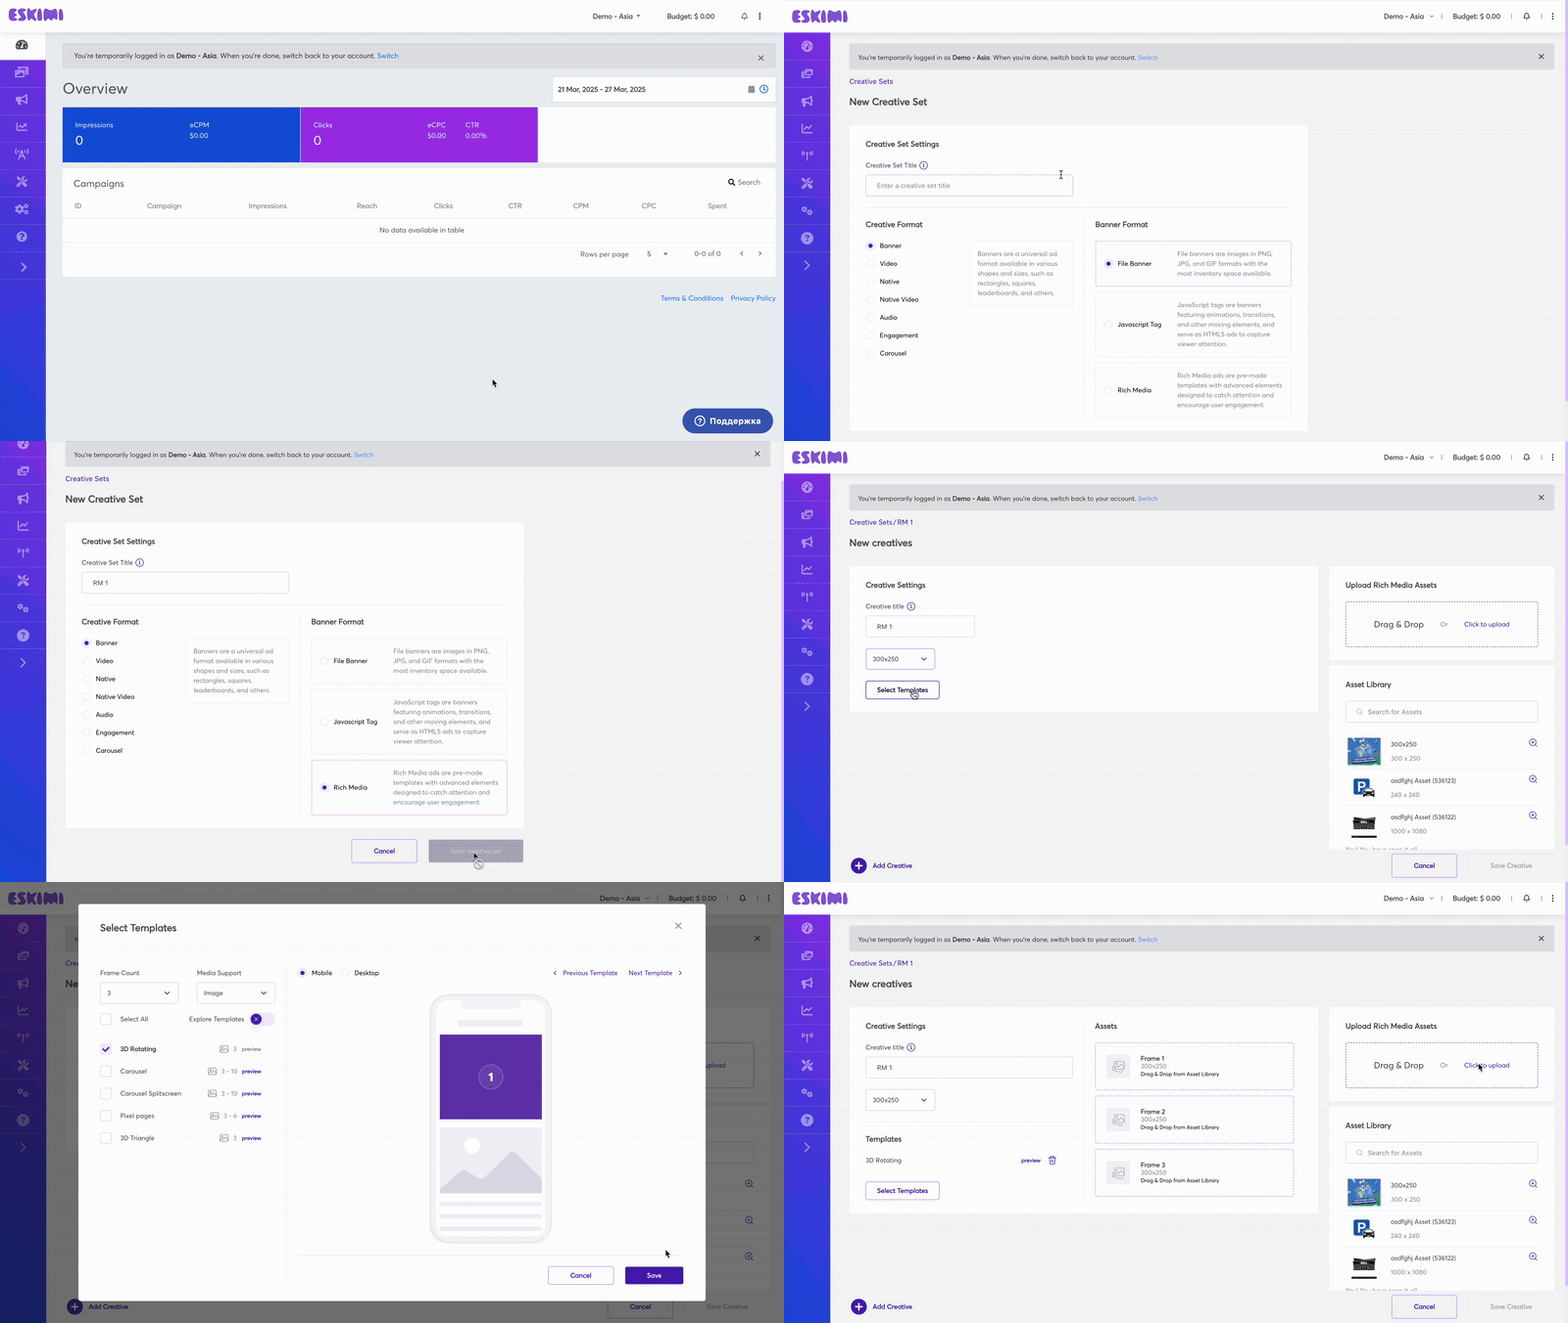
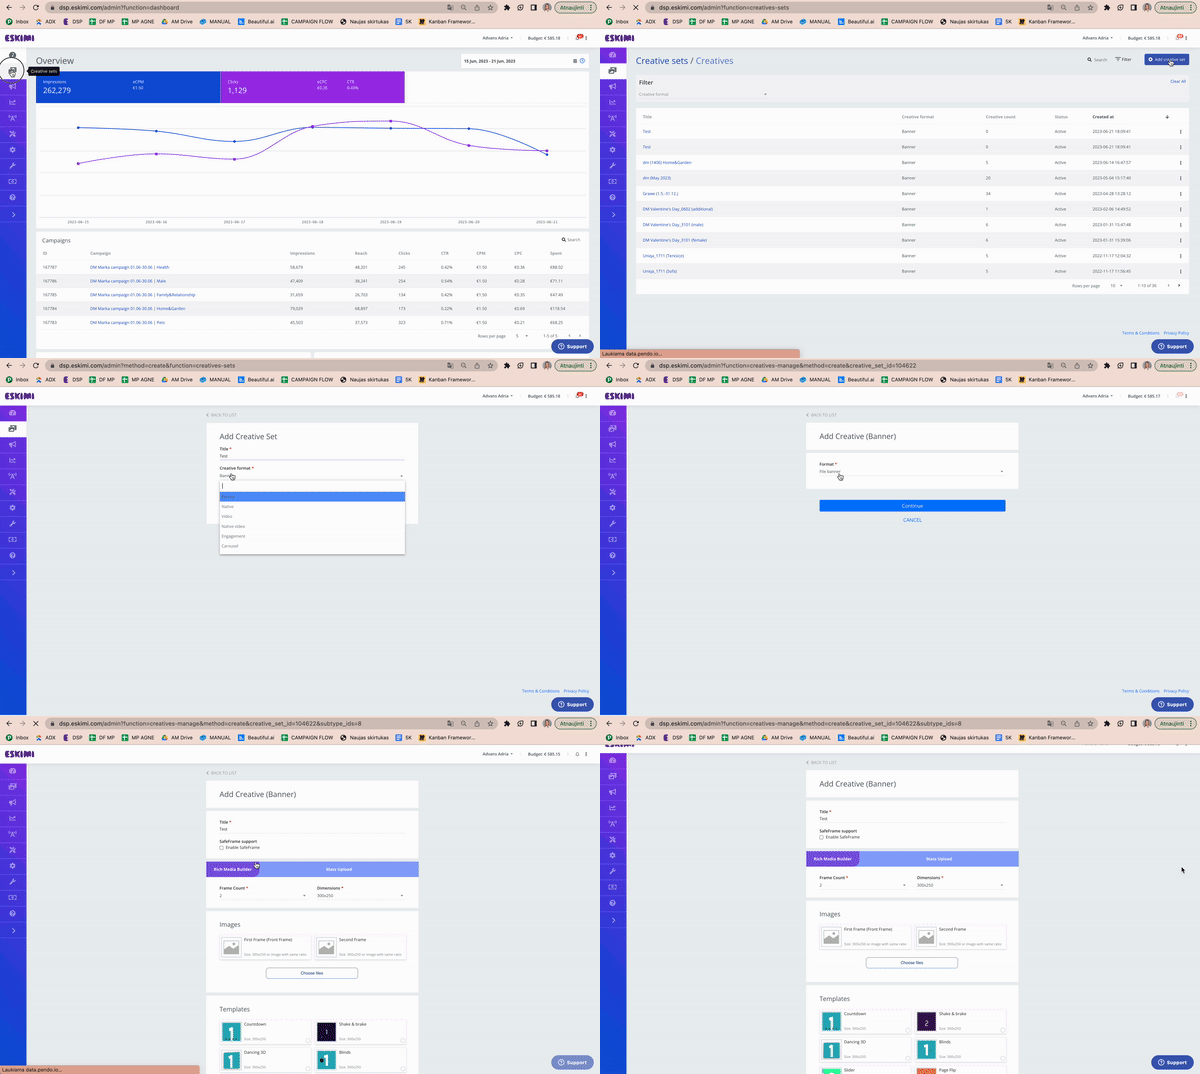
GoNavigate to the Creative
sets,Sets section.
2. Create a New Creative Set
-
Click the "Add Creative Set" button to begin.
-
In the Title field, enter a descriptive name for your creative set.
3. Select and Configure Rich Media Creative
4. Adding Multiple Rich Media Sizes (Optional)
-
If your campaign requires multiple ad sizes, click "+Add Creative".
TutorialhowRepeat the previous steps to create additional variations.
5. Save and Finalize Your Rich Media Creative
-
Once all creative elements are uploaded and configured, click "Save" to finalize your Creative Set.
-
The rich media
usingadnewis now ready to be used in a campaign.
How to Preview a Creative Set
Once you've created your rich media
buildercreative👉🏼set, you may want to preview how it will appear before launching your campaign. Follow these steps to preview all rich media creativeshttps://www.loom.com/share/7dbdbfec7d5c49978af891219dfc32b5?sid=c6be0204-cb8b-401d-bca2-edc24c46401fin your set:-
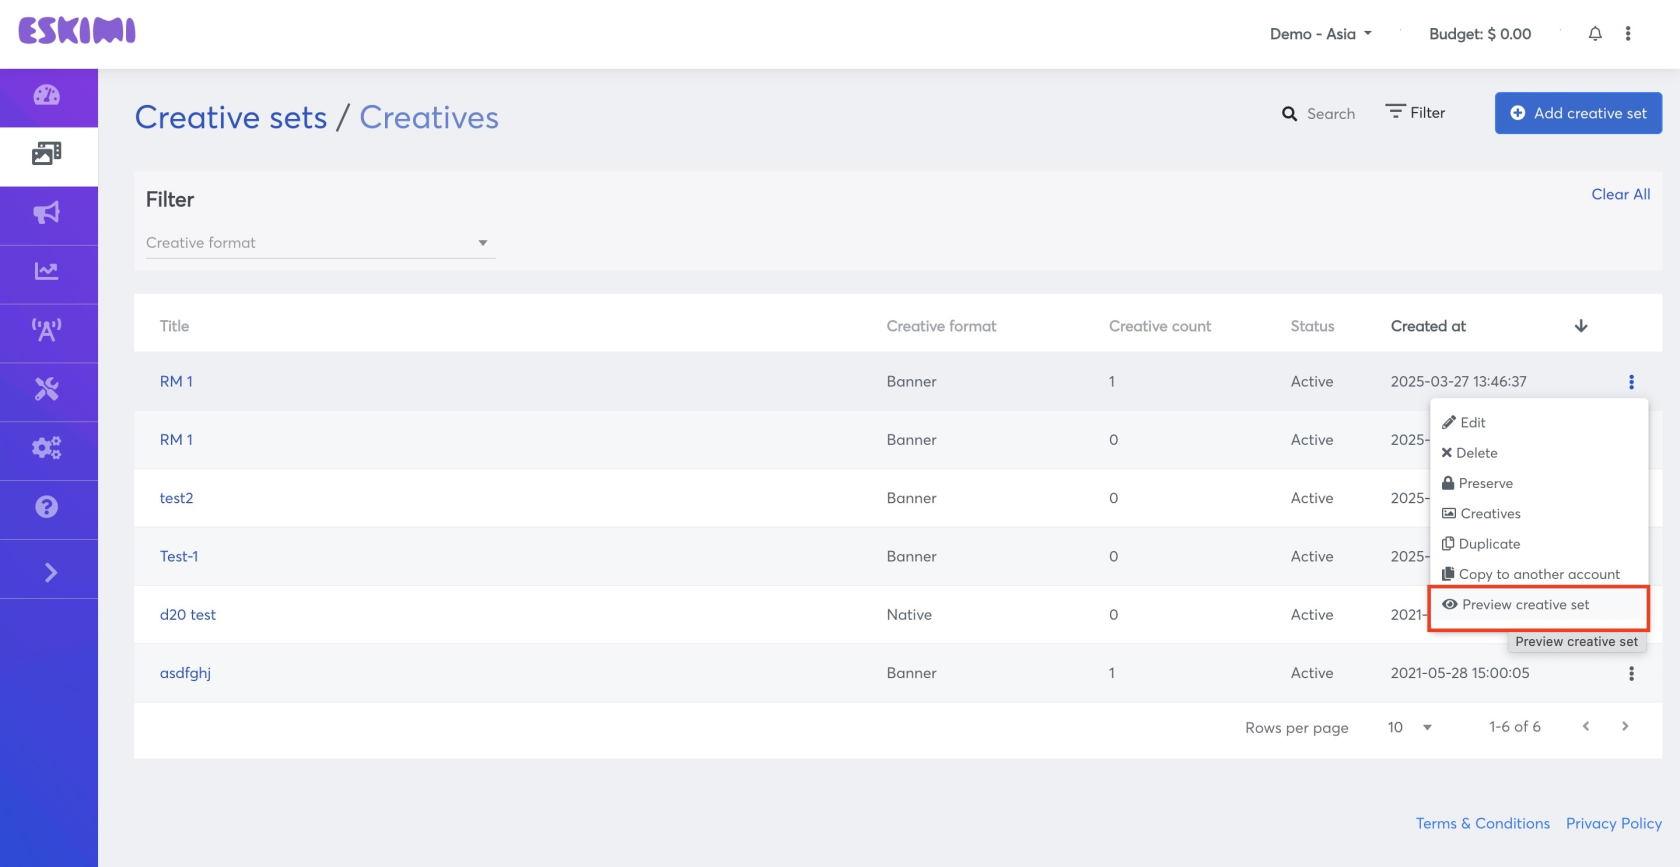
Go to the "Creative Sets" Menu in Eskimi DSP.
-
Locate the creative set you want to preview.
-
Click on the three-dot dropdown menu (⋮) next to the creative set.
-
Select "Preview Creative Set" from the menu.
will open a
Howpreview window, allowing you tocreatereviewaallpreview page linkIn order to generate a link we need to create a "draft" campaign.After creatingrichmedias,mediagocreativesto "Campaigns"Click "+ Campaign Group". Now we need to fillincluded in thefieldsset.markedEnsure that animations, interactive elements, and media assets are working correctly before proceeding withredyour*campaign. Choose🚀Creative
type "Banner" & Campaign type "Display Ads"Choose date (any)Bid (CPM), Daily budget, Total budget - rewrite what is written in grey or higher if it gives errorUncheck box "Start campaign after approval"Choose country (any)Write URL and domain (any, it can be Eskimi or client's landing page)Choose creative set (the one you prepared when making templated rich media)Click "Draft"Then click 3 dots on the right side of the draft campaign you just created and click "Preview in browser"
-


