Eskimi Pixel Implementation via GTM
Integrating tracking pixels into your digital marketing campaigns is crucial for effective measurement and optimization. If you're using Eskimi DSP for your advertising needs, this manual article will guide you through the process of implementing the Eskimi DSP tracking pixels seamlessly using Google Tag Manager (GTM).
Follow the step-by-step instructions below to efficiently set up the Eskimi DSP tracking pixels through GTM and ensure accurate tracking and measurement of your advertising efforts.
It is important to note that when implementing pixels, testing should be conducted in collaboration with the Eskimi support team. This will ensure accurate data collection, and validate whether the pixel is properly integrated with your website.
Audience pixel implementation (automated version)
Eskimi DSP has been included in the Google Tag Manager's Community Template Gallery, streamlining the process of deploying the Eskimi DSP tracking pixel on client websites that utilise GTM.
- Access your GTM account, and on the top left side of the page select New Tag
- Name the Tag according to the tag configuration and triggering
- Under Tag Configuration choose tag type - Discover more tag types in the Community Gallery
- Type Eskimi in the search bar and select Eskimi tracking pixel
- If this template is being added for the first time, click on Add to Workspace
- In the new pop-up window press Add
- Enter / paste tracking pixel ID and under Advanced Settings select Tag firing option - Once per page
- Under the Triggering section choose a default trigger - All Pages (Page View)
- Press Save to save the tag and Submit changes
![]()
Audience pixel implementation as Custom Tag (manual version)
- Access your GTM account, and on the top left side of the page select New Tag
- Name the Tag according to the tag configuration and triggering
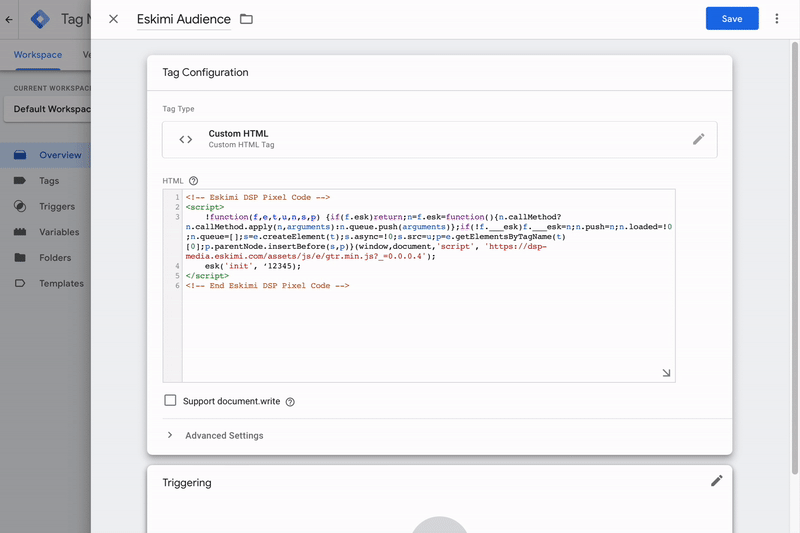
- Under Tag Configuration choose tag type - Custom HTML and paste the Eskimi DSP base (audience) tracking code
- Under Advanced Settings select Tag firing option - Once per page

- Under the Triggering section choose a default trigger - All Pages (Page View)
- Once the Tag Configuration and Triggering is added, press Save
Conversion pixel implementation
- In order to implement Eskimi conversion tracking pixel, press New Tag
- Name the tag according to the tag configuration and triggering
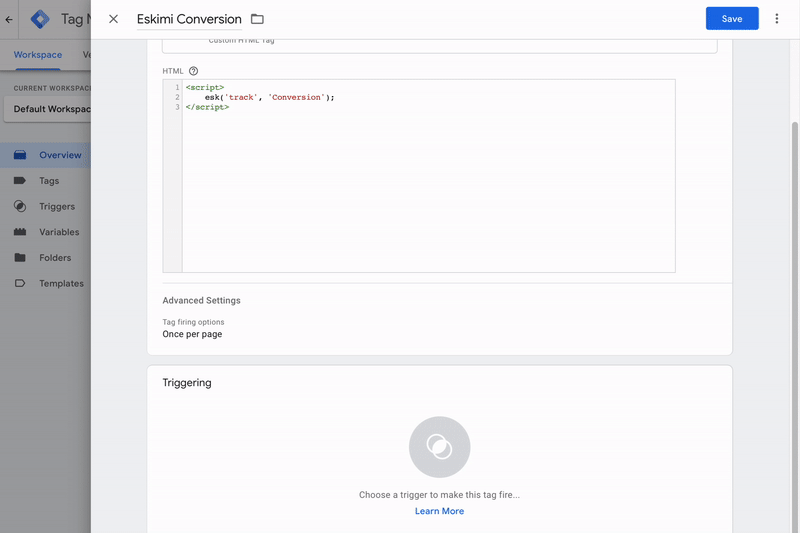
- Under Tag Configuration choose tag type - Custom HTML and paste conversion tracking code.
- Under Advanced Settings select Tag firing option - Once per page
- To finalize Eskimi conversion pixel implementation, under the Triggering section choose a conversion trigger. You can either use the existing triggers or create new one. In the example below you can see the most common trigger for tracking conversions with success/thank you page
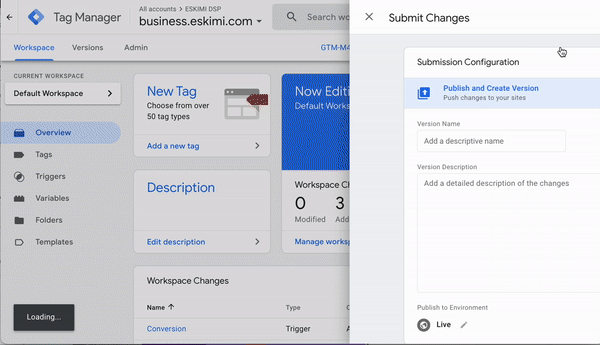
Submit the changes
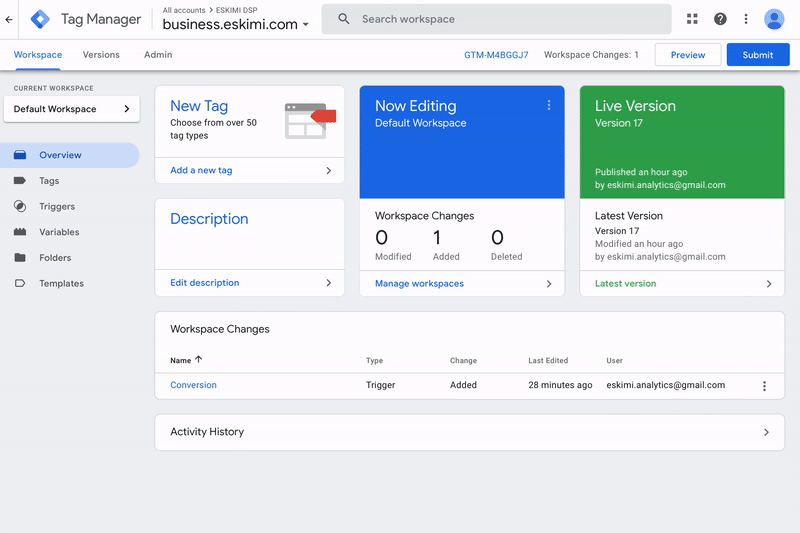
Once you have set up the necessary pixels and triggers, the last and most important step is to submit the changes. Without submitting them, the changes will not be applied to the actual environment of the site. To do this, go to the overview page and look for the "submit" button in the top right corner. Click on the "submit" button and follow the process until all the recent changes are published on your website. This submission ensures that the modifications you have made will take effect and be visible in the live environment of your site.
Here is a video that demonstrates the entire process.