Troubleshooting guide for Eskimi Tracking / Conversion pixels
How to check for Audience Tracking and/or Conversion pixels on the page
Before proceeding, it's crucial to understand the client's setup regarding Eskimi pixel implementation:
- Location of Main Audience Tracking Pixel: Determine whether the main Audience Tracking pixel is implemented on a single page or across multiple pages.
- Location and Trigger for Conversion Pixel: Determine the placement of the Conversion pixel, identify the event that triggers its firing, and ascertain whether the main Audience Tracking pixel is also present on the same page which is mandatory for conversion pixel to work.
Knowing these details, we can begin checking whether Eskimi pixels are firing on specific pages:
- To observe the triggered events, we can utilise the Eskimi Chrome extension. Click here for the guide on how to install and use it.
OR
- Open Developer Tools in any common browser by right-clicking and selecting "Inspect" on the landing page or any other page where pixels are potentially implemented.
- Navigate to the "Network" tab and type "gtr" in the search bar. This should display only Eskimi pixels. If nothing appears, try refreshing the page.
If the Audience Tracking pixel is present, we should observe two events in the "Network" tab both having Status Code: 200:
- A JavaScript file.
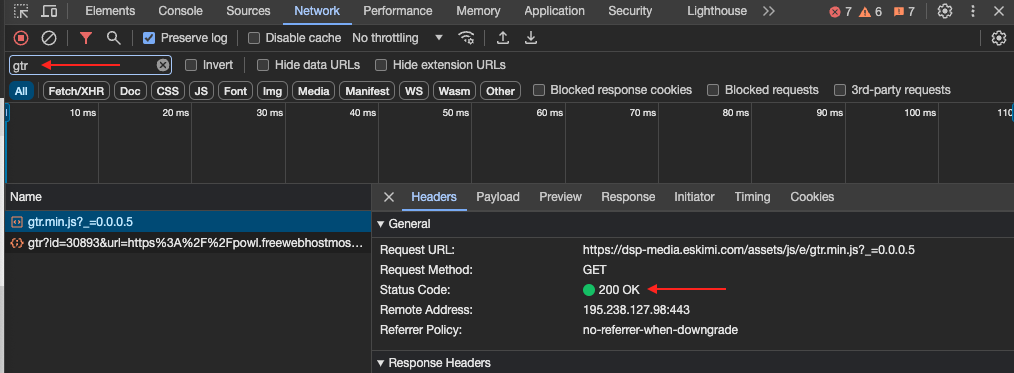
- A GET request containing the unique DSP account tracking pixel ID, page URL, and other metrics.
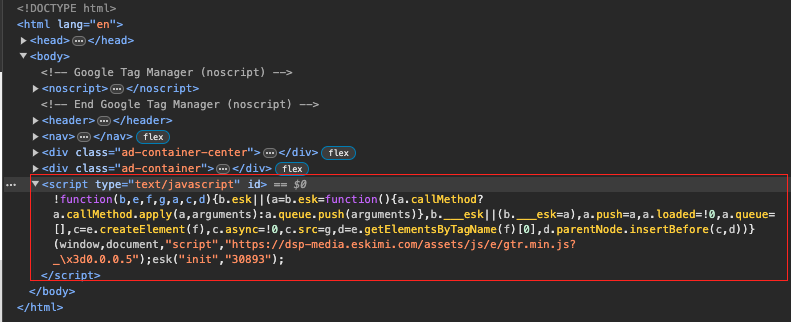
- You should also observe the Audience Tracking pixel in the Elements tab.
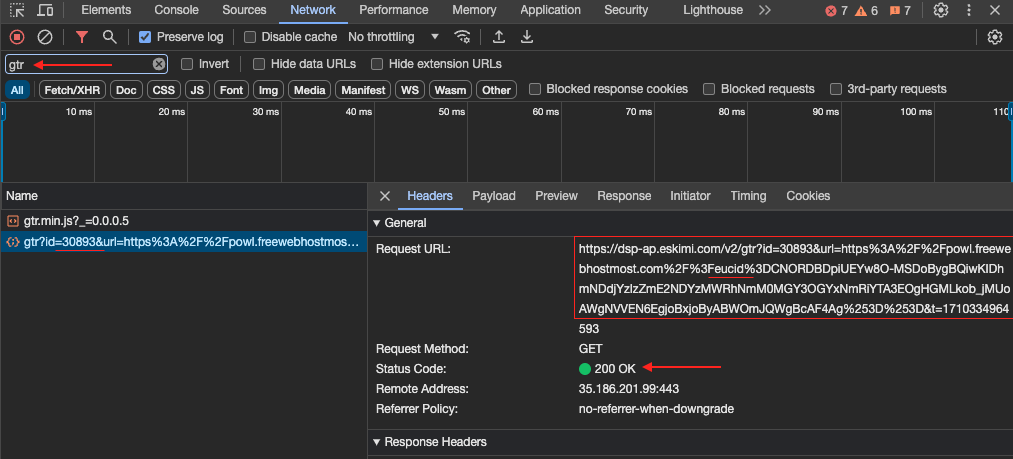
If the Conversion pixel along with the Audience Tracking pixel are present, we should also observe two events in the "Network" tab, both having Status Code: 200:
- The same JavaScript file.
- A GET request containing the unique DSP account tracking pixel ID with conv=1.
- You should also observe both pixels in the Elements tab.

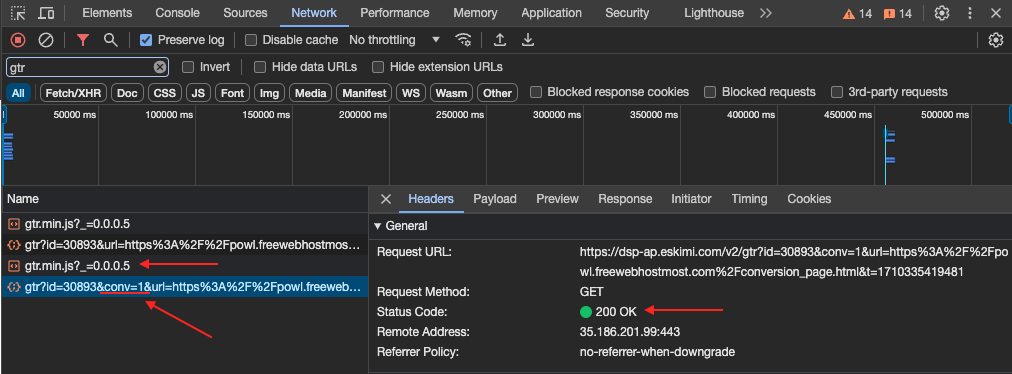
If both pixels are present in the Network and Elements tabs, then it should work as intended. If they are present and events are not counted on the DSP side, you can check a few technical aspects:
-
Unique Tracking Pixel ID: Clients often have multiple accounts in Eskimi DSP, which may result in the incorrect ID being utilised.
-
Status Codes: If the status code is not 200, it indicates potential blocking of these pixels due to the webpage configuration.
-
- There is a possibility that the client's webpage setup is blocking third-party cookies, which can affect the functionality of our tracking and attribution systems. In this case clients may need to adjust their website configurations to allow Eskimi third-party cookies if they are being blocked intentionally.
-
Test campaign
To verify whether Eskimi DSP is accurately counting engaged sessions and conversion events, we can execute a technical test campaign within the same Eskimi client's account where a unique tracking ID is utilised on the webpage.
Approval of the campaign is unnecessary; it can remain pending while utilising a click test URL. For this test to be effective, we must utilise the client's webpage as the landing page.
Test URL: Copy and paste it into your browser, then simply modify the campaign IDs in both instances - after "dspclick/..." and "?test=?..." to simulate an actual click.
https://ads.eskimi.com/dspclick/198867/0/?test=198867
***Important***
When verifying pixel implementation or conducting a test campaign, please ensure that third-party cookies are enabled on your browser. Our targeting and attribution rely on the functionality of third-party cookies, so it's essential to have them enabled.
Addressing Pixel Setup Issues: Steps and Recommendations
Upon discovering that either the audience or conversion pixel is missing, through either the Eskimi Chrome extension or manual verification, consider the following steps before escalating the matter to technical support:
-
Inquire about Pixel implementation details with the Client on more time: Clarify how the Eskimi pixel is integrated across their web properties. Questions should cover:
- The scope of Audience Tracking Pixel implementation (single page or across multiple pages).
- The intended behaviour and trigger mechanisms for the Conversion Pixel.
-
- Is the Conversion Pixel implemented on the landing page, registration form, thank you page, or elsewhere? If the client is using Google Tag Manager (GTM), please check with the client that the triggers for the Conversion Pixel have been correctly implemented.
-
- The presence of the Audience Tracking Pixel on pages designated for conversion events.
-
For Clients utilising Google Tag Manager (GTM):
- Verify Pixel Type: Confirm whether the client has opted for the Custom HTML version of the Audience Pixel or the Template version. We currently recommend the Custom HTML version for its flexibility and compatibility. For guidance, refer to the Eskimi Pixel Implementation Manual here.
- Check Tag Configuration: If the pixels are correctly added but issues persist, adjustments may be needed within GTM's Tag Sequencing or Prioritisation settings. Detailed instructions can be found in the manual under the "Tag Sequencing / Prioritisation" section here.
Contacting Eskimi Technical Support
If you require technical assistance, please submit a ticket through Zendesk with the following relevant information:
- Provide detailed information about the client's page flow and pixel implementation setup, as mentioned in the previous sections.
- If the client is utilising Google Tag Manager (GTM) for pixel implementation, it is crucial to request that the client grants view or edit permissions to eskimi.analytics@gmail.com. This will allow for quicker and more efficient issue resolution.