Simplified Conversion Pixel Implementation
This article is dedicated to users and developers who have to implement the tracking pixel to the website.
Disclaimer: all example codes are used from a testing account.
Step 1:
Firstly obtain the base pixel code.
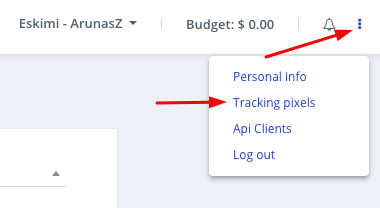
Login to your account, and access the " Tracking Pixels " section.
Step 2:
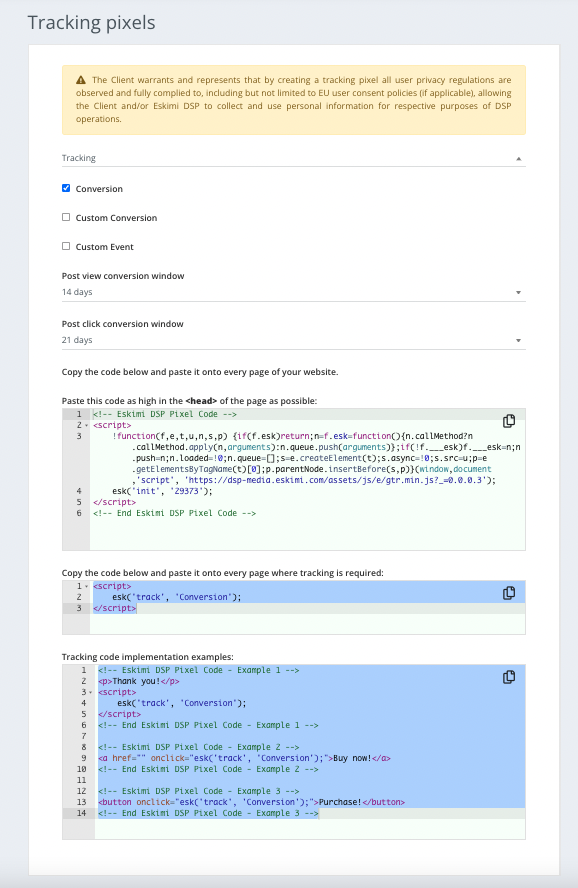
Customize your tracking code. For this example, we want to track conversions of a specific campaign.
- Tick the "Campaign" checkbox, and select the appropriate campaign.
- Tick the "Conversion" checkbox.
Now your base pixel code should look like this (see image below):
Step 3:
When you have generated the code, forward this to the website developers.
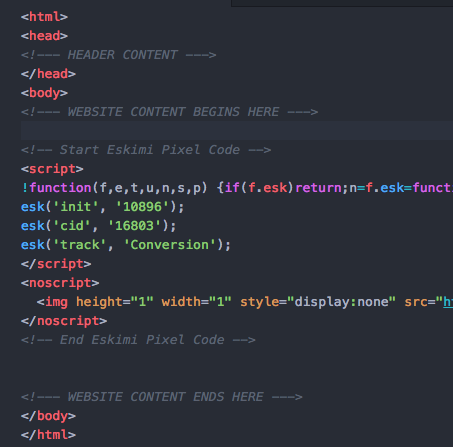
In this situation, since we are tracking conversions, the code has to be implemented between the <body> </body> tags of the success page, like in the example below.
Step 4:
Test your code and see if everything works and if the pixel code is being called.
To test the code, open up the Developer Tools of your browser and using the "Network Traffic" tools check if the pixel code is being launched.


